
The BackYard Pal

TheBackyardPal.com

  • Home
  • Categories
    • Design
    • Relaxation
    • Social Activities & Games
    • Small Yards
    • Outdoor Living
    • Backyard Structures
    • Exercise & Health
  • All Posts
  • Design
  • Relaxation
  • Social Activities & Games
  • Small Yards
  • Landscaping & Gardening
  • Outdoor Living
  • Backyard Structures
  • Exercise & Health
7 Minutes Read

How to Remove Wet Leaves from Your Backyard Without Turning Cleanup into a Workout

Homeowner gathers a small load of autumn leaves onto a backyard collection tarp


Autumn leaves are beautiful on the trees. After a rainstorm, they become a soggy backyard lasagna—and apparently, you’re the cleanup crew.

The good news? You don’t need to wrestle every leaf into a bag or buy a machine that sounds like it’s preparing for takeoff. A little planning, smaller loads, and the right tools can make the job more manageable.

The simplest way to remove wet leaves is to gently loosen them with a leaf rake, gather small amounts onto a tarp, and move them to a nearby collection spot. If you can safely wait for drier conditions, cleanup and mulch-mowing become easier. Clear slippery walking surfaces first, and save leaf vacuuming for conditions your tool’s manual allows.

Disclosure: As an Amazon Associate, we earn from qualifying purchases.

Clear the Places That Matter First

You don’t have to make the entire backyard spotless today. Start where wet leaves are creating a problem:

  • Walkways, steps, and patios: Clear the slippery layer before someone discovers an unexpected backyard skating rink.

  • Drainage openings: Remove accessible leaves blocking surface drains. Avoid pushing debris into them.

  • Heavy mats on the lawn: Focus on dense patches rather than hunting down every scattered leaf.

Leave quiet corners and suitable planting beds for later. Some leaves can stay there and benefit the landscape. Your yard can look cared for without looking vacuum-sealed.

If the lawn is waterlogged, avoid repeatedly walking over it or running heavy equipment across it. Where there’s no urgent problem, give the ground time to firm up.

Choose Your Leaves’ Destination Before You Start

Pick a collection spot close to the work: a compost area, a suitable leaf-storage enclosure, or the location required by your local yard-waste program.

Then work toward it.

Otherwise, you’ll move the same leaves three times, which is how “a quick cleanup” becomes your entire Saturday.

Keep the route short and clear. If you’ll use bags, check local collection rules before buying them; accepted materials and pickup arrangements vary.

The Rake-and-Tarp Method: Simple, Quiet, and Useful

For a small backyard or stubborn wet patches, start with a leaf rake and a tarp you already own.

1. Loosen the mat gently

Use short strokes to separate flattened leaves. You’re gathering leaves, not excavating a swimming pool. Avoid digging the tines into grass or exposed roots.

Work in sections rather than dragging one enormous pile across the yard.

2. Rake a small load onto the tarp

Spread the tarp beside the section you’re clearing. Gather leaves onto it, keeping the load manageable.

Wet leaves are heavier than they look. Resist the temptation to keep adding “just one more scoop.” That’s the yardwork equivalent of carrying every grocery bag in one trip.

3. Move the load along a clear route

Fold the edges inward to contain the leaves. If the tarp and surface allow it, pull a small load a short distance to your collection spot.

Don’t drag it across sharp edging, stairs, delicate plants, or rough surfaces that could tear it. If pulling takes a hard heave, unload some leaves or use a garden cart. A tarp reduces repeated scooping; it doesn’t make weight disappear.

4. Repeat, then stop

Empty the tarp and move to the next section. Take breaks, switch tasks, and finish another day if needed.

The goal is a usable backyard. Nobody is handing out medals for Most Leaves Moved Before Lunch.

Useful Amazon options: A leaf-collection tarp with reinforced handles, a comfortable long-handled leaf rake, or a garden cart. Check dimensions and weight: an enormous tarp invites an enormous load.


Gentle wet leaf collection steps

Will a Leaf Blower Move Wet Leaves?

Sometimes—but it may take more effort than you expect.

Wet leaves stick together and cling to surfaces. A blower that handles dry leaves well can struggle with a flattened, rain-soaked mat.

If your blower’s instructions permit the conditions:

  • Gently loosen stubborn patches with a rake first.

  • Work from the edges in small sections.

  • Direct leaves toward your collection spot.

  • Use the breeze to your advantage when practical.

  • Keep debris away from people, pets, roads, and neighboring yards.

Stop if you’re spending several minutes chasing the same clump. Switch to the rake instead of treating the lawn like a stubborn hair dryer customer.

Before buying a blower, compare more than voltage or maximum airspeed. Look at airflow, airspeed, tool weight with the battery installed, operating time, noise, and your existing battery system. A powerful but uncomfortable tool can simply replace one tiring chore with another.

Wear the protection specified in the manual. Don’t assume a cordless tool is suitable for rain or wet operating conditions.

Useful Amazon option: A variable-speed cordless blower for routine cleanup, selected for your yard and carrying comfort. A blower moves leaves; you still need a collection plan.

Should You Vacuum or Mow Wet Leaves?

Leaf vacuum: Read the manual first

A blower/vacuum combination can be convenient for dry leaf cleanup, but don’t assume it can swallow soggy piles.

For example, Toro’s Ultra Blower/Vac manual specifies vacuuming dry leaves and soft items only. It also warns against force-feeding debris and against running the cord through standing water or wet grass. That guidance applies to the covered model; check your own machine’s instructions.

If a tool clogs, turn it off and disconnect its power source according to the manual before clearing it.

Buying takeaway: A leaf vacuum may suit later, drier cleanup. It isn’t automatically the right purchase for today’s wet leaves.

Mulching mower: Wait for suitable conditions

A light layer of leaves may not need collecting at all.

University of Minnesota Extension recommends mulching leaves when they’re dry. Chopped leaves can return nutrients and organic matter to the lawn, but excessive residue is a reason to collect some instead.

Wait until the leaves and ground are suitable for mowing. Follow your mower’s instructions, remove sticks and other hazards, and collect excess leaves if the material remains in thick clumps or blankets the grass.

Think leaf confetti, not leaf casserole.

You Can Keep Some Leaves—and Skip Some Work

Leaves don’t all need a trip to the curb.

University of Maryland Extension recommends moving lawn leaves intact to other suitable areas or compost, and notes that whole leaves support overwintering wildlife.

Choose an approach that fits your space:

  • Compost: Add leaves as part of your compost routine.

  • A leaf-mold area: Store leaves in a suitable enclosure to decompose over time.

  • Appropriate planting beds: Retain or relocate leaves where they won’t bury small plants or obstruct paths.

Avoid piling them against your house, covering drainage openings, or burying plant crowns under a dense mat.

This gives you a useful compromise: clear the lawn and walking routes where necessary, while keeping some natural shelter elsewhere. The insects get a winter address. You get fewer bags.

Which Tools Are Actually Worth Buying?

Start with the bottleneck in your cleanup, not the longest product listing.

Your main problem

Tool to consider

What to check

Gathering scattered leaves

Long-handled leaf rake

Comfortable grip, reach, and manageable weight

Repeated scooping and carrying

Collection tarp

Reinforced handles, durability, and useful size

Loading leaves into a container

Leaf scoops

Grip comfort and whether bending is still required

Moving loads farther

Garden cart

Weight capacity, terrain, and storage space

Routine leaf movement

Cordless blower

Loaded weight, controls, runtime, and manual restrictions

A sensible starting kit is a rake, a tarp, and gloves. Add equipment when it solves a recurring problem.

For Amazon searches, try “leaf collection tarp with handles,” “long handle leaf rake,” or “garden cart.” Compare actual dimensions and specifications before buying. These are product categories to investigate, not claims of hands-on testing or guaranteed performance.

Match Tools to Yard Jobs

Quick Answers About Wet Leaf Cleanup

Can I wait for wet leaves to dry?

Often, yes, if there’s no urgent slip or drainage problem. Clear the priority areas and tackle the rest when conditions improve. Don’t leave a heavy lawn-covering mat indefinitely.

Is a rake or blower better for wet leaves?

For small areas of matted leaves, a rake is a useful starting point. A suitable blower can help with larger areas, but wet clumps may still need loosening and collecting.

Do I have to remove every leaf?

No. Focus on heavy accumulations and problem areas. Light leaf cover may be mulch-mowed when dry, and suitable beds can retain leaves.

How can I make cleanup less tiring?

Keep the collection spot close, move smaller loads, use comfortable tools, and work in short sessions. If the job still exceeds what you can comfortably manage, getting help is a reasonable option.

Give Yourself Permission to Leave a Few Leaves

Clear the slippery spots. Move the heavy mats. Keep each load small enough to handle comfortably.

Then decide what can stay, what can become mulch or compost, and what needs collection.

Your backyard doesn’t need to be leaf-free. It needs to work for you—and your weekend deserves something better than a prolonged argument with a soggy maple leaf.
Sources

  • University of Minnesota Extension: Fall leaf mulching is good for your lawn

  • Toro: Ultra Blower/Vac operating manual

  • University of Maryland Extension: November gardening tips and tasks

Landscaping & Gardening

0 Comments

Write A Comment

*
*
Please complete the captcha to submit your comment.
Related Posts All Posts
06.18.2026

Grow Gourmet Mushrooms in Your Backyard This Year: The Complete 2026 Beginner's Guide to Logs, Beds & Easy Harvests

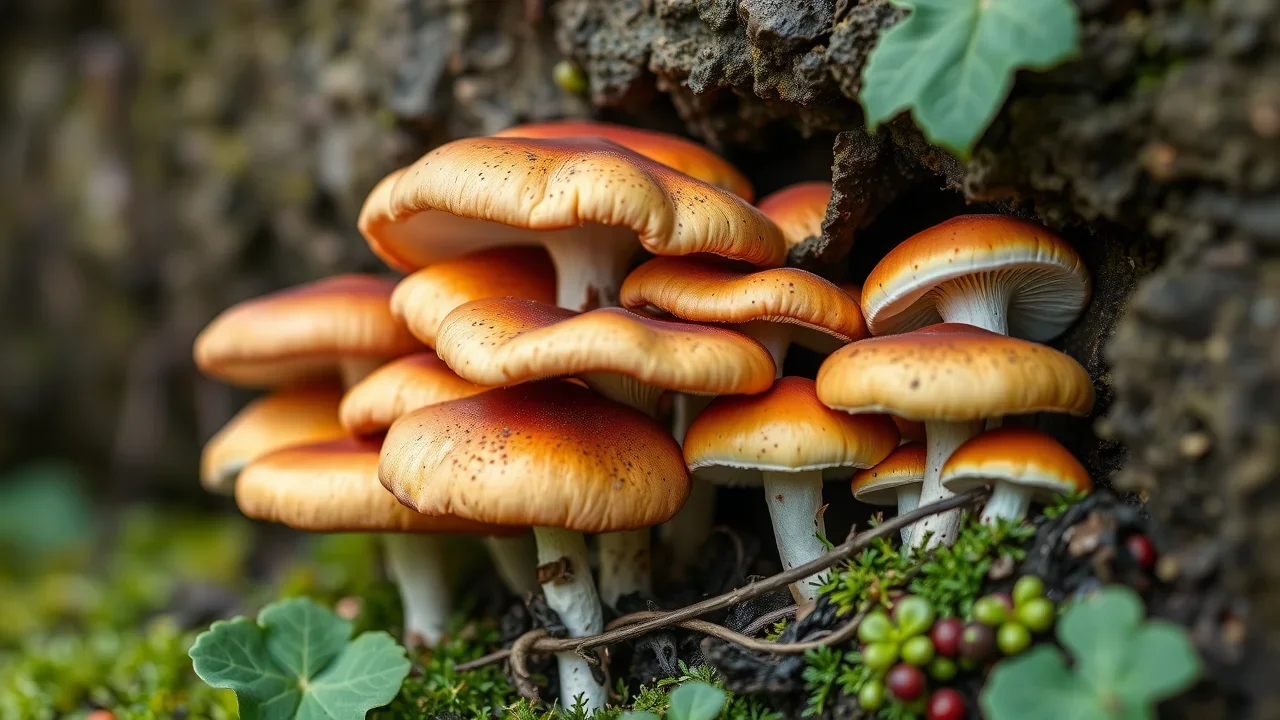
Imagine the satisfaction of harvesting fresh, gourmet mushrooms from your own backyard—pure, organic, and utterly rewarding. Growing mushrooms isn’t just gardening; it’s an enriching experience that connects you to nature’s quiet magic. Ready to transform your space into a lush mushroom haven this year? Let’s begin.Why Grow Mushrooms in Your Backyard?Choosing to grow mushrooms in your backyard offers more than just a tasty addition to your dinner table—it opens up a new dimension of sustainable, healthy living. Backyard mushroom gardening is not only an avenue to fresh, low-cost, and mouthwatering fungi, but it also brings you closer to understanding the intricate cycles of nature.As you build your own mushroom garden, you’ll discover unique joys, from witnessing the tiny pins emerge after a good rainfall, to harvesting clusters of oyster mushrooms or shiitakes at their flavorful peak. These experiences make mushroom beds and logs a natural fit for anyone seeking more from their garden routine.Health benefits: Mushrooms are packed with nutrients, vitamins, and antioxidants essential for well-being.Sustainability: Growing mushrooms outdoors supports the environment by recycling organic matter and reducing your food’s carbon footprint.Accessibility: With the right setup, you can harvest mushrooms right outside your door—no complicated equipment required.Unique satisfaction: Tending a mushroom garden provides a peaceful, almost meditative hobby distinct from growing vegetables or flowers.Nature’s magic: Watching mushrooms grow is a mesmerizing, hands-on science experience for all ages."Growing mushrooms outdoors lets you witness nature’s cycle up close—it’s rewarding, therapeutic, and truly delicious."What You'll Learn About How to Grow Mushrooms in Your BackyardThis guide will demystify backyard mushroom cultivation, making it accessible for gardeners at any experience level. By the end, you’ll feel prepared to start and maintain your own mushroom garden, confident in your setup and daily care routines. Here’s what you can expect to discover:How to select the best mushroom types for your climate, taste preferences, and available spaceStep-by-step instructions for creating log, garden bed, and mushroom bed setupsProven practices for outdoor mushroom care, watering, and harvestingSimple strategies to avoid the most common beginner mistakesThe Basics: Understanding Backyard Mushroom CultivationBefore you grow mushrooms in your backyard, it helps to understand the fundamentals of mushroom biology and the unique requirements they have. Unlike standard garden vegetables, mushrooms are the fruiting bodies of a hidden organism—mycelium—that spreads out of sight, often within a log, a mushroom bed, or under a layer of mulch. Providing the right conditions (cool shade, sustained moisture, and plenty of organic matter) is key to successful growth.Mushroom anatomy: The visible cap and stem are only the tip of the iceberg; the real magic happens within the substrate (like a hardwood log or bed of straw).Grown outdoors vs. kits: Indoor mushroom kits are convenient but limited in scale and variety, while outdoor mushroom gardening allows you to grow larger quantities and try many more mushroom species—such as shiitake mushrooms, oyster mushrooms, or wine cap varieties—right in your natural landscape.Essentials to start: You’ll need mushroom spawn (like plug spawn or sawdust spawn), the proper substrate (logs, garden beds, or wood chips), and a partially shaded spot that stays moist but never soggy.How to Select Mushroom Types for Your Backyard GardenChoosing the right mushroom species sets the foundation for a productive backyard harvest. Some mushrooms thrive in specific conditions—certain kinds do best grown outdoors in hardwood logs, while others love garden beds filled with wood chips or straw. Here’s a breakdown of the most beginner-friendly options:Shiitake mushrooms: Famous for their rich, umami flavor, shiitake mushrooms grow best on freshly cut, hardwood logs. They’re reliable when inoculated correctly and can produce flushes of mushrooms outdoors for several years. However, they require patience, as the first harvest often takes 6–18 months.Oyster mushrooms: Known for their versatility and rapid growth, oyster mushrooms adapt well to a variety of outdoor beds. They thrive on wood chips, straw, or even cardboard, and are perfect for mushroom beds if you want quick results. Their clusters—especially golden oyster varieties—are as beautiful as they are tasty.Wine cap mushrooms: Also called “garden giants,” wine cap mushrooms are ideal for outdoor gardens and mushroom beds layered with straw or wood chips. These mushrooms are robust, fast to fruit, and help build soil health by breaking down organic matter in your garden bed.Other edible options: For adventurous growers, try king stropharia, blewit mushrooms, or lion’s mane—each presents its own growing challenge and reward in a backyard mushroom garden.Preparing Your Space: Setting up a Mushroom Garden in Your BackyardA successful mushroom garden relies on thoughtful preparation—whether you’re working with a spacious yard or a cozy corner. Start by deciding if you want to use logs, a dedicated mushroom bed, or containers. Each setup has its benefits, and all can produce reliable harvests for beginners and veterans alike.Choosing and prepping: Select healthy, pathogen-free logs (ideally hardwood), or build a mushroom bed with rich, well-draining soil layered with wood chips or straw. Good preparation helps spawn establish quickly and reduces contamination risks.Soil, shade, and moisture: Mushrooms thrive in areas protected from direct sunlight, with steady moisture and high humidity. Submerged garden beds or logs under trees are ideal. Avoid areas that flood or dry out quickly—consistent moisture is essential for healthy mushroom growth.Containers and raised beds: Limited on space? Containers and raised garden beds allow flexible placement and easy maintenance—especially helpful for oyster mushrooms or wine cap species.If you're working with a smaller outdoor area, you might be surprised at how much you can achieve by combining mushroom beds with other space-saving landscaping techniques. For more inspiration on maximizing every inch of your yard, check out these smart landscaping moves for small backyards that can make your garden feel twice as spacious: landscaping ideas for compact spaces.Methods to Grow Mushrooms in Your Backyard: Logs, Garden Beds, and MoreGrow Mushrooms in Logs: Step-by-Step GuideUsing logs is a classic, reliable approach for growing shiitake mushrooms and other species that thrive on wood. Start with freshly cut hardwood logs—oak and maple work best. After drilling several holes, insert plug spawn or sawdust spawn, seal with melted wax, and stack the logs in a damp, shaded spot. Water consistently, and within months to a year, you’ll notice the first mushrooms emerging.Maintaining moisture is crucial—logs should be sprayed or soaked during dry spells to keep the mycelium alive and healthy. Periodically check that the wax seals remain intact to prevent unwanted molds. This method is not only rewarding but can supply flushes of mushrooms for years, making it a sustainable feature of your backyard mushroom garden.Best tree species: Oak, maple, and beech are favorites for shiitake mushrooms. Use logs that are 3–8 inches in diameter and freshly cut to ensure minimal competition from wild fungi.Inoculation: Drill holes along the length of the log, inject with spawn, and cover each with wax to lock in the moisture and mycelium.Maintenance: Place your logs in a shady, humid area—stacking in a crisscross pattern maximizes air circulation. Water regularly and monitor the ends for signs of fruiting or contamination.Growing Mushrooms in Garden Beds and Mushroom Bed SetupsA mushroom bed is one of the simplest—and most productive—methods for growing mushrooms outdoors. Choose a shaded location, and build your mushroom bed on bare earth by layering cardboard, wood chips, and straw. Spread mushroom spawn (like sawdust spawn) between each layer, ensuring high contact with organic matter. This environment is perfect for oyster mushrooms and wine cap varieties, which quickly colonize loose substrates and produce generous flushes.Oyster mushrooms thrive in a layer of straw, while wine cap mushrooms prefer a deep layer of wood chips for best results. Renew your mushroom bed with fresh organic matter each season to keep yields high. These setups are easy to expand, relocate, or tuck between existing garden beds—making them ideal for maximizing backyard space.Bed construction: Dig a shallow trench, lay down cardboard, and alternate layers of straw and wood chips mixed with mushroom spawn. Water well and cover with mulch.Substrates: Straw (for oysters), hardwood wood chips (for wine cap), and even a layer of composted leaves lend great results. The key is keeping the bed cool, damp, and shaded.Renewal: Top up the bed annually with new wood chips or straw to feed hungry mycelium and extend productivity season after season.Container and Raised Garden Beds for MushroomsIf your backyard has little extra space, containers and raised garden beds offer flexible solutions for mushroom cultivation. Large plastic pots, grow bags, or small raised beds can become home to oyster mushrooms and other fast-fruiting varieties.Simply add your substrate (wood chips, straw, hardwood sawdust), mix in mushroom spawn, and water regularly. Raise humidity by grouping containers or placing mulch on top. These portable mushroom beds fit on patios or shaded corners, and can be moved as needed to optimize light and moisture.Getting started: Use food-safe containers or deep grow bags filled with your chosen substrate. Drill small drainage holes and avoid direct sunlight to keep the root zone moist and cool.Maximizing yield: Water containers every few days, especially in hot weather, and refresh the top layer of substrate as needed for prolonged yields. Proper drainage prevents soggy conditions and encourages healthy mushroom grow cycles.Step-by-Step: Planting, Maintaining, and Harvesting Mushrooms OutdoorsOnce your mushroom bed, log, or container is ready, it’s time to plant your mushroom spawn and look forward to your first harvest. Whether you choose plug spawn or sawdust spawn depends on your setup. Apply the spawn evenly throughout the substrate or into drilled holes, cover with a layer of straw or mulch, and water gently to settle everything in. Mushrooms grow best when the substrate stays consistently damp—a light weekly watering is often enough, but keep an eye out during hot, dry spells.Planting: Mix spawn and substrate thoroughly for beds, or carefully insert spawn plugs into logs. Cover with a roll of burlap or mulch to retain moisture and keep competing molds at bay.Watering & mulching: Mushrooms thrive with even, gentle moisture. Mulch conserves humidity and limits weed or pest intrusion. Check beds and logs often after rain or during dry weather, adjusting your schedule to keep conditions right.Harvest signs: Most mushrooms are ready when their caps are fully formed, but before they flatten or release spores. Use a gentle twisting motion or small knife to harvest, leaving surrounding mycelium undisturbed for future flushes."Patience is key—mushrooms grow at nature’s pace, but the reward is always worth the wait."Troubleshooting & Common Issues in Backyard Mushroom GardensEven seasoned gardeners sometimes encounter obstacles when trying to grow mushrooms in a backyard setting. The most common issues include contamination from molds or bacteria, the appearance of pests like slugs, or surprisingly low yields from mushroom beds and logs. Early detection and simple management strategies can prevent minor headaches from becoming large setbacks.Avoiding molds, pests, and contamination: Keep your mushroom garden clean and don’t let debris pile up. Remove any visibly moldy or misshapen mushrooms, and use covers or barriers to exclude slugs and insects. Wash hands and tools before handling new spawn or substrate.Troubleshooting poor yields: If your mushrooms aren’t fruiting as expected, check for adequate moisture, substrate freshness, and sufficient shade. Refreshing the bed with a new layer of substrate or re-watering logs can revive production.Safety tips: Only harvest mushrooms you intentionally planted and can positively identify. When in doubt, consult a local mycological society or extension office to rule out lookalikes.Tips for Sustainable Outdoor Mushroom GardeningSustainability lies at the heart of the best mushroom gardens. By thoughtfully recycling substrates and practicing mindful harvesting, you’ll encourage thriving biodiversity in your backyard and ensure plentiful mushrooms for years to come.Recycle and reuse: After a mushroom bed or log has finished producing, mix it into compost or add it as mulch to vegetable beds—spent substrate is packed with nutrients and beneficial fungi.Biodiversity: Outdoor mushroom gardens attract worms, beetles, and pollinators, helping turn your mushroom beds into micro-ecosystems that enrich soils and support resilient garden beds nearby.Responsible harvesting: Always leave some mushrooms behind to complete their life cycle, spreading spores to renew future harvests naturally.Comparing Popular Backyard Mushroom TypesMushroom TypeBest Growing MethodTime to HarvestUnique BenefitsShiitakeHardwood logs6–18 monthsRich flavor, multiple-year harvest, grows well in shadeOysterGarden beds, containers2–6 weeksFast-growing, adapts to many substrates, great for beginnersWine capMushroom bed, wood chips2–4 monthsImproves soil, tolerates variable conditions, large yieldsCreative Mushroom Garden Ideas for Small SpacesThink you need a large yard to cultivate mushrooms outdoors? Think again! With a touch of creativity, you can establish thriving mushroom beds or container gardens even in limited spaces like patios, balconies, or side yards. Vertical planters, stacked logs, and layered raised beds allow you to maximize yield and keep maintenance easy.Use tiered shelves or wall-mounted pots to create a vertical mushroom garden—perfect for oyster mushrooms and shades-loving herbs.Opt for containers or grow bags placed in shaded corners or under taller plants to suit small patios or urban balconies.Integrate mushroom beds with your vegetable garden, letting the rich, decomposing organic matter in mushroom beds nourish neighboring crops—reinforcing mutually beneficial relationships all season.People Also Ask About How to Grow Mushrooms in Your BackyardIs it good for mushrooms to grow in your yard?Yes—mushrooms that grow naturally in your yard can indicate rich, healthy soil and a thriving ecosystem. However, for edible harvests, always plant known, safe mushroom species and avoid consuming wild mushrooms unless you are 100% certain of their identity.Is mushroom safe for hypertension?Most culinary mushrooms, such as shiitake and oyster mushrooms, are naturally low in sodium and rich in nutrients, making them a potentially healthy food choice for individuals managing hypertension. As always, consult your healthcare provider for specific advice about your diet.Can you legally grow your own mushrooms?Growing edible mushrooms for personal use is legal in most regions. However, some areas regulate or restrict certain psychedelic or wild mushroom species, so always check your local laws before purchasing spawn or starting mushroom cultivation projects.What mushrooms can you grow in your backyard?Many varieties are suitable, including shiitake mushrooms, oyster mushrooms (and golden oyster types), wine cap, lion’s mane, and more. Choose mushrooms that match your climate, setup, and culinary preferences for best results.Frequently Asked Questions About Growing Mushrooms in Your BackyardHow much space do I need in my backyard for a mushroom garden?Even a corner of 3x3 feet can host a productive mushroom bed or several logs—expand as your confidence grows.Can I mix mushroom varieties in the same mushroom garden bed?Yes, provided the mushrooms have similar substrate and moisture needs—oysters and wine cap, for example, often thrive together.What’s the best time of year to start a backyard mushroom garden?Most gardeners start in early spring or fall when nights are cool and natural rainfall is plentiful. However, oyster mushrooms in containers can start almost any time with careful moisture control.How do I store and cook homegrown mushrooms?Store fresh mushrooms in a paper bag in the refrigerator; cook by sautéing, roasting, or adding to soups and stir-fries for maximum flavor and nutrition.Key Takeaways for Aspiring Backyard Mushroom GrowersBeginner-friendly species make it simple to grow mushrooms in your backyardLogs, garden beds, and mushroom beds each offer unique benefits for every garden typeOngoing care ensures continual harvests of gourmet mushrooms outdoorsExperiment with different mushroom grow setups for year-round rewardsReady to Grow Mushrooms in Your Backyard?Unlock the world of gourmet mushrooms right outside your door—start your own mushroom garden today and enjoy fresh harvests, improved soil, and the sheer wonder of nature’s quiet magic.If you’re inspired to transform your backyard into a productive oasis, there’s even more you can do to make the most of your outdoor space. Discover how thoughtful landscaping strategies can visually expand your yard and create a harmonious environment for both mushrooms and other garden features.Explore these expert tips on making a small backyard feel twice as large, and unlock new possibilities for beauty, function, and abundance in your home landscape by visiting the complete guide to maximizing small backyards.Explore more ideas to upgrade your space: theBackyardPal.comSourcesIf you were to grow mushrooms in your garden, would it ... - RedditGrowing Mushrooms at Home - UF/IFAS Gardening SolutionsHow to Grow Mushrooms In Your YardStarting a Mushroom Garden - 5 ways to get growingDon't Stop Here, There's More ...Your Backyard Is Begging to Feed You: Gorgeous Edible Landscaping Ideas That Look Like Art and Taste Even Better

09.13.2026

I Finally Got Tired of Fighting My Weeds: Why I Upgraded to an 80V String Trimmer

Looking for the best cordless string trimmer for thick weeds? Here's why many homeowners eventually outgrow their old trimmers and upgrade to the Greenworks 80V String Trimmer.

08.15.2026

My Small Hedge Problem Turned Into a Big Hedge Problem: Why I Finally Upgraded to a Pole Hedge Trimmer

Looking for the best cordless pole hedge trimmer for tall hedges? Here's why many homeowners outgrow standard 20V hedge trimmers and upgrade to the Greenworks 40V Pole Hedge Trimmer.

© 2026 CompanyName All Rights Reserved. Address . Contact Us . Terms of Service . Privacy Policy

Terms of Service

Privacy Policy

Core Modal Title

Sorry, no results found

You Might Find These Articles Interesting

T
Please Check Your Email
We Will Be Following Up Shortly
*
*
*