The BackYard Pal
update

TheBackyardPal.com

update
  • Home
  • Categories
    • Design
    • Relaxation
    • Social Activities & Games
    • Small Yards
    • Outdoor Living
    • Backyard Structures
    • Exercise & Health
  • All Posts
  • Design
  • Relaxation
  • Social Activities & Games
  • Small Yards
  • Landscaping & Gardening
  • Outdoor Living
  • Backyard Structures
  • Exercise & Health
May 19.2026
16 Minutes Read

Your Backyard Is Begging to Feed You: Gorgeous Edible Landscaping Ideas That Look Like Art and Taste Even Better

Joyful gardener in golden-hour light, admiring a vibrant edible landscape garden.

Imagine stepping into your own backyard, where every plant not only beautifies your space but also nourishes your body. Transforming a small backyard with edible landscaping blends creativity and sustainability, offering fresh flavors right at your doorstep while making your outdoor space a true masterpiece.

If you crave a yard that does double duty—bursting with beauty and brimming with homegrown produce—these small backyard edible landscaping ideas will redefine your approach to outdoor living. Whether you’re a gardening newbie or a seasoned foodscaper, discover how you can create a stunning edible garden that balances form and function, proof that with smart planning, even the tiniest yard can become your personal edible oasis.

basil, tomatoes, and marigolds companion planting in small backyard edible landscaping ideas

Unlocking the Potential of Small Spaces: The Art and Science of Edible Landscaping

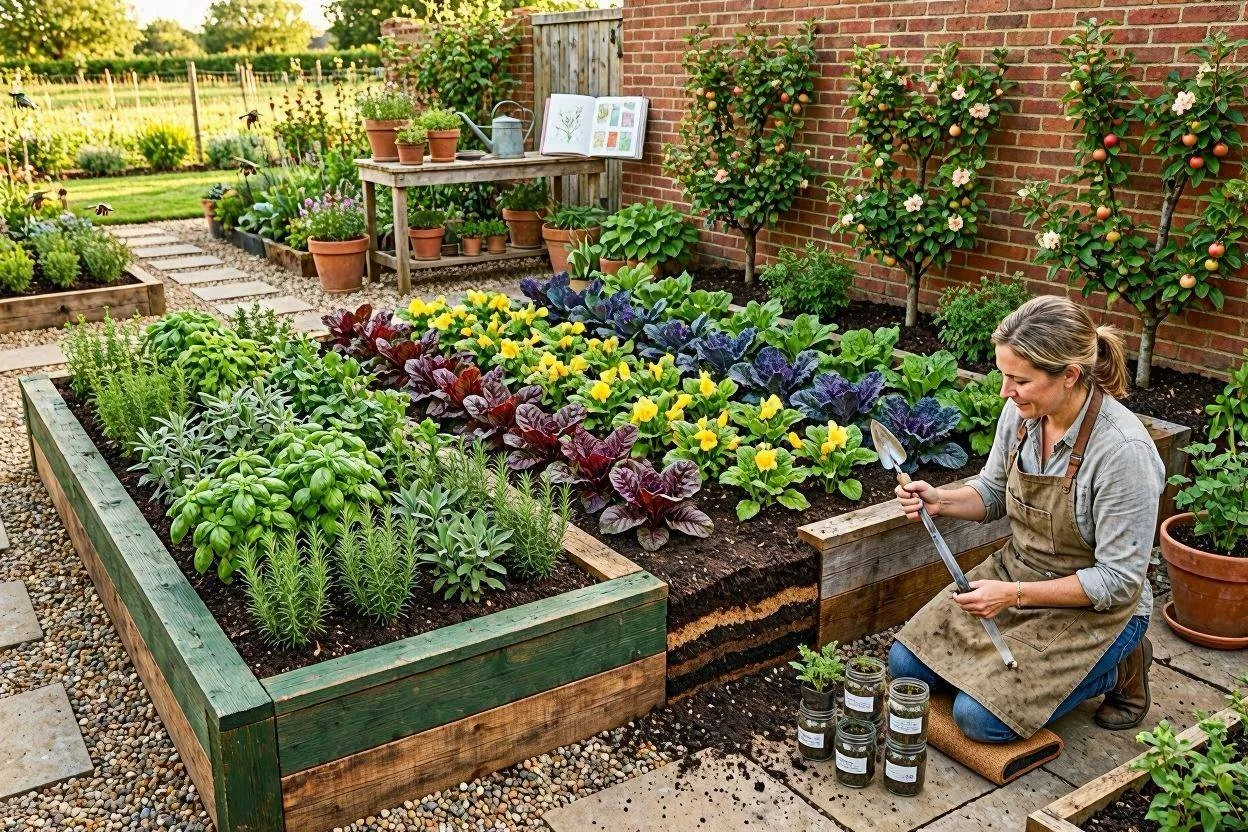
Small spaces can be powerful canvases for creativity and abundance. Edible landscaping brings together the artistry of ornamental design and the practicality of growing food in every available inch. In the modern backyard, foodscaping goes far beyond the traditional vegetable patch—think sculpted raised beds, colorfully patterned edible plants, and thoughtful companion planting for visual delight and maximum productivity. By understanding fundamental garden principles and leveraging the right edible plant palette, you can turn even a postage-stamp yard into a high-yield masterpiece that’s as beautiful as it is delicious.

Great edible landscaping in small spaces starts by viewing every element with dual purpose: berries in window boxes, fruit trees as living focal points, and herbs as aromatic ground cover. With the right design approach, your landscape will not only look stunning from every angle but also provide you with a continuous harvest. The art and science of edible landscaping merges texture, color, and seasonal variety to form a space that naturally attracts beneficial insects, inspires curiosity, and keeps your kitchen stocked with the very best flavors—all grown right at home.

“Foodscaping is where beauty meets bounty—your backyard is not just a feast for the eyes, but for your table.”

small backyard edible landscaping ideas with raised beds and patio containers, herbs, strawberries, and leafy greens, lush greenery, under gentle sunlight

What You'll Learn About Small Backyard Edible Landscaping Ideas

  • The essentials of small backyard edible landscaping ideas

  • How to incorporate edible plants in small spaces

  • Design principles for edible landscaping

  • Practical tips for maximizing yield and aesthetics

  • Companion planting for beauty and function

Small Backyard Edible Landscaping Ideas: Principles to Guide Your Foodscape

Understanding the Rule of 3 in Small Space Edible Landscaping

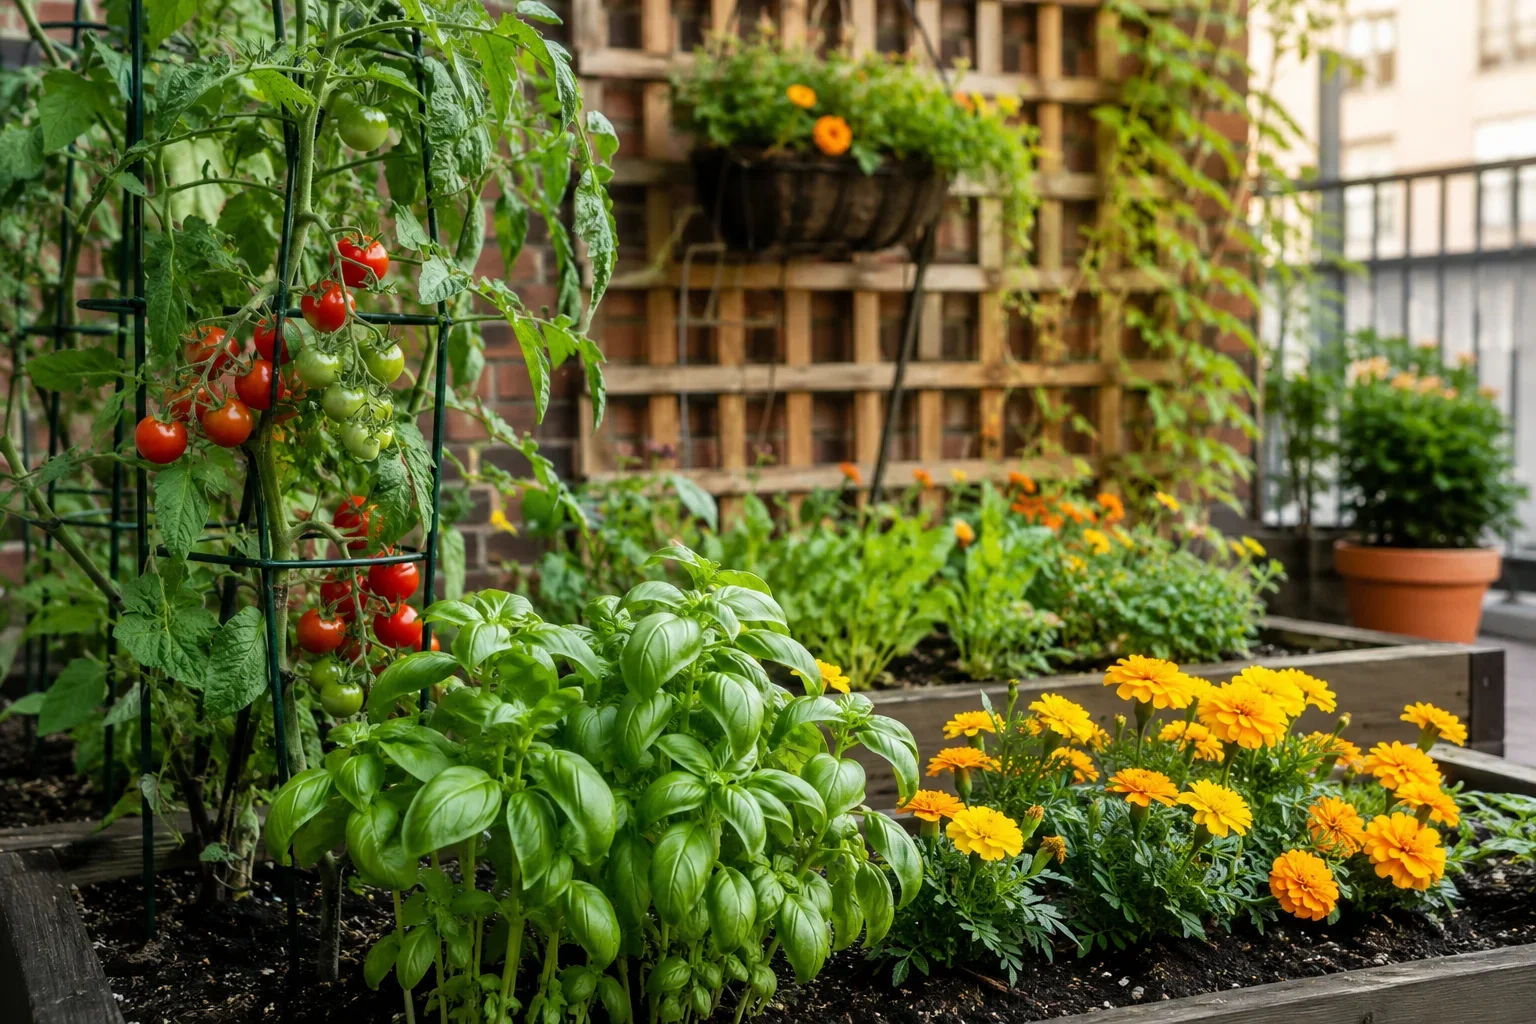
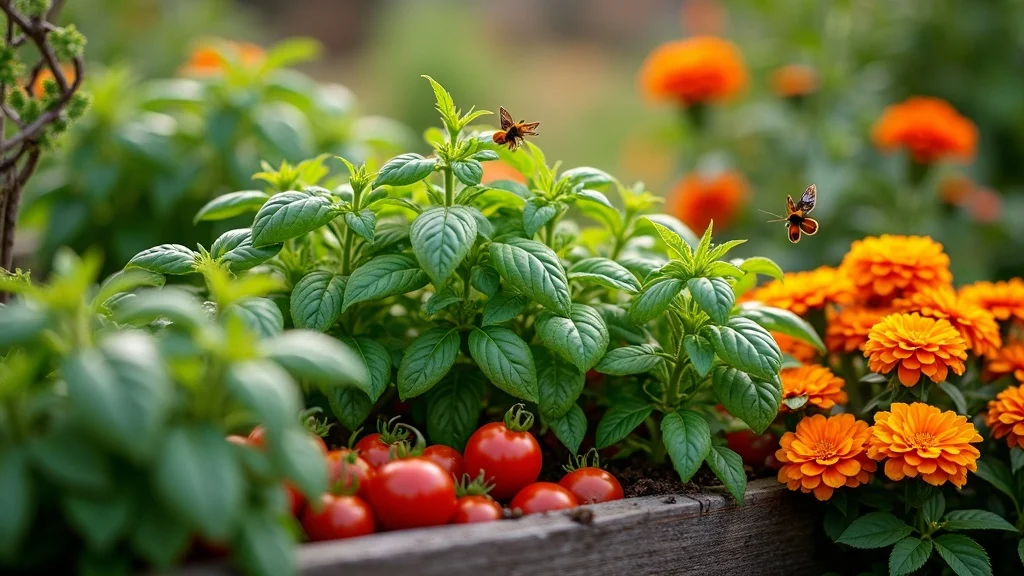
The rule of 3 is an essential design principle when considering small backyard edible landscaping ideas. By grouping plants—such as tomatoes, basil, and marigolds—in clusters of three, you effortlessly achieve visual harmony and rhythm. This method isn’t just about aesthetics; it harnesses the natural diversity of edible plants to ensure a balance between color, form, and function.

When you repeat these groupings in raised garden beds or along pathways, your landscape feels organized and intentional, drawing the eye through the space while maximizing the productive capacity of every inch. The rule of 3 also supports companion planting, encouraging beneficial insect activity and boosting both plant health and harvest in compact yards.

Applying the rule of 3 works wonderfully whether you’re mixing dwarf fruit trees, edible flowers, or aromatic herbs. For example, three strawberry pots may sit at different heights near a sunny wall, or three types of leafy greens might alternate along a garden bed. Each set becomes a focal point, and when repeated, brings a sense of flow that connects the entire yard. In small spaces, these design clusters minimize visual clutter and create easy-to-maintain focal points that deliver both beauty and bounty every season.

three clustered edible plants—tomato, basil, marigold in raised beds for small space edible landscaping

Applying the 70/30 Rule in Edible Gardens for Visual Harmony

The 70/30 rule is an ingenious way to balance lasting structure with adaptable color and flavor in your edible landscape. Dedicate roughly 70% of your small garden to permanent, structural edible plants like fruit trees, berry bushes, and perennial herbs. These elements form the enduring backbone of your design, providing height, form, and consistency through every season. The remaining 30% is reserved for seasonal or annual edible plants—think fast-growing salad greens, Swiss chard, edible flowers, and compact veggie varieties—that refresh the landscape throughout the growing season and add ever-changing interest.

This ratio ensures you achieve both year-round productivity and a dynamic look. In a small backyard, the 70/30 rule leads to a space that feels full, organized, and always productive. Structural elements like dwarf fruit trees become the main event, while clusters of lettuce, borage, or nasturtiums can be swapped out to introduce bursts of color and flavor. Paired with thoughtful companion planting, this approach maximizes every square inch, making even a compact edible garden feel generous and alive with activity.

Edible Landscaping Basics: Transforming Small Spaces Into Edible Gardens

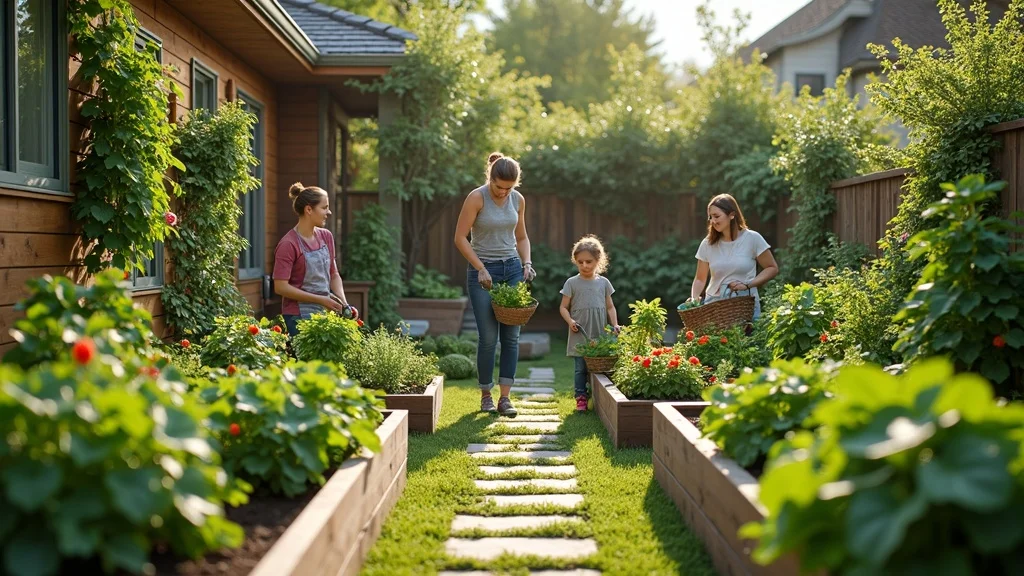
Transforming a small backyard into an edible landscape starts with understanding the strengths and limitations of your available space. Maximize yield by layering plants, utilizing vertical surfaces, and choosing plant varieties specifically bred for compact areas. Look for dwarf fruit trees, bush-type vegetables, and vining plants like peas or beans for trellised walls.

Consider raised beds for easier soil management and higher density planting, and intersperse edible flowers and herbs along paths or patios for visual appeal and culinary diversity. Good design in small space edible landscaping marries productivity with curb appeal, giving you the best of both function and form.

Soil quality, sunlight, and watering are the lifeblood of a productive edible garden. Enriching your soil with organic matter ensures long-term health for your foodscape, while understanding sunlight patterns—especially in urban settings—can help you make the most of microclimates and maximize your edible plant selection. Vertical gardens and multi-level raised beds allow you to grow a wide range of crops without sacrificing style or space.

Remember, every surface and structural feature—fences, walls, trellises—represents an opportunity to grow food while providing the anchoring structure that makes small edible landscapes uniquely eye-catching and efficient.

Designing Your Edible Landscape: Inspiration and Planning

Assessing Light, Soil, and Water in Small Backyard Edible Landscaping Ideas

Successful foodscaping starts with site analysis. Carefully observe how sunlight moves across your backyard during the day and across seasons; most edible plants need at least six hours of sun. Patchy light? Place shade-loving greens and herbs in filtered areas and fruit trees or tomatoes in the sunniest spots.

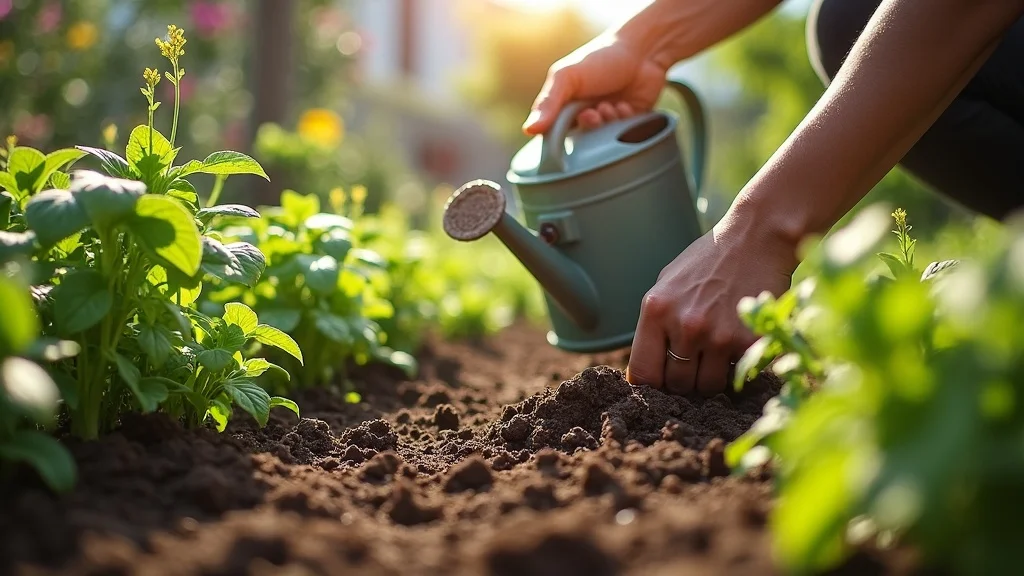
Test your soil for drainage and organic matter—rich, well-drained earth is key to healthy edible landscaping, but even compacted or poor soil can be revived with organic compost and mulching. Pay special attention to water access in small backyards, as containers and raised garden beds need regular, consistent hydration to thrive.

Don’t neglect the little details—they’re often the difference in achieving a productive edible landscape. Use rain barrels or drip irrigation for water efficiency and group plants by their watering needs. Add mulch to keep soil moist and beneficial insects happy. By assessing your microclimate and soil, you give your edible garden its best shot for abundant, flavorful harvests, while making ongoing care simple and sustainable for even the busiest homeowner.

gardener checking soil quality for small backyard edible landscaping ideas near thriving plants

How to Landscape with Edible Plants in Small Spaces

Creating a vibrant edible landscape in a small space calls for a blend of creativity and smart plant selection. Use vertical structures like trellises, fences, and wall-mounted planters for strawberries, herbs, and vining vegetables. Patio containers can host dwarf fruit trees or bushy tomatoes, doubling as both ornamental focal points and productive plants.

Layer ground cover like thyme or oregano along walkways, letting their flowers and fragrances spill naturally for both beauty and pollinator appeal. Interweave edible flowers throughout to punctuate color and attract beneficial insects that help your harvest thrive.

Blend your edible plants seamlessly with ornamentals for a landscape that looks curated and intentional, not utilitarian. Example table:

Space

Edible Plant

Ornamental Value

Vertical wall

Strawberries

Trailing foliage, red berries

Patio containers

Dwarf fruit trees

Blossoms, compact form

Ground cover

Thyme

Flowering carpet, aromatic

Best Edible Plants for Small Backyard Edible Landscaping Ideas

  • Dwarf fruit trees for small spaces

  • Edible flowers for color and taste

  • Herbs as edible ground cover

  • Leafy greens for structural diversity

  • Berries in raised beds and containers

Choosing Compact Fruit Trees and Berry Varieties

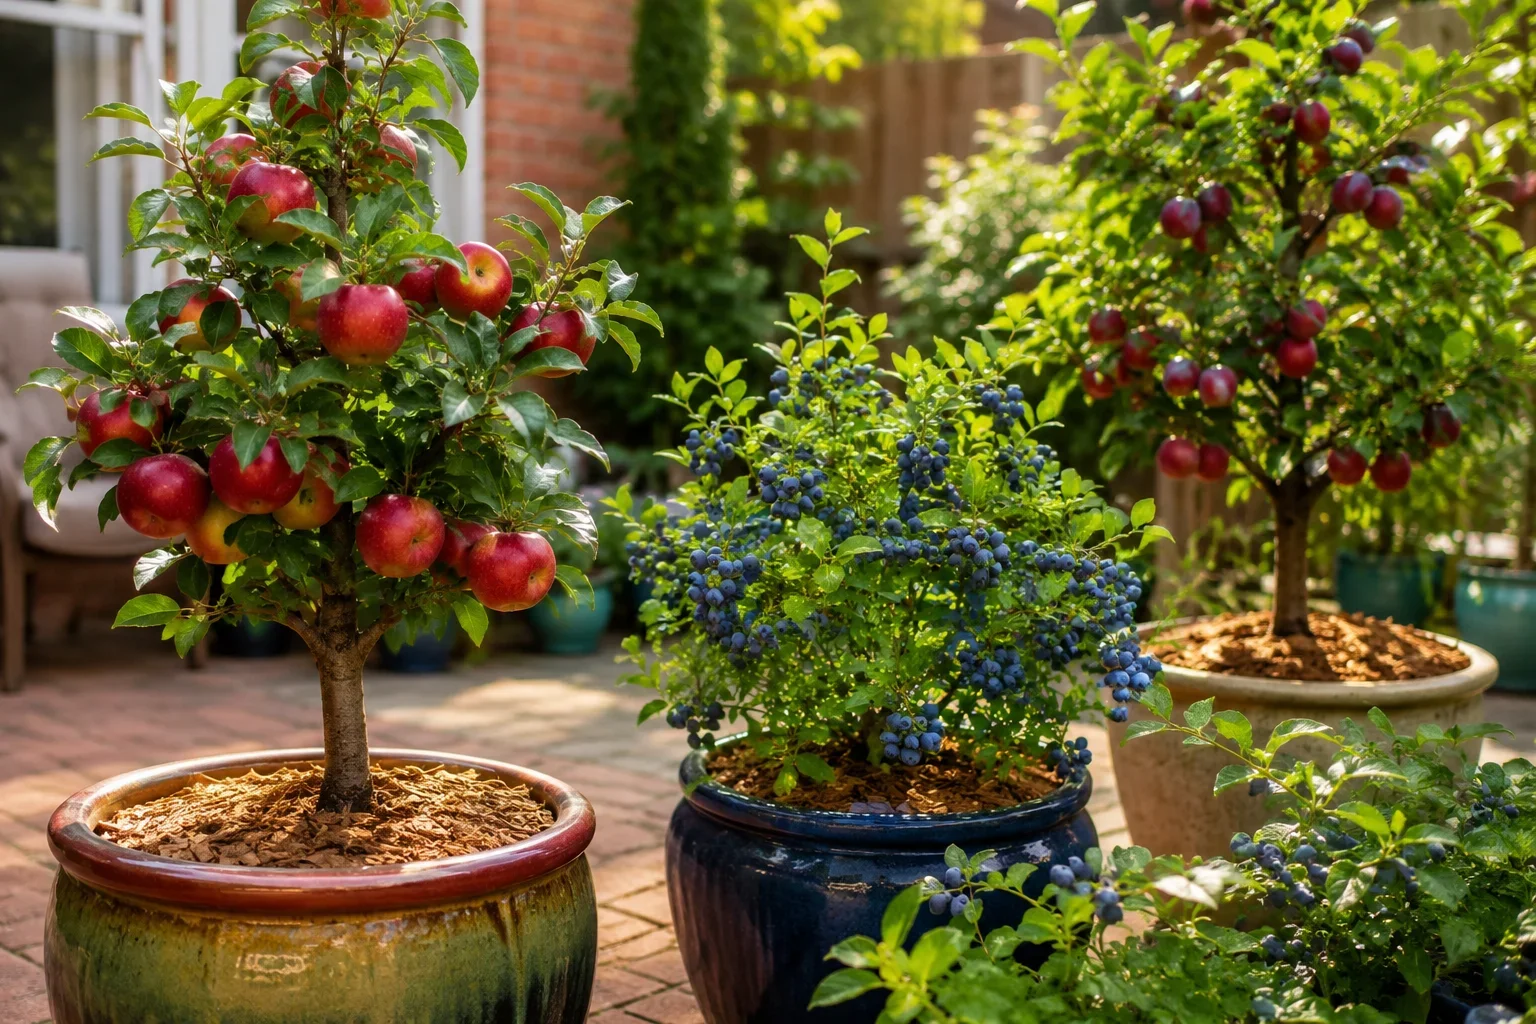
Dwarf fruit trees and careful berry selection are the stars of any small space edible landscape. These pint-sized trees—such as apple, peach, or fig—remain under six feet tall in containers, bursting with blossoms in spring and luscious fruit in summer. Not only do they serve as productive focal points, but their structured branches and lush green leaves provide ornamental value year-round.

Compact berry bushes (blueberries, raspberries) thrive in decorative planters or raised beds, delivering visual interest with glossy foliage and abundant seasonal fruit. Both options are ideal for urban homeowners wanting to grow food without sacrificing style or space.

When choosing fruit trees or berries, select disease-resistant, self-pollinating varieties for simplest care and maximal yield. Use dwarf fruit trees as anchor points in your design—frame doorways, patios, or entry paths with them so they serve an ornamental function as well as a fruitful one. With thoughtful placement, these edible plantings become structural elements, boosting privacy and forming a living edible hedge that’s just as appealing as any ornamental shrubbery.

dwarf fruit trees and berry bushes in decorative planters for small backyard edible landscaping ideas

Edible Flowers: Add Color and Edibility

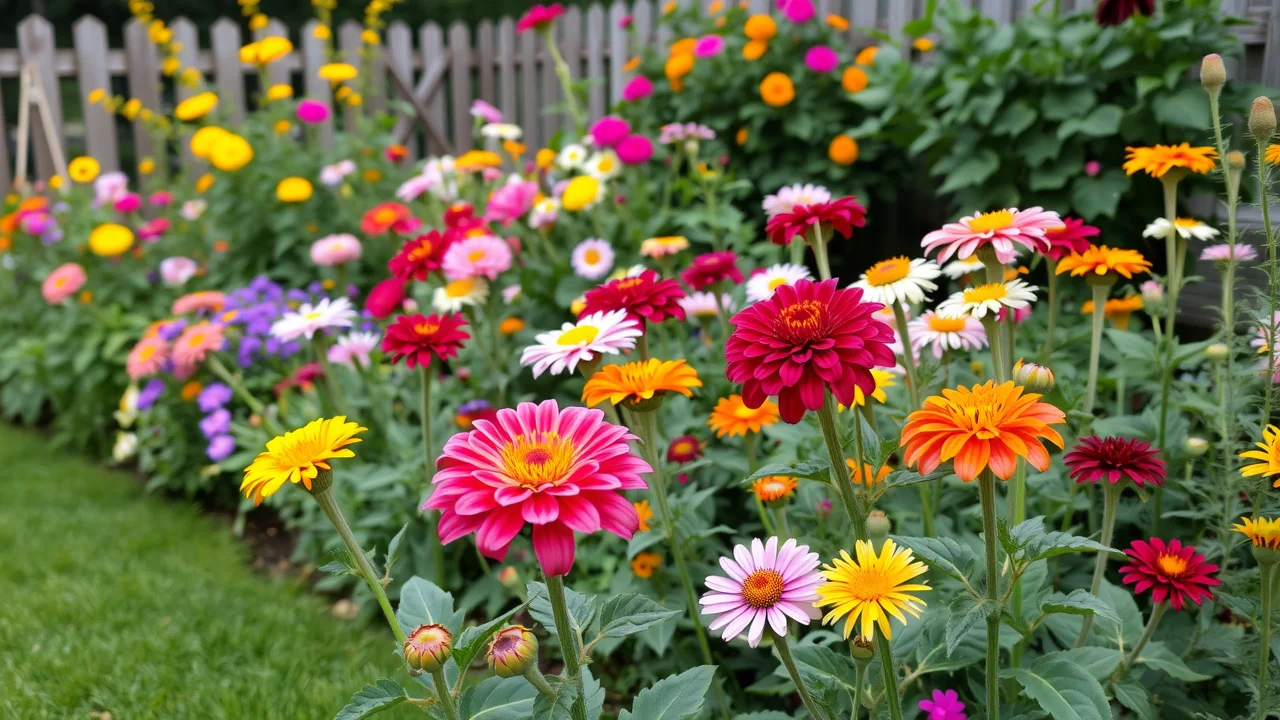
Edible flowers are a secret weapon for small backyard edible landscaping ideas. Varieties like nasturtiums, violets, calendula, borage, and pansies bring bursts of color, intricate petal shapes, and unique heights to your garden beds and borders. These flowers aren’t just pretty faces—they’re packed with flavor, adding subtle spice or sweetness to salads and desserts. Edible flowers attract a wide range of beneficial insects, naturally supporting pollination and healthy crops throughout the growing season.

When interspersed among herbs and vegetables, edible flowers soften transitions between landscaping elements and offer continuous blooms even as other plants come and go. Choose species whose flowers are edible and whose leaves may also contribute flavor or aroma, maximizing each plant’s utility. This multi-tasking approach delivers a living ornamental bed that looks lush and vibrant, while doubling as a source of fresh, seasonal produce for your kitchen.

Ground Cover as Edible Plant Choices

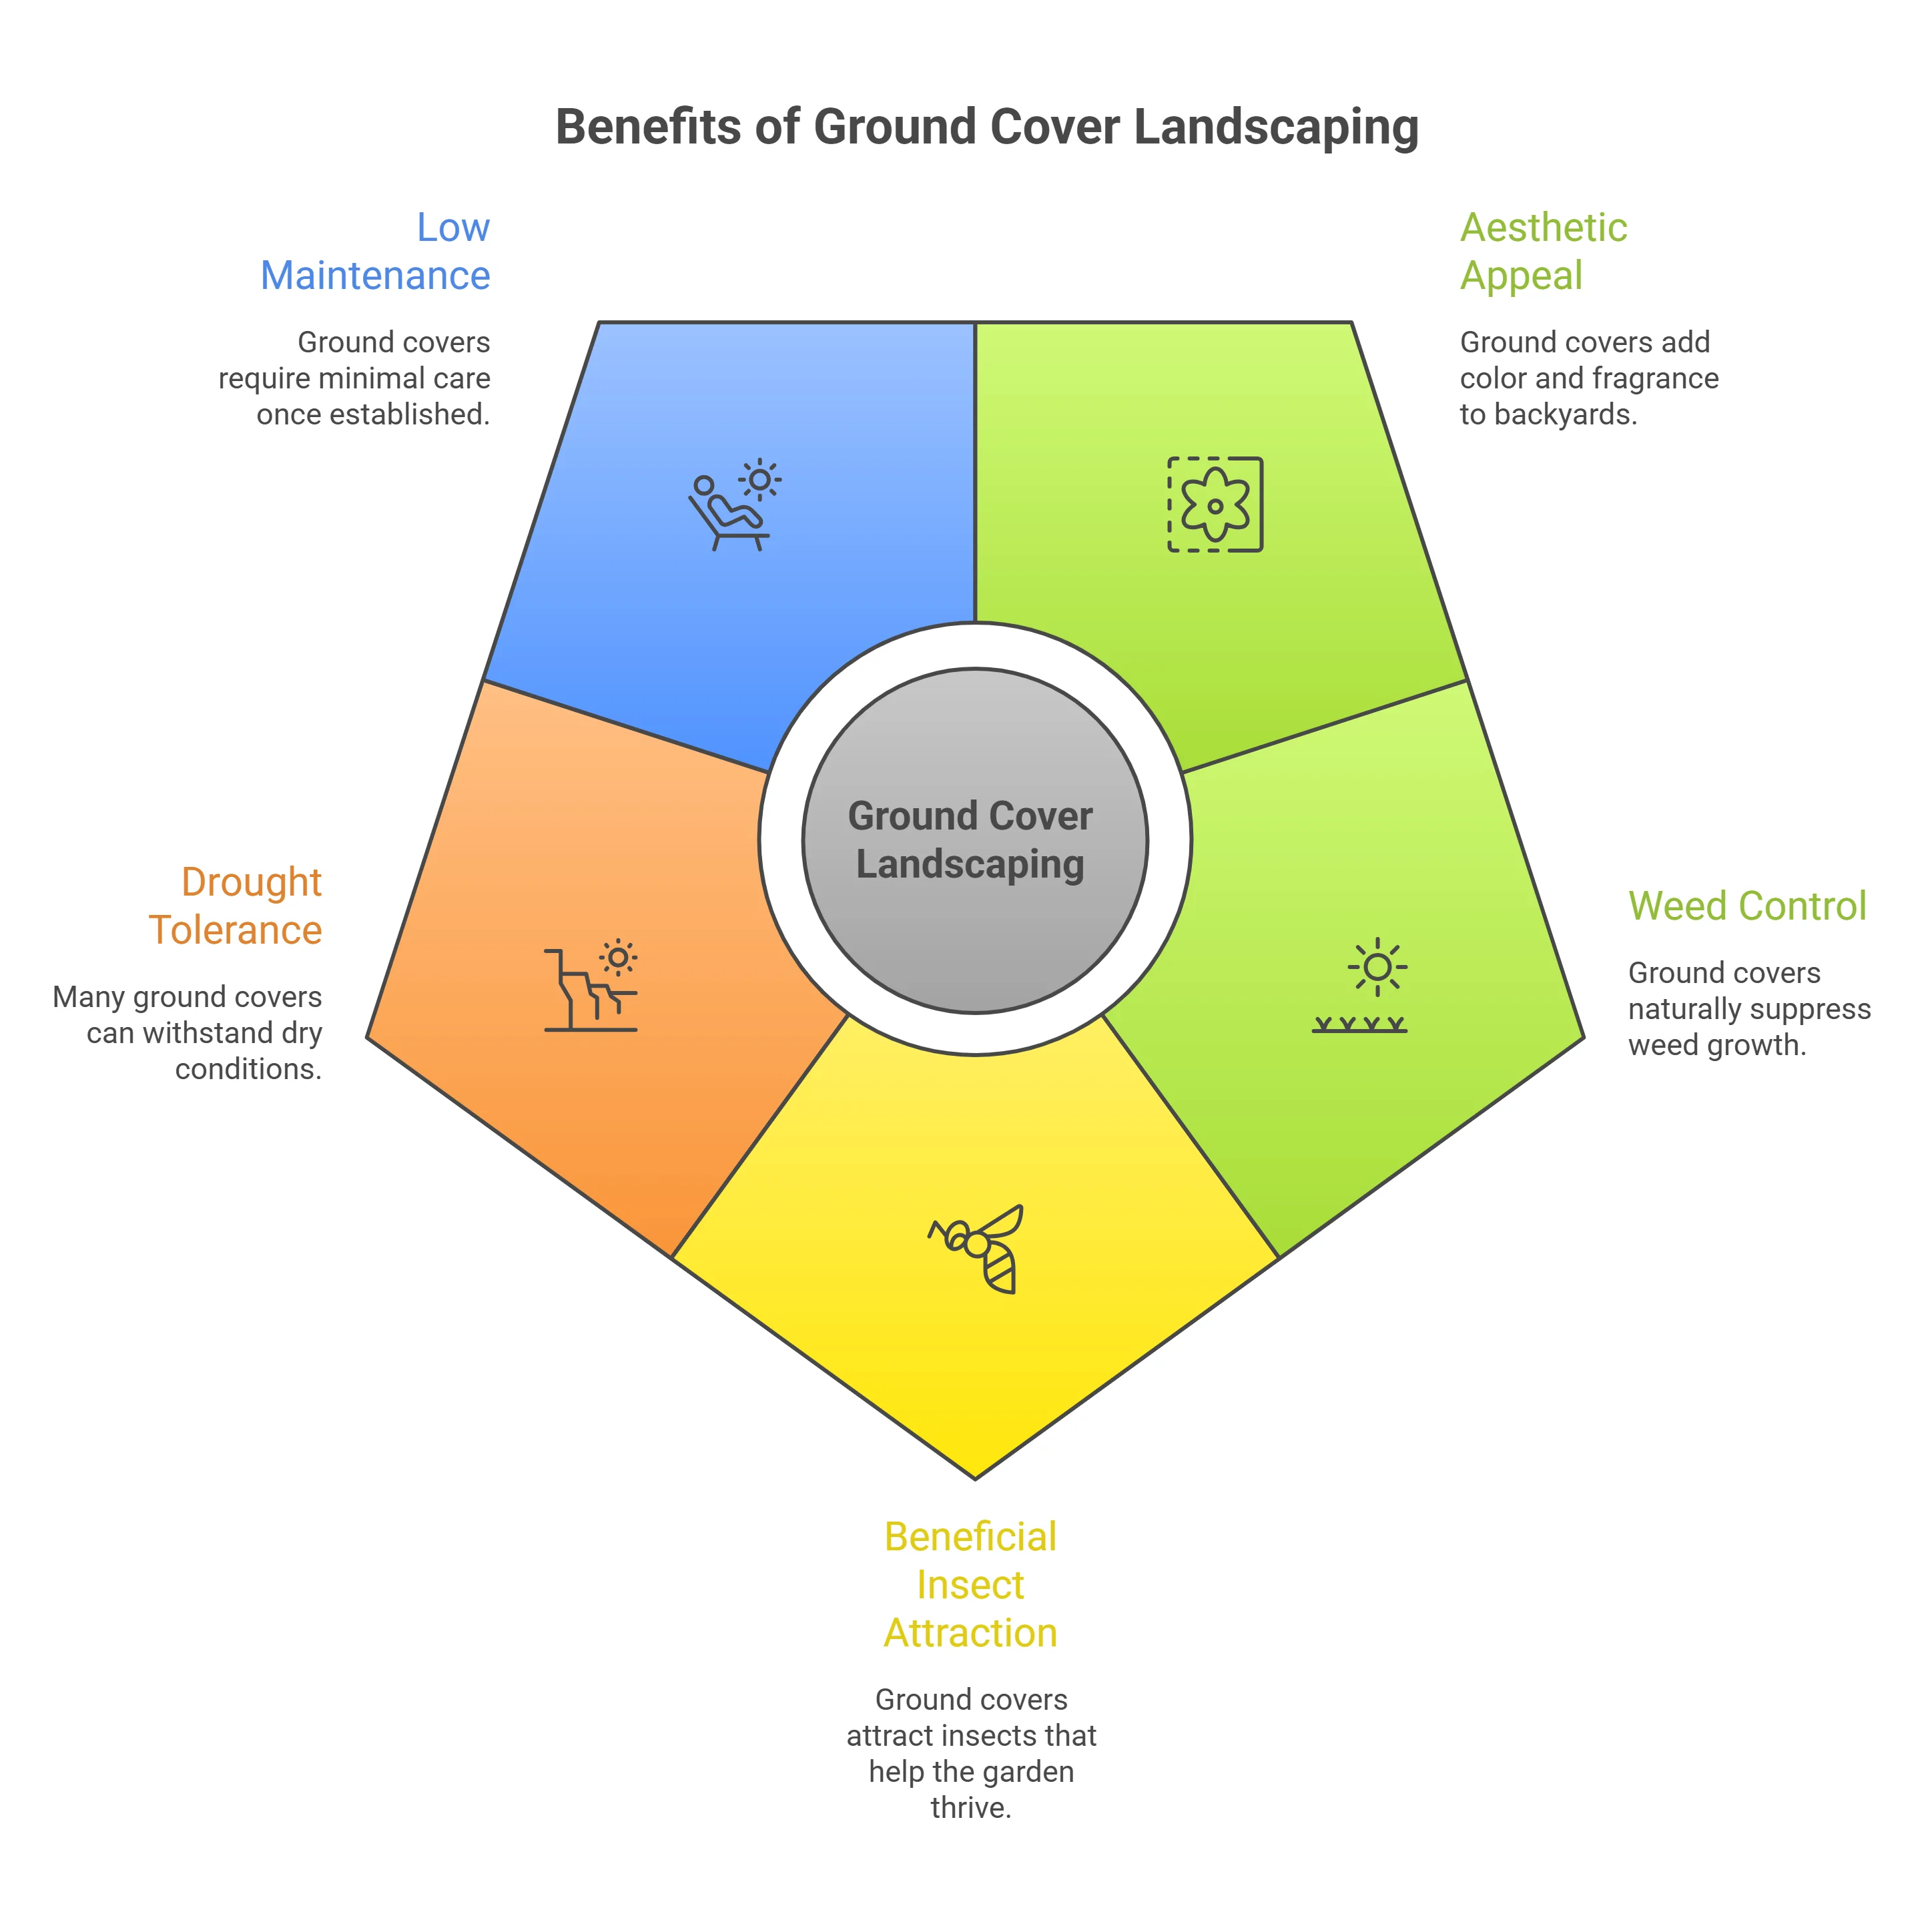
Ground covers like creeping thyme, oregano, and alpine strawberries are ideal for weaving together small backyard edible landscaping ideas. These low-growing perennials effortlessly spread across empty spaces, replacing traditional mulch or turf with a tapestry of green leaves and edible blooms. When you walk outside, you’ll enjoy aromatic fragrance and lush color, plus a living "carpet" that attracts beneficial insects and naturally crowds out weeds. Many ground covers are drought-tolerant, thrive in poor soils, and require almost no maintenance once established.

Beyond saving space, edible ground covers create transition areas between beds, paths, and main focal points, giving your landscape a cohesive, interconnected feel. Choose varieties that tolerate foot traffic and provide occasional harvests for the kitchen. With ground cover, every inch of your landscape becomes both visually striking and ultimately productive—a perfect solution for small spaces striving for beauty, bounty, and sustainability.

dwarf fruit trees and berry bushes in decorative planters for small backyard edible landscaping ideas

Creating Edible Garden Beds and Raised Beds in Small Spaces

Garden Bed Layouts to Maximize Small Backyard Edible Landscaping

Well-designed garden beds transform even the smallest backyard into an efficient, edible landscape. Rectangular or L-shaped beds along fences cleverly use available boundaries, while circular or keyhole beds become engaging focal points surrounded by paths or patio stones. Grouping plants by their size, harvest timing, or sun needs maximizes productivity and makes ongoing care far easier. Interplant fast-growing leafy greens like lettuce with slower-growing tomatoes or peppers so every inch is actively producing food throughout the growing season.

Raised beds are a favorite for small backyard edible landscaping ideas because they warm up quickly in spring and drain well, providing an early start and healthy growth. Use deep beds for root crops, while shallow beds fit herbs and salad greens. Design each bed with a clear edge—wood, stone, or recycled materials work well—adding definition and structure as well as pleasing connection to patios or walkways. This thoughtful bed layout allows even the smallest yard to offer a wide range of nutritious harvests and ornamental interest.

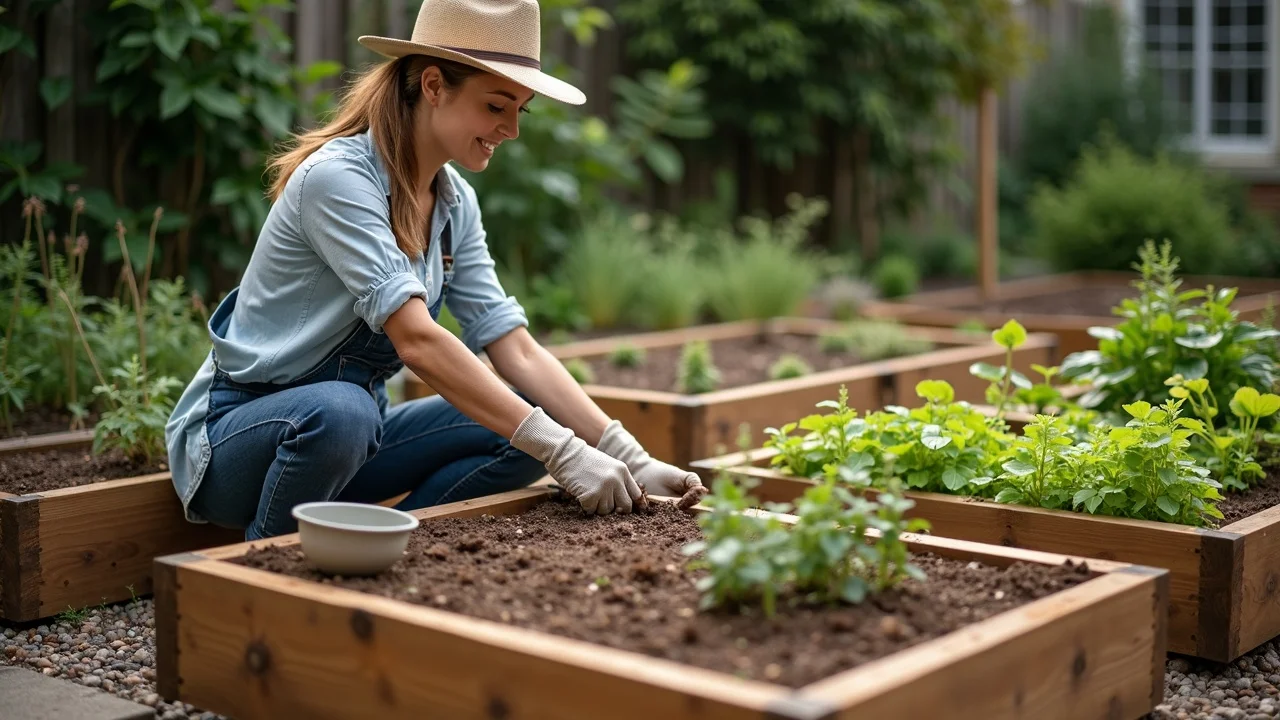
Building and Planting Raised Beds for Edible Landscaping

Raised beds bring edible gardening within everyone’s reach, especially in small spaces where soil may be depleted or compacted. Use rot-resistant wood, stone, or eco-friendly composite to build structures at least 12 inches deep for ample root space. Fill beds with rich organic matter, blending compost, aged manure, and native soil for long-lasting fertility.

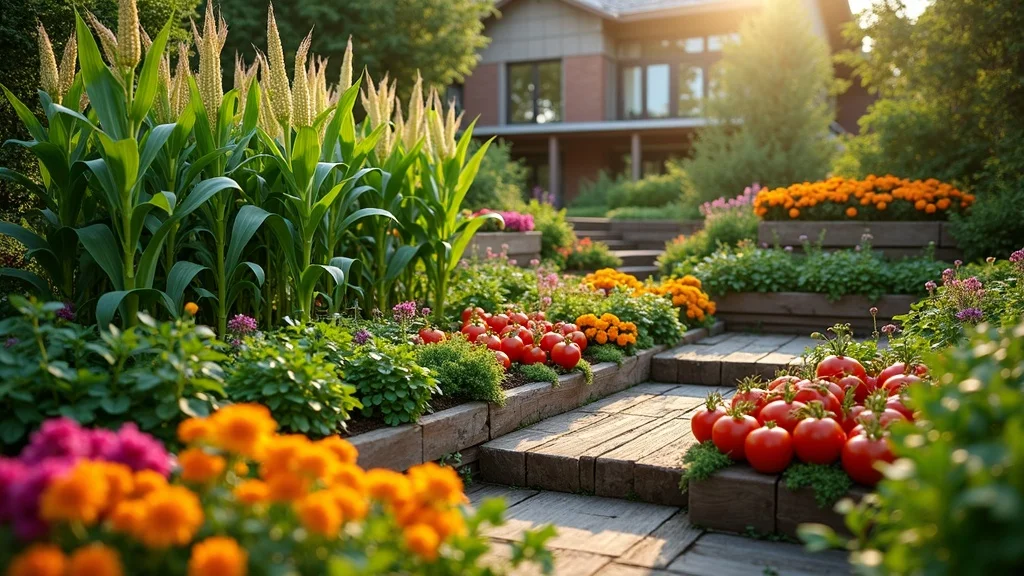
Raised beds are simple to organize, enabling clear crop rotation, companion planting, and even decorative patterns that delight the eye. When planning, consider placing taller edible plants like tomatoes or corn at the north-most back edge, with mid-height plants and ground cover cascading toward the front for a layered, ornamental effect.

Plant densely to shade soil, suppress weeds, and maximize returns. Tuck edible flowers and herbs along the borders for pest control and visual pop, and group plants with similar water needs to streamline care. Mulch deeply to conserve moisture and maintain consistent growth across changing weather. Raised beds help you grow food efficiently in limited space, with structural integrity and ornamental appeal that puts your edible landscape on par with the best show gardens.

gardener arranging seedlings in raised beds in small backyard edible landscaping ideas

Integrating Companion Planting Into Small Backyard Edible Landscaping

Companion Planting for Pest Control and Productivity

Companion planting is the natural gardener’s trick for thriving, chemical-free edible landscapes. By thoughtfully pairing edible plants—like tomatoes with basil, or carrots with onions—you create small-scale ecosystems that boost productivity and discourage pests.

In the limited real estate of a small space, companion planting pulls double-duty: organizing plants for maximum efficiency while supporting a balance of beneficial insects, pollinators, and complementary flavors. Mixed beds layered with flowers, greens, and herbs look as good as they taste, helping the entire garden flourish throughout the growing season.

Edible landscaping truly shines when beauty and bounty combine in dense, diverse plantings. Incorporate marigolds for color and deterrence of soil nematodes, borage to attract pollinators, and chives beside lettuce to repel aphids. Each grouping is a micro-habitat that enhances edible plant health, yields vibrant harvests, and transforms your homegrown produce into the pride of your kitchen and table.

basil, tomatoes, and marigolds companion planting in small backyard edible landscaping ideas

Edible Plants That Thrive Together in Small Spaces

  • Tomatoes & basil

  • Lettuce & chives

  • Carrots & onions

  • Strawberries & borage

Combining these tried-and-true edible plant companions in small backyard garden beds simplifies maintenance and doubles your returns. Not only do you enjoy better pollination and pest resistance, but these combinations also create lush, textured layers that resemble an ornamental bed—proof that edible landscaping can be as attractive as it is functional, even in the smallest of yards.

Aesthetic Tips: Making Your Small Backyard Edible Landscaping Look Stunning

Using Color, Texture, and Height in Edible Landscaping

Great design in an edible garden leverages contrast and structure to create showstopping outdoor "rooms. " Mix plants of different colors—from purple basil to rainbow chard, golden marigolds, and bright red strawberries—for a tapestry effect. Blend textural contrasts, pairing the lacy leaves of carrots with broad, glossy Swiss chard or the fine spray of fennel against the solid blades of garlic chives.

Play with plant height: place tall sunflowers or fruit trees toward the back, medium tomatoes and peppers in the center, and trailing herbs or edible flowers up front. This strategy creates a sense of depth and visual rhythm, making the garden bed feel spacious and well-composed.

Color and structure aren’t just for ornament—they’re tools for sustainability, too. Dense, layered edible plantings help shade soil, foster beneficial insect habitats, and make ongoing care easier. When your landscape is a feast for the eyes and the plate, you’re more likely to spend time outdoors, tending, harvesting, and discovering new flavors every week.

multi-height edible landscaping with colorful vegetables, herbs, and edible flowers in small backyard

Edible Landscaping Ideas for Vertical and Hanging Gardens

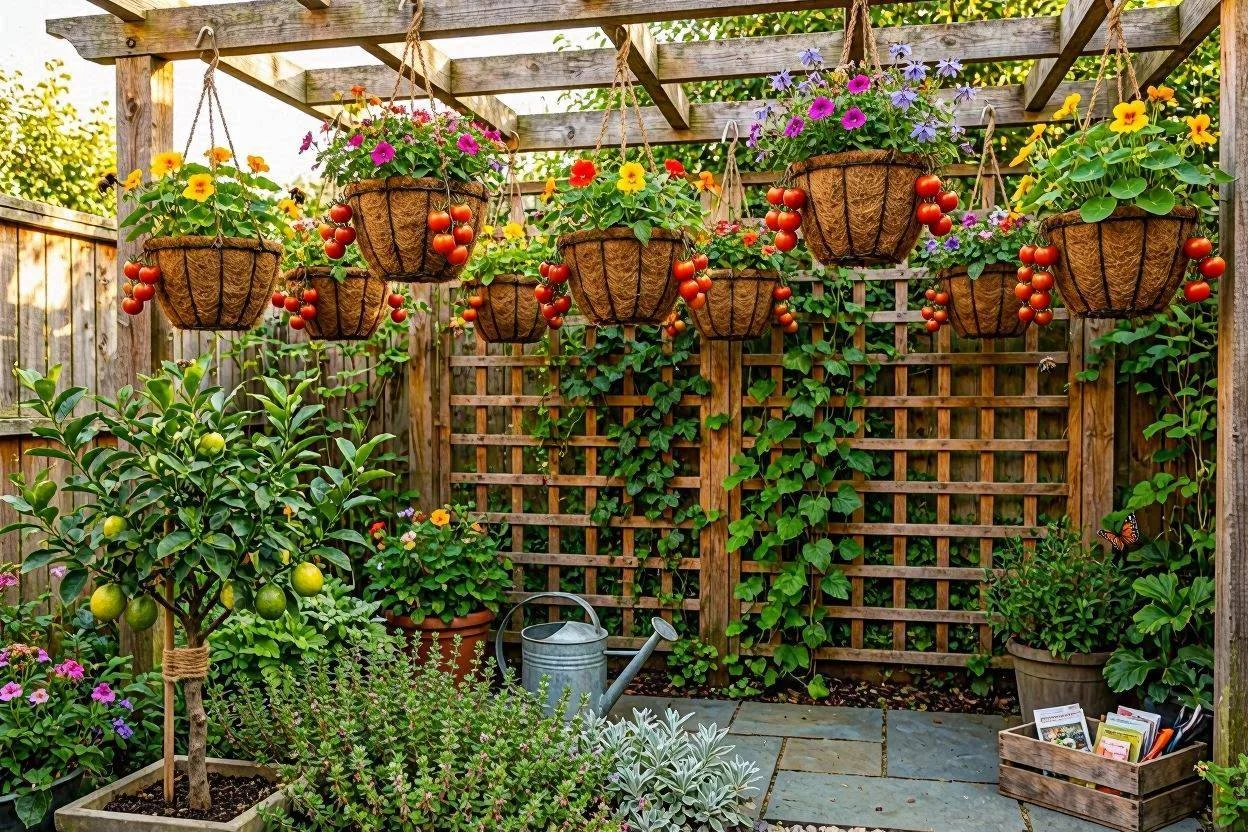
In the smallest spaces, vertical and hanging gardens multiply your planting potential and create living art walls that change with the seasons. Use wall-mounted pockets, stacked planter barrels, or lattice trellises to grow strawberries, peas, or herbs upward instead of out.

Hanging baskets full of cherry tomatoes or edible flowers bring color to eye level and free up ground space for compact fruit trees or ground cover. Vertical edible gardens can become stunning living screens, providing privacy, shade, and pollinator habitat—while giving you a constant source of fresh ingredients for your meals.

Vertical gardening in edible landscapes brings not only extra harvest but also dramatic appeal. Play with layers by tucking microgreens between larger leaf crops, adding edible vines to climb fences, and blending ornamental vines with edible ones for a seamless, luxuriant look. Even the tiniest balcony or patio can become a lush, productive tapestry with the right mix of vertical and horizontal edible plantings.

Caring for Your Edible Landscape: Smart Maintenance for Small Spaces

Watering, Feeding, and Pruning Edible Plants in Small Gardens

Smart maintenance keeps your compact edible landscape thriving with minimal effort. Most edible plants need steady moisture—use drip irrigation, self-watering containers, or soaker hoses to make watering efficient and hands-off. Feed soil monthly with compost or organic liquid fertilizers to keep perennial plants vigorous and annual veggies productive. Prune regularly to maintain shapes, remove crowded branches, and encourage more fruit or leaf production, especially in densely planted raised beds or containers.

Successful small space edible landscaping relies on routine but efficient care. Monitor plants weekly for pest problems, yellowing leaves, or poor growth, and address issues early to keep the harvest coming. Remove spent annuals at the end of the growing season, top up mulch, and replant with seasonal varieties to ensure year-round color, texture, and productivity in your edible garden beds.

Seasonal Checklist for Small Backyard Edible Landscaping

Spring: Prep beds, amend soil with compost, and plant early greens and herbs. Summer: Mulch deeply, harvest fruits/veggies, and prune for airflow. Fall: Sow cool-season crops, tidy annuals, and add leaves or compost as mulch. Winter: Clean up, plan crop rotation, and prune perennial fruit trees to maintain structure. This continual cycle keeps your small backyard edible landscaping both beautiful and abundant, with minimal effort and ongoing returns throughout the year.

basil, tomatoes, and marigolds companion planting in small backyard edible landscaping ideas

People Also Ask: Top Questions About Small Backyard Edible Landscaping Ideas

What is the rule of 3 in landscaping?

Explained: The rule of 3 in small backyard edible landscaping means grouping plants or design elements in sets of three for visual balance and harmony. This principle helps achieve a natural, aesthetically pleasing arrangement, whether using edible plants, fruit trees, or garden beds.

What are the easiest backyard landscaping ideas?

Explained: The easiest small backyard edible landscaping ideas include growing herbs in containers, using raised beds for salad greens, and planting compact fruit trees. These require minimal effort, adapt well to small spaces, and provide both beauty and harvest.

What is the 70/30 rule in gardening?

Explained: The 70/30 rule in gardening involves dedicating 70% of your garden space to permanent or structural edible plants (like fruit trees or shrubs), and 30% to seasonal or annual edible plants. This ensures year-round interest and productivity in small backyard edible landscaping ideas.

How to landscape with edible plants?

Explained: To landscape with edible plants in a small backyard, blend edible varieties with ornamentals, utilize vertical and layered plantings, and incorporate aesthetic elements like color and texture. Plan companion plant groupings and use garden beds or raised beds to organize your edible landscape efficiently.

Common Small Backyard Edible Landscaping FAQs

What are low-maintenance edible plants for small spaces?

Small gardens are ideal for low-maintenance edible plants like herbs (basil, thyme, and chives), which thrive in pots with minimal sunlight and watering. Leafy greens such as spinach and lettuce are also excellent choices, as they grow quickly and can be harvested multiple times. For sunny balconies or patios, dwarf tomato and pepper varieties offer compact yet productive yields. With vertical gardening techniques, even the smallest spaces can produce a surprisingly fresh and varied harvest.

How do I protect my edible landscape from pests?

Companion planting is an effective first line of defense against pests — marigolds, for example, naturally repel aphids while adding color to your garden. Keeping your garden tidy by removing dead leaves and debris is equally important, as clutter invites unwanted insects. Introducing beneficial insects like ladybugs and lacewings provides natural, chemical-free pest control. For added protection, floating row covers shield young plants from insects without hindering their growth.

Can edible landscaping work in shaded small backyards?

Shaded backyards are well-suited for greens like lettuce, spinach, and Swiss chard, as well as herbs such as mint, parsley, and chives, all of which flourish with limited sunlight. Vertical gardening techniques — using hanging pots, wall-mounted planters, or trellises — help maximize small shaded spaces while adding visual appeal. With some creativity, even a sun-deprived yard can become a productive and beautiful edible garden.

How often do I need to replant containers or raised beds?

Annuals like vegetables and flowers typically benefit from fresh soil and replanting each season, while perennials can remain in place for several years with periodic pruning and compost refreshers. Quick-turnaround crops like herbs may need replanting a couple of times per season depending on growth and space. Watching for signs of overcrowding or fatigue in your plants is the best indicator that it's time for a refresh.

Key Takeaways on Small Backyard Edible Landscaping Ideas

  • Small backyard edible landscaping ideas can turn even the tiniest outdoor area into a productive and beautiful foodscape.

  • Effective design and plant selection can combine practicality, beauty, and sustainability.

  • Edible landscaping offers homeowners a fresh approach to backyard gardening that highlights both form and function.

Ready to Start Your Edible Landscape Journey?

"Get More Backyard Ideas at: TheBackyardPal.com"

With creativity, strategic plant selection, and sustainable methods, you can transform your small backyard into an edible oasis. Start today, and let your outdoor space feed both your eyes and your table!

Sources

  • Garden Design – https://www.gardendesign.com/edible-landscaping/

  • Modern Farmer – https://modernfarmer.com/2019/04/edible-landscaping-design-principles/

  • University of Georgia Extension – https://extension.uga.edu/publications/detail.html?number=B1554&title=edible-landscaping

  • Fine Gardening – https://www.finegardening.com/project-guides/edible-gardening/how-to-design-edible-landscapes

Transforming your small backyard into a productive and visually appealing edible landscape is both achievable and rewarding. For inspiration, consider the article “Small Backyard Ideas for an Edible Garden” from Sunset Magazine, which offers ten design ideas to seamlessly integrate edible plants into compact spaces, emphasizing the use of curving raised beds and water-wise plants to create a high-style edible retreat. (sunset. com)

Also, the “Complete Guide to Edible Landscaping for Small Spaces” provides practical advice on vertical gardening, selecting multi-functional plants, and layering planting areas to maximize productivity and aesthetic appeal in limited spaces. (thrivelot. com) By exploring these resources, you’ll discover innovative strategies to transform your small backyard into a lush, edible oasis that delights both the eyes and the palate.

theBackyardPal.com

Landscaping & Gardening

0 Comments

Write A Comment

*
*
Please complete the captcha to submit your comment.
Related Posts All Posts
06.18.2026

Grow Gourmet Mushrooms in Your Backyard This Year: The Complete 2026 Beginner's Guide to Logs, Beds & Easy Harvests

Imagine the satisfaction of harvesting fresh, gourmet mushrooms from your own backyard—pure, organic, and utterly rewarding. Growing mushrooms isn’t just gardening; it’s an enriching experience that connects you to nature’s quiet magic. Ready to transform your space into a lush mushroom haven this year? Let’s begin.Why Grow Mushrooms in Your Backyard?Choosing to grow mushrooms in your backyard offers more than just a tasty addition to your dinner table—it opens up a new dimension of sustainable, healthy living. Backyard mushroom gardening is not only an avenue to fresh, low-cost, and mouthwatering fungi, but it also brings you closer to understanding the intricate cycles of nature.As you build your own mushroom garden, you’ll discover unique joys, from witnessing the tiny pins emerge after a good rainfall, to harvesting clusters of oyster mushrooms or shiitakes at their flavorful peak. These experiences make mushroom beds and logs a natural fit for anyone seeking more from their garden routine.Health benefits: Mushrooms are packed with nutrients, vitamins, and antioxidants essential for well-being.Sustainability: Growing mushrooms outdoors supports the environment by recycling organic matter and reducing your food’s carbon footprint.Accessibility: With the right setup, you can harvest mushrooms right outside your door—no complicated equipment required.Unique satisfaction: Tending a mushroom garden provides a peaceful, almost meditative hobby distinct from growing vegetables or flowers.Nature’s magic: Watching mushrooms grow is a mesmerizing, hands-on science experience for all ages."Growing mushrooms outdoors lets you witness nature’s cycle up close—it’s rewarding, therapeutic, and truly delicious."What You'll Learn About How to Grow Mushrooms in Your BackyardThis guide will demystify backyard mushroom cultivation, making it accessible for gardeners at any experience level. By the end, you’ll feel prepared to start and maintain your own mushroom garden, confident in your setup and daily care routines. Here’s what you can expect to discover:How to select the best mushroom types for your climate, taste preferences, and available spaceStep-by-step instructions for creating log, garden bed, and mushroom bed setupsProven practices for outdoor mushroom care, watering, and harvestingSimple strategies to avoid the most common beginner mistakesThe Basics: Understanding Backyard Mushroom CultivationBefore you grow mushrooms in your backyard, it helps to understand the fundamentals of mushroom biology and the unique requirements they have. Unlike standard garden vegetables, mushrooms are the fruiting bodies of a hidden organism—mycelium—that spreads out of sight, often within a log, a mushroom bed, or under a layer of mulch. Providing the right conditions (cool shade, sustained moisture, and plenty of organic matter) is key to successful growth.Mushroom anatomy: The visible cap and stem are only the tip of the iceberg; the real magic happens within the substrate (like a hardwood log or bed of straw).Grown outdoors vs. kits: Indoor mushroom kits are convenient but limited in scale and variety, while outdoor mushroom gardening allows you to grow larger quantities and try many more mushroom species—such as shiitake mushrooms, oyster mushrooms, or wine cap varieties—right in your natural landscape.Essentials to start: You’ll need mushroom spawn (like plug spawn or sawdust spawn), the proper substrate (logs, garden beds, or wood chips), and a partially shaded spot that stays moist but never soggy.How to Select Mushroom Types for Your Backyard GardenChoosing the right mushroom species sets the foundation for a productive backyard harvest. Some mushrooms thrive in specific conditions—certain kinds do best grown outdoors in hardwood logs, while others love garden beds filled with wood chips or straw. Here’s a breakdown of the most beginner-friendly options:Shiitake mushrooms: Famous for their rich, umami flavor, shiitake mushrooms grow best on freshly cut, hardwood logs. They’re reliable when inoculated correctly and can produce flushes of mushrooms outdoors for several years. However, they require patience, as the first harvest often takes 6–18 months.Oyster mushrooms: Known for their versatility and rapid growth, oyster mushrooms adapt well to a variety of outdoor beds. They thrive on wood chips, straw, or even cardboard, and are perfect for mushroom beds if you want quick results. Their clusters—especially golden oyster varieties—are as beautiful as they are tasty.Wine cap mushrooms: Also called “garden giants,” wine cap mushrooms are ideal for outdoor gardens and mushroom beds layered with straw or wood chips. These mushrooms are robust, fast to fruit, and help build soil health by breaking down organic matter in your garden bed.Other edible options: For adventurous growers, try king stropharia, blewit mushrooms, or lion’s mane—each presents its own growing challenge and reward in a backyard mushroom garden.Preparing Your Space: Setting up a Mushroom Garden in Your BackyardA successful mushroom garden relies on thoughtful preparation—whether you’re working with a spacious yard or a cozy corner. Start by deciding if you want to use logs, a dedicated mushroom bed, or containers. Each setup has its benefits, and all can produce reliable harvests for beginners and veterans alike.Choosing and prepping: Select healthy, pathogen-free logs (ideally hardwood), or build a mushroom bed with rich, well-draining soil layered with wood chips or straw. Good preparation helps spawn establish quickly and reduces contamination risks.Soil, shade, and moisture: Mushrooms thrive in areas protected from direct sunlight, with steady moisture and high humidity. Submerged garden beds or logs under trees are ideal. Avoid areas that flood or dry out quickly—consistent moisture is essential for healthy mushroom growth.Containers and raised beds: Limited on space? Containers and raised garden beds allow flexible placement and easy maintenance—especially helpful for oyster mushrooms or wine cap species.If you're working with a smaller outdoor area, you might be surprised at how much you can achieve by combining mushroom beds with other space-saving landscaping techniques. For more inspiration on maximizing every inch of your yard, check out these smart landscaping moves for small backyards that can make your garden feel twice as spacious: landscaping ideas for compact spaces.Methods to Grow Mushrooms in Your Backyard: Logs, Garden Beds, and MoreGrow Mushrooms in Logs: Step-by-Step GuideUsing logs is a classic, reliable approach for growing shiitake mushrooms and other species that thrive on wood. Start with freshly cut hardwood logs—oak and maple work best. After drilling several holes, insert plug spawn or sawdust spawn, seal with melted wax, and stack the logs in a damp, shaded spot. Water consistently, and within months to a year, you’ll notice the first mushrooms emerging.Maintaining moisture is crucial—logs should be sprayed or soaked during dry spells to keep the mycelium alive and healthy. Periodically check that the wax seals remain intact to prevent unwanted molds. This method is not only rewarding but can supply flushes of mushrooms for years, making it a sustainable feature of your backyard mushroom garden.Best tree species: Oak, maple, and beech are favorites for shiitake mushrooms. Use logs that are 3–8 inches in diameter and freshly cut to ensure minimal competition from wild fungi.Inoculation: Drill holes along the length of the log, inject with spawn, and cover each with wax to lock in the moisture and mycelium.Maintenance: Place your logs in a shady, humid area—stacking in a crisscross pattern maximizes air circulation. Water regularly and monitor the ends for signs of fruiting or contamination.Growing Mushrooms in Garden Beds and Mushroom Bed SetupsA mushroom bed is one of the simplest—and most productive—methods for growing mushrooms outdoors. Choose a shaded location, and build your mushroom bed on bare earth by layering cardboard, wood chips, and straw. Spread mushroom spawn (like sawdust spawn) between each layer, ensuring high contact with organic matter. This environment is perfect for oyster mushrooms and wine cap varieties, which quickly colonize loose substrates and produce generous flushes.Oyster mushrooms thrive in a layer of straw, while wine cap mushrooms prefer a deep layer of wood chips for best results. Renew your mushroom bed with fresh organic matter each season to keep yields high. These setups are easy to expand, relocate, or tuck between existing garden beds—making them ideal for maximizing backyard space.Bed construction: Dig a shallow trench, lay down cardboard, and alternate layers of straw and wood chips mixed with mushroom spawn. Water well and cover with mulch.Substrates: Straw (for oysters), hardwood wood chips (for wine cap), and even a layer of composted leaves lend great results. The key is keeping the bed cool, damp, and shaded.Renewal: Top up the bed annually with new wood chips or straw to feed hungry mycelium and extend productivity season after season.Container and Raised Garden Beds for MushroomsIf your backyard has little extra space, containers and raised garden beds offer flexible solutions for mushroom cultivation. Large plastic pots, grow bags, or small raised beds can become home to oyster mushrooms and other fast-fruiting varieties.Simply add your substrate (wood chips, straw, hardwood sawdust), mix in mushroom spawn, and water regularly. Raise humidity by grouping containers or placing mulch on top. These portable mushroom beds fit on patios or shaded corners, and can be moved as needed to optimize light and moisture.Getting started: Use food-safe containers or deep grow bags filled with your chosen substrate. Drill small drainage holes and avoid direct sunlight to keep the root zone moist and cool.Maximizing yield: Water containers every few days, especially in hot weather, and refresh the top layer of substrate as needed for prolonged yields. Proper drainage prevents soggy conditions and encourages healthy mushroom grow cycles.Step-by-Step: Planting, Maintaining, and Harvesting Mushrooms OutdoorsOnce your mushroom bed, log, or container is ready, it’s time to plant your mushroom spawn and look forward to your first harvest. Whether you choose plug spawn or sawdust spawn depends on your setup. Apply the spawn evenly throughout the substrate or into drilled holes, cover with a layer of straw or mulch, and water gently to settle everything in. Mushrooms grow best when the substrate stays consistently damp—a light weekly watering is often enough, but keep an eye out during hot, dry spells.Planting: Mix spawn and substrate thoroughly for beds, or carefully insert spawn plugs into logs. Cover with a roll of burlap or mulch to retain moisture and keep competing molds at bay.Watering & mulching: Mushrooms thrive with even, gentle moisture. Mulch conserves humidity and limits weed or pest intrusion. Check beds and logs often after rain or during dry weather, adjusting your schedule to keep conditions right.Harvest signs: Most mushrooms are ready when their caps are fully formed, but before they flatten or release spores. Use a gentle twisting motion or small knife to harvest, leaving surrounding mycelium undisturbed for future flushes."Patience is key—mushrooms grow at nature’s pace, but the reward is always worth the wait."Troubleshooting & Common Issues in Backyard Mushroom GardensEven seasoned gardeners sometimes encounter obstacles when trying to grow mushrooms in a backyard setting. The most common issues include contamination from molds or bacteria, the appearance of pests like slugs, or surprisingly low yields from mushroom beds and logs. Early detection and simple management strategies can prevent minor headaches from becoming large setbacks.Avoiding molds, pests, and contamination: Keep your mushroom garden clean and don’t let debris pile up. Remove any visibly moldy or misshapen mushrooms, and use covers or barriers to exclude slugs and insects. Wash hands and tools before handling new spawn or substrate.Troubleshooting poor yields: If your mushrooms aren’t fruiting as expected, check for adequate moisture, substrate freshness, and sufficient shade. Refreshing the bed with a new layer of substrate or re-watering logs can revive production.Safety tips: Only harvest mushrooms you intentionally planted and can positively identify. When in doubt, consult a local mycological society or extension office to rule out lookalikes.Tips for Sustainable Outdoor Mushroom GardeningSustainability lies at the heart of the best mushroom gardens. By thoughtfully recycling substrates and practicing mindful harvesting, you’ll encourage thriving biodiversity in your backyard and ensure plentiful mushrooms for years to come.Recycle and reuse: After a mushroom bed or log has finished producing, mix it into compost or add it as mulch to vegetable beds—spent substrate is packed with nutrients and beneficial fungi.Biodiversity: Outdoor mushroom gardens attract worms, beetles, and pollinators, helping turn your mushroom beds into micro-ecosystems that enrich soils and support resilient garden beds nearby.Responsible harvesting: Always leave some mushrooms behind to complete their life cycle, spreading spores to renew future harvests naturally.Comparing Popular Backyard Mushroom TypesMushroom TypeBest Growing MethodTime to HarvestUnique BenefitsShiitakeHardwood logs6–18 monthsRich flavor, multiple-year harvest, grows well in shadeOysterGarden beds, containers2–6 weeksFast-growing, adapts to many substrates, great for beginnersWine capMushroom bed, wood chips2–4 monthsImproves soil, tolerates variable conditions, large yieldsCreative Mushroom Garden Ideas for Small SpacesThink you need a large yard to cultivate mushrooms outdoors? Think again! With a touch of creativity, you can establish thriving mushroom beds or container gardens even in limited spaces like patios, balconies, or side yards. Vertical planters, stacked logs, and layered raised beds allow you to maximize yield and keep maintenance easy.Use tiered shelves or wall-mounted pots to create a vertical mushroom garden—perfect for oyster mushrooms and shades-loving herbs.Opt for containers or grow bags placed in shaded corners or under taller plants to suit small patios or urban balconies.Integrate mushroom beds with your vegetable garden, letting the rich, decomposing organic matter in mushroom beds nourish neighboring crops—reinforcing mutually beneficial relationships all season.People Also Ask About How to Grow Mushrooms in Your BackyardIs it good for mushrooms to grow in your yard?Yes—mushrooms that grow naturally in your yard can indicate rich, healthy soil and a thriving ecosystem. However, for edible harvests, always plant known, safe mushroom species and avoid consuming wild mushrooms unless you are 100% certain of their identity.Is mushroom safe for hypertension?Most culinary mushrooms, such as shiitake and oyster mushrooms, are naturally low in sodium and rich in nutrients, making them a potentially healthy food choice for individuals managing hypertension. As always, consult your healthcare provider for specific advice about your diet.Can you legally grow your own mushrooms?Growing edible mushrooms for personal use is legal in most regions. However, some areas regulate or restrict certain psychedelic or wild mushroom species, so always check your local laws before purchasing spawn or starting mushroom cultivation projects.What mushrooms can you grow in your backyard?Many varieties are suitable, including shiitake mushrooms, oyster mushrooms (and golden oyster types), wine cap, lion’s mane, and more. Choose mushrooms that match your climate, setup, and culinary preferences for best results.Frequently Asked Questions About Growing Mushrooms in Your BackyardHow much space do I need in my backyard for a mushroom garden?Even a corner of 3x3 feet can host a productive mushroom bed or several logs—expand as your confidence grows.Can I mix mushroom varieties in the same mushroom garden bed?Yes, provided the mushrooms have similar substrate and moisture needs—oysters and wine cap, for example, often thrive together.What’s the best time of year to start a backyard mushroom garden?Most gardeners start in early spring or fall when nights are cool and natural rainfall is plentiful. However, oyster mushrooms in containers can start almost any time with careful moisture control.How do I store and cook homegrown mushrooms?Store fresh mushrooms in a paper bag in the refrigerator; cook by sautéing, roasting, or adding to soups and stir-fries for maximum flavor and nutrition.Key Takeaways for Aspiring Backyard Mushroom GrowersBeginner-friendly species make it simple to grow mushrooms in your backyardLogs, garden beds, and mushroom beds each offer unique benefits for every garden typeOngoing care ensures continual harvests of gourmet mushrooms outdoorsExperiment with different mushroom grow setups for year-round rewardsReady to Grow Mushrooms in Your Backyard?Unlock the world of gourmet mushrooms right outside your door—start your own mushroom garden today and enjoy fresh harvests, improved soil, and the sheer wonder of nature’s quiet magic.If you’re inspired to transform your backyard into a productive oasis, there’s even more you can do to make the most of your outdoor space. Discover how thoughtful landscaping strategies can visually expand your yard and create a harmonious environment for both mushrooms and other garden features.Explore these expert tips on making a small backyard feel twice as large, and unlock new possibilities for beauty, function, and abundance in your home landscape by visiting the complete guide to maximizing small backyards.Explore more ideas to upgrade your space: theBackyardPal.comSourcesIf you were to grow mushrooms in your garden, would it ... - RedditGrowing Mushrooms at Home - UF/IFAS Gardening SolutionsHow to Grow Mushrooms In Your YardStarting a Mushroom Garden - 5 ways to get growingDon't Stop Here, There's More ...Your Backyard Is Begging to Feed You: Gorgeous Edible Landscaping Ideas That Look Like Art and Taste Even Better

06.07.2026

Fastest Flowers to Grow from Seed Outdoors: Quick Bloom Guide

Want to see your garden burst with color quickly by growing annual flowers from flower seeds? Discover which flower seeds grow fastest outdoors and how planting these annual flowers can transform your garden space quickly.Ready to enjoy blooms sooner than you imagined? This guide is packed with expert tips and practical steps for creating a garden that’s lively, colorful, and blooming within weeks. Whether you’re a seasoned gardener or new to sowing flower seeds, you’ll find essential strategies to fuel your flower beds with easy-to-grow annuals—all from seed!See Your Garden Bloom Fast: Why Choose the Fastest Flowers to Grow from Seed Outdoors?If you crave an immediate impact in your landscape, choosing the fastest annual flowers to grow from seeds outdoors is the ultimate gardening hack. Bright, vibrant annual flowers can transform empty garden beds or patchy lawns into a lush canvas of color with surprisingly little effort and time. These quick-bloomers can be sown directly in spring, bringing your garden to life in as little as four to eight weeks.The ease of starting flower seeds outside makes them the perfect project for beginners and seasoned gardeners alike. Plus, sowing seeds is much more cost-effective than buying mature plants and allows you to experiment with unique annual flower varieties—perfect for gardeners who love watching seeds germinate and grow.Immediate impact: Enjoy colorful annual flower displays in weeks.Easy for beginners: Growing annual flowers from just seeds offers simple satisfaction.Cost-effective: Buy flower seeds, sow in March or spring, and watch quick results."Planting the fastest flowers to grow from seed outdoors means you get a summer garden full of vibrant color with minimal wait." What You'll Learn in This Fastest Flowers to Grow from Seed Outdoors GuideThis Quick Bloom Guide is designed to help you turn bare ground into a lively garden space in record time. Whether you’re transforming a new flower bed or just want to add cheerful bursts of color to your yard with the easiest, most reliable annuals, you’ll get:Top-ranked fastest-growing flower seeds with bloom timeframesEssential planting tips for outdoor sowingCare instructions for continual floweringAnswers to common questions about growing annual flowers from seedOverview Table: Fastest Flowers to Grow from Seed OutdoorsFlower NameDays to BloomBest Outdoor Sowing TimeSun RequirementsSweet Pea50–60Early spring / Sow in MarchFull sun / Part shadeNasturtium40–50After frostFull sunCalendula45–60Early springFull sun / Part shadeSunflower60+After frostFull sunCosmos50–60After frostFull sunZinnia45–55After frostFull sunMarigold50After frostFull sun / Part shadeClarkia40–60Early spring / Sow in MarchFull sun / Part shadeBachelor’s Button50–60Early spring / Sow in MarchFull sunMorning Glory50–60After frostFull sun Top 10 Fastest Flowers to Grow from Seed Outdoors1. Sweet Pea (Lathyrus odoratus): Scented Blooms FastSweet pea is a beloved classic among flower seeds for fast results and vibrant annual blooms. Ideal for cool springs, sweet pea seeds are often top picks for gardeners sowing annual flowers in March. Once sprouted, these annuals develop their fragrant, colorful blossoms in just 50 to 60 days. Many gardeners appreciate how quickly sweet peas climb trellises and add vertical interest to flower beds or even along fences in a cottage garden.The seeds to sow are quite tolerant of early spring chill, making sweet peas one of the few blooms that thrive when the growing season is just getting started. For best results, soak sweet pea seeds overnight before planting them directly in the ground a few weeks before the last frost date. This ensures steady, strong germination—a must for any gardener eager for early color and beautiful scents in their outdoor space.Perfect for sow in March or cool springsBlooms in 50-60 daysTips for growing annual sweet peas outdoors"Sweet peas are a classic annual flower choice for gardeners seeking quick results and beautiful fragrance from flower seeds."2. Nasturtium: Flower Seed That Blossoms QuicklyWith their peppery, edible blooms and quick sprouting nature, Nasturtiums are highly prized among annuals for fast growth and vibrant color. These seeds are sown directly outdoors once all danger of frost has passed, germinating within a week and blooming as soon as 40 to 50 days after planting. Nasturtiums are easy to grow and provide playful mounds of orange, yellow, and scarlet blossoms that spill beautifully over the edges of beds or rock gardens.Not only are these flowers visually appealing, but their edible flower petals can be a delightful, spicy addition to salads or as a garnish—a unique way to enjoy your garden harvest. For quickest results, sow seed two to three times per growing season, allowing new rounds of colorful flowers to replace those that have faded. Their ability to attract beneficial insects also makes nasturtiums terrific companions for the vegetable garden.Flower seeds sown outdoors after frostEdible blooms in 40-50 daysGrowing tips for quick color 3. Calendula (Pot Marigold): Classic Annual FlowerCalendula, also known as Pot Marigold, is another easy-to-grow annual flower that brightens gardens with sunny yellow and orange blooms. Sow these resilient flower seeds directly in the garden in early spring, or even sow in March in temperate climates. Within 45 to 60 days, calendula rewards you with masses of cheerful, daisy-like blossoms that attract pollinators and beneficial insects to your outdoor beds.Perfect for the front of flower borders or even tucked among herbs and vegetables, calendula regularly self-sows and can continue flowering throughout the growing season with regular deadheading. These flowers are not just pretty—they’re also commonly used as edible petals, herbal teas, or homemade skincare remedies. The secret to continual calendar blooms is consistent deadheading and a sunny spot with well-draining soil.Sow flower seeds direct in early springBlooms in 45-60 daysTips for continuous flowering annuals4. Sunflower: Speedy Growth, Impressive BloomsFew annual flowers make as bold a statement as the Sunflower. While these giants might seem slow, certain varieties can bloom just 60 days after sowing—the perfect pick for those craving fast and dramatic garden impact. Sunflower seeds should be sown directly in the ground after all danger of frost has passed to ensure optimal germination. These seeds sprout quickly and send up sturdy, leafy shoots that become towering stalks within weeks.Sunflowers thrive in full sun, and their bright, cheerful blooms are a magnet for birds, bees, and children alike. Plant a variety of heights and colors to create a sunflower mosaic, or use them as cheerful cut flowers throughout early and mid-summer. Their sturdy nature makes sunflowers easy to grow even in poor or rocky soil, turning almost any garden space into a field of sunshine.Tall, bold annual flower from seedBlooms start in just 60 days 5. Cosmos: Feather-Light Flower Seeds for Outdoor SowingCosmos are beloved for their feathery foliage and daisy-like flowers that seem to float atop long, slender stems. These are easy to grow from seed: just sprinkle them in prepared soil after frost, and they germinate quickly—often blooming within 50 to 60 days. Cosmos prefer full sun and are especially well suited for wildflower beds, cottage gardens, or even as colorful hedges between the vegetable garden and the rest of your outdoor space.These annuals are low-maintenance and tolerant of poor soil, thriving in lean conditions where many other plants would struggle. For continuous blossoms throughout the growing season, keep deadheading spent flowers and sow a new batch of cosmos seeds every few weeks. Their delicate, pastel shades complement almost any garden color palette.Germinate and bloom rapidly from seedIdeal for easy growing annual wildflower beds6. Zinnia: Reliable Annual Flower Seed for Fast ColorZinnias are famous for their reliability and dazzling color range, making them a staple of quick-blooming annual flower beds. Zinnia seeds love to be sown directly into the garden after frost, preferably in rich, well-draining soil where they get full sun all day. With proper care, you’ll see blossoms erupting in six to eight weeks—sometimes sooner with early-sown blooms.Zinnias thrive in summer heat and are incredibly low-maintenance, requiring only moderate watering and occasional deadheading. Their bold petals draw pollinators, and cut zinnia flowers last well in vases, adding joy both outdoors and indoors. To extend their color show, sow seeds in succession every couple of weeks, ensuring new blooms through late summer and into fall.Grows quickly in full sunFlowers in six to eight weeks outdoors 7. Marigold: Sow in Spring and Bloom SwiftlyMarigolds are legendary for their cheerful blooms and garden-protecting powers. These annual flowers are incredibly easy to grow, sprouting in just a few days and producing bright orange, yellow, or red blossoms within 50 days of sowing. Marigolds flourish in either full sun or partial shade, making them incredibly adaptable to various garden spots—from flower beds to borders and even containers.Their natural scent and vibrant flowers deter many garden pests while attracting helpful pollinators. To keep marigolds blooming throughout the growing season, regularly remove spent flowers and water during dry spells. Their consistent, speedy growth has made marigold seeds a favorite for anyone creating a fast, colorful display from early summer through to frost.Flowers grow in sun or part shadeBright blooms in 50 days8. Clarkia: Annual Flower for Early DisplaysClarkia stands out as one of the earliest-blooming annual flowers for cool climates. Best sown directly outdoors in March or as soon as soil can be worked, clarkia germinates quickly—even in somewhat chilly conditions—and will produce sprays of pink, purple, or white blossoms 40 to 60 days after sowing. Clarkia’s upright stems and delicate blooms make wonderful additions to cut flower arrangements and add a flutter of color to the spring garden.It thrives in full sun to part shade and prefers moist, well-drained soil. Clarkia’s ability to establish quickly even in less-than-ideal conditions makes it a go-to for anyone looking to fill gaps in the flower bed or create a naturalistic wildflower look in early spring.Sow directly in cool conditionsBlooms in 40-60 days9. Bachelor’s Button (Cornflower): Easy Growing AnnualBachelor’s button, or Cornflower, delivers that iconic wildflower charm and is exceptionally easy to grow from seed. Sow these seeds in March or as soon as the soil is workable for one of the fastest starts among annuals. Within 50 to 60 days, clusters of blue, pink, or white blooms will color your garden beds and invite beneficial insects and pollinators.Bachelor’s button adapts to a variety of soil conditions and thrives in full sun, making it a natural fit for wildflower meadows, cottage gardens, or even as a ground cover in larger, informal beds. For continuous color, sow new batches of seed a few weeks apart through early spring and deadhead spent flowers as the season progresses.Sow in March for speedy bloomsAdapts to various soils 10. Morning Glory: Flower Seed for Quick Spring ColorMorning Glory is unmatched as a speedy annual climber with its heart-shaped leaves and trumpet blooms that open each morning. Sow flower seed outdoors directly after the last frost, and within 50 to 60 days, you’ll see vines scrambling up trellises, fences, or arbors, displaying a vivid parade of purples, blues, pinks, and whites.Morning Glory is an essential for anyone wanting a quick, vertical display with long-lasting impact. For faster germination, nick or soak seeds overnight before sowing in moist, well-drained soil. Morning Glories thrive in full sun and will self-seed for years, offering a reliable pop of color in the cottage or vegetable garden each growing season.Rapid climbing growth from seedBlooms mid-to-late spring outdoors How to Sow Fastest Flowers to Grow from Seed OutdoorsPreparing Your Outdoor Bed for Fast GrowthSetting your garden up for success starts with preparing outdoor beds diligently. Choose a sunny spot—at least six to eight hours of daylight is ideal for most growing annuals. Loosen the top 8–10 inches of soil with a fork, removing weeds and mixing in a layer of compost to enrich the ground. This step ensures flower roots develop quickly and have plenty of nutrients to support early blooms.Early spring—especially if you sow in March—is the perfect time to prep your beds for flower seed. Test your soil if possible: annual flowers favor well-draining earth that doesn’t stay soggy. Rake the surface level and let the soil warm slightly before sowing. With these preparations, seeds take root swiftly and produce lush, healthy plants that bring maximum color in minimum time.Soil selection and amendments for growing annualsWhen and how to sow in March or after frost Direct Sowing: Secrets for Success with Flower SeedsWhen direct sowing flower seeds, spacing and depth matter just as much as timing to ensure healthy growth of annual flowers. Most annual flower seeds should be sown at a depth twice their size—check your seed packets for specific instructions. Water the soil lightly after sowing and keep evenly moist until seeds germinate. Position seeds where they’ll receive ample sunlight, as this encourages both strong germination and healthy growth for species like zinnia, cosmos, and marigold.Provide support, such as trellises or sticks, early for climbing flowers like sweet peas and morning glories. Once seedlings have established their second set of leaves, thin them according to the package’s recommended spacing to prevent crowding and poor air flow. Regular attention in the initial weeks is the best way to see swift growth and maximize your garden’s color display from season’s start to finish.Spacing, watering, and sunlight tipsSupporting seedlings until bloomCaring for the Fastest Flowers to Grow from Seed OutdoorsMaintaining Health and Prolonging BloomsAfter sowing, keeping your annual flower beds healthy ensures they reach full potential and bloom for as long as possible. Feed annual beds with balanced fertilizer every 3–4 weeks to provide nutrients that fuel extended flowering. Regularly deadhead (remove spent blooms) to prevent the plant from setting seed too soon—this encourages more buds and keeps flowers coming all growing season. Monitor for pests like aphids and snails that target tender flower shoots.Use organic methods, like hand-picking or neem oil sprays, to protect beneficial insects and keep flowers safe. Efficient watering is key: water early in the day and avoid wetting foliage, which minimizes disease and fungal issues. Mulch beds lightly to conserve moisture, suppress weeds, and maintain steady soil temperatures, particularly during hot, dry spells.Fertilizing annual flower bedsDeadheading and pest prevention for growing annuals Frequently Asked Questions about Fastest Flowers to Grow from Seed OutdoorsQ: What flowers bloom the quickest from seed?A: Some of the quickest flowers include nasturtiums, marigolds, and sweet peas, all of which can bloom in as little as 6 weeks outdoors.Q: What flower grows in 2 months?A: Popular flowers that commonly grow and bloom within two months from seed include zinnias, calendulas, and sunflowers under optimal conditions.Q: Which seed will grow in 3 days?A: While most flowers won't sprout fully in just three days, some fast-germinating annual flower seeds, like marigolds and zinnias, often sprout within 5-7 days.Q: What flowers are easy to grow from seed outside?A: Easy-to-grow outdoor flower seeds include cosmos, bachelor's button, marigolds, calendulas, and sweet peas—all requiring minimal care.People Also Ask About Fastest Flowers to Grow from Seed OutdoorsWhat flowers bloom the quickest from seed?Some of the quickest flowers to grow from seed outdoors include nasturtium, marigold, and sweet pea. Sown directly after the last frost, many of these annuals begin to flower in just six weeks, offering a vibrant boost to flower beds with minimal wait. These varieties are perfect if you want to see fast results and are generally easy to grow, adapting well to various garden conditions.What flower grows in 2 months?Several popular flowers bloom within two months from seed, such as zinnias, calendulas, and sunflowers if planted after frost in warm soil. These annuals thrive in full sun, grow rapidly, and reward you with a profusion of blooms—making them excellent choices for anyone looking to maximize the growing season with minimal effort.Which seed will grow in 3 days?Most flower seeds won’t fully sprout in just three days, but some—such as marigold and zinnia—may germinate within 5–7 days when provided with warm, moist, and well-prepared garden soil. For the fastest visible seedling emergence, choose varieties known for rapid germination and ensure ideal growing conditions from the start.What flowers are easy to grow from seed outside?The easiest outdoor flower seeds include cosmos, bachelor’s button (cornflower), marigolds, calendulas, and sweet peas. All of these require very little care after sowing, making them perfect for beginners and for those looking to fill spaces in their garden quickly with reliable annual blooms.Summary List: Fastest Flowers to Grow from Seed OutdoorsSweet PeaNasturtiumCalendulaSunflowerCosmosZinniaMarigoldClarkiaBachelor’s ButtonMorning Glory Key Takeaways on the Fastest Flowers to Grow from Seed OutdoorsFuel your garden’s color faster with easy, quick-blooming flower seedsAnnual flowers such as sweet peas, nasturtiums, and zinnias offer reliable speed and impactSow in March or after the last frost for best resultsExpert Quote: Success Growing Annuals Quickly Outdoors"With just a few packets of flower seeds, including sweet peas and other fast-growing annual flowers, you can refresh your outdoor space in weeks, not months."Your Next Step: More Information You Can Use and TrustReady to turn your yard into a field of fast blooms? Find step-by-step guides and flower seed tips at TheBackYardPal.com for more practical gardening advice.SourcesGardener’s Supply Company – https://www.gardeners.com/how-to/fastest-growing-annual-flowers/7889.htmlRoyal Horticultural Society – https://www.rhs.org.ukBetter Homes & Gardens – https://www.bhg.com/gardening/flowers/annuals/best-annuals-to-grow-from-seed/Gardenista – https://www.gardenista.com/posts/10-easy-flowers-grow-seed/To enhance your understanding of rapidly blooming flowers from seed, consider exploring the following resources:“Fast Growing Flowers From Seed: 10 Easy Options” (savvygardening.com)“10 Quick Blooming Flowers to Grow from Seed” (growveg.com)These articles provide detailed insights into selecting and cultivating fast-growing flowers, offering practical tips to achieve a vibrant garden in a short time. theBackyardPal.com Don't Stop Now, You're On a Roll ...Your Backyard Is Begging to Feed You: Gorgeous Edible Landscaping Ideas That Look Like Art and Taste Even Better Lawns Are Out, Forests Are In: How to Design a DIY Backyard Pocket Forest for Privacy and Food

05.28.2026

Poisonous Plants for Dogs in Backyard: A New Homeowner’s Survival Guide

Discover poisonous plants for dogs in backyard spaces. Learn dangerous plants to remove, symptoms to watch for, and how to create a safer yard for pets.

Terms of Service

Privacy Policy

Core Modal Title

Sorry, no results found

You Might Find These Articles Interesting

T
Please Check Your Email
We Will Be Following Up Shortly
*
*
*