
The BackYard Pal

TheBackyardPal.com

  • Home
  • Categories
    • Design
    • Relaxation
    • Social Activities & Games
    • Small Yards
    • Outdoor Living
    • Backyard Structures
    • Exercise & Health
  • All Posts
  • Design
  • Relaxation
  • Social Activities & Games
  • Small Yards
  • Landscaping & Gardening
  • Outdoor Living
  • Backyard Structures
  • Exercise & Health
7 Minutes Read

Rain or Shine: Why Bioclimatic Pergola DIY Kits Are the Ultimate 4-Season Backyard Upgrade

Smiling homeowner relaxing under a sleek BIO pergola, enjoying sun and light rain.

You’re sitting on the patio enjoying a quiet evening when the sky suddenly decides to ruin the mood.

Five minutes ago it was perfect. Now the wind picks up, the sun disappears, and you’re carrying plates back inside before the rain arrives.

Backyards tend to have a strange rule: they’re amazing about 30% of the time and inconvenient the other 70%.

That’s exactly why bioclimatic pergolas have exploded in popularity over the last few years. They promise something traditional patios can’t deliver — a backyard space you can actually use in almost any weather.

This guide explains what bioclimatic pergola DIY kits are, what they really cost in 2026, and whether they’re worth the investment for homeowners who want their backyard to work year-round.

What a Bioclimatic Pergola Actually Is

A bioclimatic pergola is an outdoor structure with adjustable aluminum louvers in the roof that rotate to control sunlight, airflow, and rain protection. When open, the louvers allow light and ventilation. When closed, they create a nearly waterproof roof that channels rain into hidden gutters.

The name comes from the idea that the structure responds to climate conditions — controlling heat, shade, and airflow naturally instead of relying on full enclosure.

Think of it as a pergola that behaves more like a smart roof than a decorative frame.


Bioclimatic pergola weather-resistant luxury outdoor comfort

Real Cost Breakdown

Unlike traditional wood pergolas, bioclimatic pergolas are typically made from powder-coated aluminum with mechanical louvers.

The honest price range in 2026 is $6,000 to $25,000 depending on size and features.

(Source: Fixr Outdoor Living Report 2025; HomeAdvisor outdoor structure cost guide)

Typical Bioclimatic Pergola Kit Costs

Structure Type

Price Range

Typical Size

Small manual louver pergola

$6,000 – $10,000

10x10

Mid-range DIY kit

$10,000 – $18,000

12x12 – 12x16

Premium motorized pergola

$18,000 – $25,000

12x16 – 14x20

Custom installed system

$25,000 – $50,000+

Large patios

Motorized louver systems cost more because they include electric motors, rain sensors, and remote controls.

Hidden or Additional Costs

Many homeowners only budget for the kit itself.

But installation conditions matter.

Additional Cost

Typical Price

Concrete footings or slab

$1,500 – $6,000

Electrical wiring (motorized roof)

$400 – $1,200

LED lighting add-ons

$300 – $1,500

Privacy screens or louvers

$600 – $3,000

Installation labor (if not DIY)

$2,000 – $6,000

(Source: Angi Outdoor Structures Cost Guide)

Pergola in all weather conditions

A Realistic All-In Example

Let’s take a popular mid-range DIY pergola kit.

Pergola kit (12x16): $12,500
Concrete anchors and footings: $2,200
Electrical wiring for motorized louvers: $800
Integrated LED lighting: $600

Total finished project: about $16,100

That’s why most homeowners end up spending $14K–$20K for a fully functional system.

Why Homeowners Are Buying These Now

1. Outdoor living spaces are a top home upgrade

About 61% of homeowners are prioritizing outdoor improvements in renovation plans (Houzz Outdoor Trends Study 2024).

Covered patios rank among the most requested projects.

2. Shade structures increase usable yard time

Studies show homeowners use patios two to three times more often when shade structures are present (American Society of Landscape Architects survey).

The simple reason: direct sun makes patios uncomfortable quickly.

3. Backyard entertaining is increasing

Outdoor dining areas, fire pits, and covered patios have become common features in modern backyard design.

Bioclimatic pergolas provide weather flexibility without fully enclosing the space.

Landscape architect Michael Glassman explains:

“Adjustable pergola systems allow homeowners to extend outdoor living seasons dramatically without building a permanent roof.”
(Landscape Architecture Magazine interview)

Benefits of DIY Pergola Kits

Genuine Advantages

1. You Can Use the Patio in Almost Any Weather

Traditional pergolas provide shade but no rain protection.

A bioclimatic pergola lets you close the louvers during rain and reopen them afterward.

That flexibility makes patios usable far more often.

2. Built-In Temperature Control

Rotating louvers control airflow.

Open them slightly and you create natural ventilation that reduces heat buildup.

Closed louvers provide shade while still allowing light through small gaps.

3. Much Lower Maintenance Than Wood Pergolas

Most systems use powder-coated aluminum.

That means:

  • no staining

  • no rot

  • minimal maintenance

Compared with wood pergolas, aluminum structures often last 20+ years with basic cleaning.

4. They Instantly Upgrade Backyard Design

From a visual standpoint, bioclimatic pergolas look far more modern than traditional patio covers.

Architectural outdoor structures often increase perceived home value because they create a defined outdoor room.


Real Downsides

1. They’re Expensive Compared to Basic Pergolas

A standard wood pergola might cost $2,500–$6,000.

Bioclimatic systems cost significantly more because of the mechanical roof system.

2. Motorized Systems Need Power

If you choose an automated pergola, you’ll need an electrical connection.

Without power, the louvers can’t adjust.

Manual systems avoid this issue but lose some convenience.


3. DIY Installation Can Be Challenging

These kits often weigh 400–900 pounds depending on size.

That means multiple people are usually needed during assembly.

For some homeowners, hiring installation help is worth it.

Does a Bioclimatic Pergola Add Home Value?

Indirectly, yes.

Outdoor living features can increase property appeal, though they rarely return their full cost.

According to the National Association of Realtors Remodeling Impact Report, outdoor living upgrades recover roughly 50–80% of their cost depending on region.

Buyers often view covered patios as usable living space, even if it’s technically outdoors.

Relaxing family gathering at golden hour

Who Should (and Shouldn't) Buy One

Good Fit

A bioclimatic pergola makes sense if you:

  • host outdoor gatherings

  • want a shaded patio without building a full roof

  • live in a climate with strong sun or occasional rain

  • value modern backyard design

Probably Not Worth It

This upgrade may not be ideal if you:

  • rarely use your patio

  • want the cheapest shade solution

  • have limited outdoor space

In those cases, a simple umbrella or shade sail may be enough.

People Also Ask

What is a bioclimatic pergola?

A bioclimatic pergola is an outdoor structure with adjustable roof louvers that control sunlight, ventilation, and rain protection.

Are bioclimatic pergolas waterproof?

Bioclimatic pergolas are designed to enhance outdoor comfort by allowing for adjustable slats that control sun exposure, airflow, and rain protection. While they are not completely waterproof in the traditional sense, many modern bioclimatic pergolas are engineered with features that can effectively channel rainwater away. The slats can be tilted to an angle that directs water runoff to the sides, often using integrated drainage systems to prevent water from pooling.

How long do aluminum pergolas last?

Aluminum pergolas are known for their durability and low maintenance, making them a popular choice among homeowners. Typically, an aluminum pergola that is powder-coated aluminum can last anywhere from 20 to 30 years, depending on factors such as the quality of the material, the climate, and the level of maintenance. Unlike wood, aluminum is resistant to rot, corrosion, and pests, which greatly contributes to its longevity.

Are bioclimatic pergolas DIY friendly?

Bioclimatic pergolas can be DIY-friendly, but the complexity largely depends on the design and materials chosen. Many manufacturers offer DIY pergola kits that come with pre-cut components and detailed instructions, making it easier for individuals with basic carpentry skills to assemble. These kits often include features like adjustable slats that allow you to control sunlight and ventilation, contributing to energy efficiency and comfort in your outdoor space.

What is the difference between a pergola and a bioclimatic pergola?

A traditional pergola is essentially an outdoor structure with an open roof, made up of a series of vertical posts and cross-beams. It provides some shade and a nice aesthetic touch to your garden or patio, but it doesn’t offer much protection from the elements. A bioclimatic pergola is a structure that typically features adjustable louvered roofs, which allow you to control the amount of sunlight and ventilation that comes through.

What are the common mistakes when building a pergola?

Building a pergola can significantly enhance your outdoor space, but several common mistakes can undermine its functionality and aesthetics. One of the most frequent errors is improper planning and measurement. Failing to adequately measure the area where the pergola will sit can lead to structural issues or a design that doesn’t fit well with the surrounding architecture. It’s crucial to consider both the dimensions of the area and the scaling of the pergola relative to your home and yard.

Another common mistake is neglecting to choose the right materials for both durability and style. Some builders opt for materials based solely on cost, overlooking how they will fare against weather and wear over time. Properly treating wood, using resistant finishes, or selecting naturally weather-resistant materials can save you from costly repairs down the line. Additionally, underestimating the importance of securing a solid foundation is another pitfall; it’s essential for ensuring the longevity and stability of your pergola. Taking the time to carefully plan, select suitable materials, and ensure a strong base will lead to a successful pergola project.


Traditional vs. bioclimatic pergolas comparison

Final Take

Most patios suffer from the same problem: they’re great when the weather cooperates.

Bioclimatic pergolas solve that problem by giving you control over shade, airflow, and rain.

They’re not the cheapest backyard upgrade — but they dramatically increase how often you can actually use your outdoor space.

And once you experience sitting outside during a light rain while everyone else runs indoors, you realize something interesting:

A good backyard isn’t just about space.

It’s about making that space usable whenever you want it.

If you’re planning larger outdoor upgrades, this guide may also help:
How to Screen Out a Double Story Neighbor’s View of Your Yard Without Feeling Like You Live in a Fortress

Outdoor Living Backyard Structures

0 Comments

Write A Comment

*
*
Please complete the captcha to submit your comment.
Related Posts All Posts
07.29.2026

Best Foundations for Backyard Buildings: Gravel, Concrete, or Helical Piles?

Did you know the right foundation can extend your backyard shed's life by decades? Choosing between gravel, concrete, or helical piles impacts durability, cost, and ease of installation. Discover the best foundation for your backyard shed and build with confidence.Extend Your Shed’s Lifespan: Why the Best Foundation for Backyard Shed MattersDid you know the right shed base can extend your outdoor building’s life by decades? Choosing the best foundation for backyard shed impacts structural integrity, installation ease, and total cost.When it comes to your backyard shed, the foundation is more than just a starting point—it’s the base that supports every season, storm, and project you’ll throw at it. Selecting the best foundation for backyard shed isn’t simply about supporting the structure; it’s about protecting your investment for years to come.The right shed base prevents shifting, resists moisture, and shields your building from pests and frost damage, ensuring that expensive repairs or replacement are not needed over time.From small tool storage to spacious hobby sheds, a properly chosen foundation directly affects your shed’s lifespan, reducing the risk of sagging floors, warped doors, or rot. Whether you’re considering a gravel pad, a sturdy concrete slab, or advanced helical piles, understanding your options—and what they mean for your property and goals—is critical. Let’s explore what you need to know before you begin your shed foundation project.What You’ll Learn About the Best Foundation for Backyard Shed• Key factors that determine the best foundation for backyard shed• Pros and cons of gravel pad, concrete slab, and helical pile shed foundations• Insights on types of shed foundations for various soil and shed types• Step-by-step guides on installing popular shed foundation optionsThis comprehensive guide will equip you with everything you need to confidently choose and build the right foundation for your shed. By the end, you’ll understand which type of foundation suits your needs, the differences in cost, durability, and installation, and practical steps to make your shed project a success.Understanding Shed Base Options: Principles for the Best Foundation for Backyard ShedWhat is a Shed Base and Why Is It Critical for Shed Foundations?The shed base is the prepared surface or structure on which your shed rests. It’s the most crucial component of any shed foundation because it provides stability, prevents the structure from settling unevenly, and acts as a barrier against ground moisture. Whether you choose a gravel pad foundation, a concrete slab foundation, or the more advanced helical pile system, each type of foundation ensures your shed remains level and protected from water, frost, and pests.Installing the correct base is essential for both wooden, metal shed, and plastic shed construction; skipping this step often leads to doors and windows not closing properly, sagging floors, and even total shed failure. A reliable base also simplifies the rest of the building process, making it easier to build a shed that lasts for years.Core Factors Shaping the Type of Foundation: Soil, Shed Use, and Size• Types of shed• Load requirements• Drainage and frost line considerations• Local regulations on shed foundationBefore selecting the type of foundation for your shed, consider your property’s soil type, drainage patterns, frost line depth, and the size and use of your shed. Different types of shed foundations support varying loads—so a gravel pad may be ideal for small to medium wooden sheds, while a concrete slab foundation is the solid base of choice for larger, heavier structures or workshops storing vehicles or machinery. Always check local building code requirements, as regulations often dictate the minimum depth and material needed for a legal and safe installation.Ultimately, soil stability, water drainage, and whether you expect to relocate the shed later all play roles in deciding between gravel pads, concrete slabs, piers, or more modern solutions like helical piles. If your yard is uneven or susceptible to frost heave, helical piles or piers might offer the best long-term performance. Assess these core factors early on—you’ll save money, time, and future maintenance headaches.Choosing the right foundation depends heavily on the size and weight of what you're putting on top of it. Before you pour a single bag of concrete, make sure your overall project budget is realistic by checking out: The Real Cost of Building a Backyard Structure in 2026.Shed Foundation Types: Comparing Gravel, Concrete, and Helical PilesOverview Table: Best Foundation for Backyard Shed ComparisonFoundation TypeAverage CostInstallation DifficultyLongevityShed Types SupportedMaintenance NeedsGravel Pad$350–$900DIY-friendly15–25 yearsWooden, small–medium plastic/metal shedsLow: Rake, add gravelConcrete Slab$1,000–$3,200Professional/Advanced DIY30+ yearsAll, best for larger/heavy-duty shedsMonitor cracksHelical Piles$1,500–$3,500Professionally installed25–50 yearsAll, especially sloped/poor soilOccasional inspectionThe Gravel Pad Foundation for Sheds• What is a gravel pad foundation?• When to choose a gravel shed base• How to build a gravel pad – steps and tips• Pros & cons: longevity, drainage, costThe gravel pad foundation is a simple yet powerful solution for many backyard sheds. This foundation option involves creating a level, compacted bed of crushed stone—usually 4 to 6 inches deep—surrounded by a timber or plastic frame to keep gravel from spreading. The biggest advantage of a gravel shed base is its excellent drainage, which keeps your shed floor dry and safe from rot. It’s a favorite for wooden or small-to-mid-size plastic sheds and suits most DIYers looking to build a shed foundation themselves.You’ll want to choose a gravel pad if your site is flat, your shed isn’t excessively heavy, and you want a relatively low-cost, low-maintenance shed base. To build one, mark out and excavate your area, add landscape fabric for weed control, and fill with layers of compacted gravel. Always ensure the gravel and frame are level before installing your shed. The gravel foundation offers a solid base and is often approved by local building codes for sheds not intended for heavy equipment.“A gravel pad is simple, cost-effective, and often recommended for wooden sheds due to its natural drainage capability. ” – Professional BuilderConcrete Slab Foundation: A Durable Option for Shed Foundations• What is a concrete slab foundation?• Benefits of a concrete pad or slab foundation for sheds• Step-by-step: How to pour a concrete slab for your shed• Challenges and maintenance of concrete shed foundationsThe concrete slab foundation is widely regarded as the best foundation for backyard shed projects needing maximum strength and permanence. A concrete pad starts with excavation and formwork, followed by steel reinforcement and the pour of concrete that sets into a solid, perfectly level surface. It excels for larger sheds, metal sheds, or garages where you’ll park equipment, store heavy tools, or use as a workshop—situations where a solid base is essential.The main benefits are remarkable stability, permanent level support, and minimal maintenance—just monitor for cracks and reseal if necessary. However, installation is more complex and often requires professional help or advanced DIY skill, especially if digging to the frost line or working on sloped ground. The investment is higher, but so is the return: a well-poured concrete slab can last more than three decades with little upkeep, supporting your shed through all seasons.“Concrete provides a solid, smooth, and level surface, making it the best foundation for backyard sheds intended for heavy equipment or vehicles. ” – Construction ExpertHelical Piles: Modern and Efficient Shed Foundations• What are helical piles and how do they work as a type of foundation?• Installation process for helical piles in backyard shed projects• Pros & cons: speed, minimal site disturbance, cost, longevityHelical piles are a cutting-edge solution growing in popularity for challenging shed sites and modern outdoor structures. These steel shafts feature spiral blades and are “screwed” deep into the earth using a power tool, bypassing unstable or sloped ground and anchoring your shed to a stable soil layer—often below the frost line. Their main advantages are rapid installation (usually less than a day), minimal mess, and suitability for sloped or flood-prone yards where traditional bases struggle.A professionally installed helical pile foundation is ready for immediate shed construction and offers longevity up to 50 years with very little maintenance. The main drawbacks are higher upfront cost and the need for specialized installation machinery. For owners committed to permanent, zero-settlement support in tricky locations—or those wanting an environmentally friendly and non-invasive shed foundation—helical piles are a smart investment.“Helical piles deliver an eco-friendly and fast-installing solution for uneven terrain. ” – Structural EngineerOther Shed Foundation Alternatives: Concrete Blocks, Piers, and More• Concrete block foundations• Concrete piers and pier foundations• Pad foundations: when to use them?For temporary or small-to-medium sheds where budget, portability, or ease of installation matter most, concrete blocks or concrete piers offer excellent alternatives. Concrete block foundations are assembled by stacking heavy-duty blocks at each corner and along the shed’s perimeter, creating an elevated, movable base that’s perfect when you don’t want permanent disruption to your yard. These are particularly helpful for smaller sheds or utility units and work well on relatively flat, compacted soil.In contrast, concrete piers (sometimes called a pier foundation) involve pouring concrete into holes dug below the frost line, creating deep-set vertical supports for large or raised sheds, decks, or greenhouses. This approach is more labor intensive but offers superior frost protection and leveling on uneven terrain.Lastly, pad foundations combine a poured or precast pad—similar to a small slab—with anchors or brackets for easy installation of lightweight units. For all these options, careful site prep and adherence to local codes are essential for security and longevity.Choosing the Best Foundation for Backyard Shed: Factors to Consider• Soil type and level• Shed size and type of shed (wooden, metal shed, plastic)• DIY skill level and tools required• Local building codes• Future plans and relocation needsMaking an informed choice starts with your site evaluation. Determine if your soil is sandy, clay, or loam—drainage impacts everything from gravel pads to concrete slabs. Think about the size and use of your shed: heavier uses or larger sheds benefit from a solid base like a concrete pad, while lighter or temporary sheds work with concrete blocks.Consider your ability and appetite for DIY work, the availability of tools, and local climate factors like freeze-thaw cycles; the frost line can dictate if a shallow gravel pad or deeper helical piles or piers are necessary.Don’t overlook legal requirements. Even if you’re working on private property, many jurisdictions enforce setback distances, minimum depth for foundations, and anchoring rules to ensure safety. If you might move or upgrade the shed later, opt for a base that’s either reusable (like concrete blocks) or easily adapted. And always invest in proper drainage—nothing shortens a shed’s life faster than standing water or unchecked frost heave.Step-by-Step Guide: How to Build a Shed FoundationPlanning and Site Preparation for the Best Foundation for Backyard ShedBefore you lay any material, proper planning lays the groundwork for a successful shed base. Choose a level, well-drained location away from trees or utility lines. Using a tape measure, mark out your shed's footprint, then add at least a foot on all sides for foundation overhang or drainage.Next, remove grass or soil to create a flat, stable platform. For all types of shed foundations—from gravel pad to slab—compacting the soil and checking for levelness with a spirit level is key to preventing future shifting or uneven settling.If your ground slopes, consider partial excavation or selecting a helical pile or pier foundation, which handle grades much better than surface pads. Site prep also includes checking municipal codes: some areas require a building permit or inspection before concrete is poured or piers are dug. With careful marking and prep, your shed project starts on the right foot.How to Build a Gravel Shed Base1. Excavate the shed footprint area to about 4–6 inches deep.2. Lay down landscape fabric to block weeds.3. Install a timber or plastic edge to contain the gravel.4. Add and compact crushed stone/gravel in 2-inch layers, checking for level after each fill.5. Tamp the entire surface flat and make sure drainage slopes slightly away from the center—install your shed once level.Gravel pads are ideal for small and medium wooden sheds and deliver excellent drainage at a bargain cost. You’ll need minimal tools: shovel, rake, tamper, and a wheelbarrow. Maintenance down the line is simple—just add extra gravel and re-level if settlement occurs.How to Pour a Concrete Slab Foundation for a Shed1. Excavate the footprint to recommended depth (usually 6–12 inches or to local frost line).2. Build and secure wooden forms to shape the slab.3. Add and compact a base layer of crushed stone.4. Place rebar or mesh for reinforcement.5. Pour concrete evenly, screed to level, and smooth the surface.6. Allow to cure fully, then install anchor bolts or fasteners.This foundation option is best reserved for those comfortable with concrete work or hiring a pro. Concrete slabs are heavy-duty and handle the heaviest metal shed, workshops, or garages with ease.Installing Helical Piles for Shed Foundations1. Map out the shed corners and mark pile positions based on engineer or manufacturer instructions.2. Using mechanical screw machinery, install steel piles to the required depth, often past the local frost line.3. Attach a pile cap or bracket to each for shed framing attachment.4. Level all pile tops to ensure even support.5. Place beams or shed skids on the caps; build your shed as normal.Helical piles require professional equipment and expertise but deliver a foundation that’s ready the same day, with near-zero impact on existing landscaping. They’re excellent where soil or slope issues make other foundations impractical.Placing Concrete Blocks or Concrete Piers for Sheds1. Place concrete blocks at each shed corner and along the sides for load support on a compacted, level pad.2. For piers, dig holes below the frost line, insert a form tube, and pour concrete to create a short “pillar. ”3. Allow piers to cure, then install metal brackets or anchors for the shed frame.4. Adjust height for level and ensure stable contact between all supports.These foundation options are especially useful for temporary structures or owners who may want to move their shed in the future. They’re also quick to re-level or repair if settling occurs due to fluctuating ground moisture.Maintenance Tips for the Best Foundation for Backyard Shed• Gravel pad maintenance• Concrete slab crack monitoring• Helical pile inspection• Avoiding frost heave and water poolingMaintaining your shed foundation is critical for long-term performance. For gravel pads, rake the surface annually to ensure levelness and add fresh gravel if low spots appear. Inspect concrete slabs each season for cracks or surface erosion—small cracks can be filled to prevent moisture intrusion, while larger ones may require a professional assessment.Helical piles need only periodic inspection to check for movement, exposed metal, or loosening of bolts. Regardless of base type, proactively address signs of water pooling or frost heave, and keep any foliage or debris cleared from the shed perimeter to prevent pest problems and excess moisture.Taking these simple steps protects your shed—and its foundation investment—for years to come, reducing costly repairs and the risk of structural failure.Cost Analysis: The Best Foundation for Backyard Shed by BudgetFoundation TypeUpfront Cost (Material/Labor)Long-Term Costs (Maintenance/Repair)Best ForGravel Pad$350–$900 (mostly DIY labor)Low ($30–$90 per decade)Wooden, plastic sheds; flat sitesConcrete Slab$1,000–$3,200 (material + pro labor)Very low ($150–$300 for sealing/crack repair over 20+ years)Large, heavy-duty, or metal sheds; permanent useHelical Piles$1,500–$3,500 (professional only)Very low ($0–$70 for periodic inspection every 20 years)Sloped/unstable soil; premium/eco-friendly buildsConcrete Block/Pier$200–$700 (DIY/labor)Low, if re-leveled ($50–$200; rarely more)Temporary or portable sheds; flexible or uneven sitePeople Also Ask: Best Foundation for Backyard ShedWhat is the best foundation for a backyard shed?A detailed answer that summarizes shed base types, pros and cons, and expert recommendation based on shed size, use, and soil—using the main keyword.The best foundation for backyard shed depends on your site conditions, shed size, intended use, and budget. For most homeowners, a gravel pad foundation offers a balance of low cost, DIY readiness, and solid drainage—great for wooden or small plastic sheds. Concrete slab foundations are best for large or heavy-duty applications, offering maximum durability and stability, especially for metal sheds or workshops.Helical piles suit sloped yards or challenging soil conditions, providing fast, permanent support with minimal landscaping disturbance. If you need portability or have a small, temporary shed, concrete blocks or piers are practical alternatives. Consult local building codes and consider drainage, frost line, and soil type to make the right choice for your property.Can I put a shed directly on concrete?Directly placing a shed on concrete slab foundation is common, but proper moisture barriers and anchors are critical to prevent rot and secure the shed effectively.Yes, placing a shed directly on a concrete slab is common and effective, especially for metal sheds or workshops. However, it’s essential to install a moisture barrier between the shed floor and slab to avoid condensation and rot. Additionally, use proper anchors or bolts to secure the shed structure to the slab, preventing wind uplift and shifting—this is especially important in regions with high winds or freeze-thaw cycles.Do outdoor sheds need a foundation?Most outdoor sheds require a stable foundation—such as a gravel pad, concrete slab, or helical piles—to prevent shifting, settlement, and moisture issues.Nearly all outdoor sheds benefit from a stable foundation option to protect against uneven settlement, water intrusion, frost heave, and pest damage. Building your shed directly on the ground can lead to rapid deterioration of the floor, warped framing, and shortened lifespan. Proper types of shed foundations like gravel pads, slabs, or piers ensure your structure stays level, safe, and dry for years to come.How deep should foundations be for a shed?Foundation depth varies by type—concrete pads and helical piles often require digging down to or below the frost line, while gravel pad foundations should be at least 4–6 inches deep.The recommended foundation depth varies. Gravel pads should be a minimum of 4–6 inches deep. Concrete pads and piers must reach below the frost line (often 24–48 inches, varying by climate), to prevent shifting during freeze/thaw cycles. Helical piles are mechanically screwed past the frost line, ensuring stability in all weather. Always verify your local building code for foundation requirements before digging or pouring!Watch this expert explainer video for a side-by-side visual guide to foundation choices, animated installation steps, cost comparisons, and pro recommendations for your shed project.See the full process of planning, site prep, and building your shed base—perfect for first-time DIYers or anyone wanting a visual walkthrough!Best Foundation for Backyard Shed – Quick Picks by Use-CaseBest for wooden sheds: gravel pad foundationBest for heavy-duty use: concrete slab foundationBest for sloped yards: helical pilesMost DIY-friendly: gravel padBest for temporary or movable sheds: concrete blocksKeep in mind, the foundation is just step one. To make sure you aren't blindsided by the price of lumber, roofing, and permits later on, check out our complete breakdown of the real cost to build a backyard structure in 2026."FAQs About the Best Foundation for Backyard ShedCan I install a shed foundation myself? Yes, most gravel pads, concrete blocks, and some piers can be installed DIY with basic tools and careful planning. For concrete slabs and helical piles, professional help is recommended for best results.How long do different shed bases last? Gravel pads and block foundations can last 10–25 years with simple maintenance; concrete slabs regularly exceed 30 years; helical piles offer up to 50 years of stable support with minimal upkeep.Does a metal shed require a concrete slab? While not always required, concrete slabs are often preferred for metal sheds due to their weight and need for anchoring—always check the manufacturer’s recommendation and local code.What permits do I need for shed foundations? Most towns and cities require a permit for permanent shed installations, particularly when using a concrete slab, piers, or large structures. Always confirm requirements before breaking ground.Which type of foundation is best for wet areas? For wet or flood-prone yards, helical piles or elevated concrete pier foundations offer the best protection against ground moisture, as they elevate the structure above standing water and avoid saturation.Key Takeaways: Finding the Best Foundation for Your Backyard ShedDifferent types of foundations suit different sheds and budgetsGravel pad and concrete slab remain the leading choices for most homeownersHelical piles excel for challenging sitesProper preparation and installation are vital for shed longevityBuilding with Confidence: Trust the Best Foundation for Backyard Shed AdviceReady to build? Visit TheBackYardPal.com for detailed guides, trusted product recommendations, and the latest information you can use and trust on shed foundations.Build smarter—choose the right foundation for your shed and protect your investment for decades to come. Information You Can Use and Trust: TheBackYardPal. comSourcesFamily Handyman – https://www.familyhandyman.com/project/best-shed-foundation/Home Depot – https://www.homedepot.com/c/ah/building-a-shed-base/9ba683603be9fa5395fab90191d2206Houzz – https://www.houzz.com/magazine/the-best-type-of-foundation-for-your-shed-stsetivw-vs~15977257This Old House – https://www.thisoldhouse.com/sheds/21015094/how-to-choose-the-best-shed-foundationBetter Homes & Gardens – https://www.bhg.com/home-improvement/outdoor/sheds/choose-shed-foundation/Selecting the appropriate foundation is crucial for the longevity and stability of your backyard shed. Among the various options, gravel pads, concrete slabs, and helical piles are commonly considered.Gravel Pad FoundationA gravel pad foundation is a cost-effective and DIY-friendly option, particularly suitable for small to medium-sized sheds. It offers excellent drainage, preventing water accumulation that can lead to structural issues. To construct a gravel pad, excavate the shed’s footprint to a depth of 4–6 inches, lay down landscape fabric to deter weeds, and fill the area with compacted crushed stone. This method provides a stable base and is relatively easy to install. (shelterlogic. com)Concrete Slab FoundationFor larger or heavier structures, a concrete slab foundation offers maximum strength and durability. This type of foundation creates a solid, level surface capable of supporting substantial weight without shifting. The process involves excavating the area, building and securing wooden forms, adding a base layer of crushed stone, placing reinforcement materials like rebar, and pouring concrete. While more labor-intensive and costly, a well-poured concrete slab can last for decades with minimal maintenance. (durasheds. com)Helical PilesHelical piles are an advanced solution ideal for challenging sites, such as those with uneven terrain or poor soil conditions. These steel shafts with spiral blades are screwed deep into the ground, anchoring the shed to a stable soil layer below the frost line. The main advantages include rapid installation, minimal site disturbance, and suitability for sloped or flood-prone areas. However, this option requires professional installation and comes with a higher upfront cost. (durasheds. com)When choosing the best foundation for your backyard shed, consider factors such as soil type, shed size and weight, budget, and local building codes. Each foundation type has its pros and cons, so it’s essential to select the one that aligns with your specific needs and site conditions.For a visual guide on laying a foundation base for a backyard storage shed, you might find the following video helpful: How to lay a foundation base for a backyard storage shed.

07.27.2026

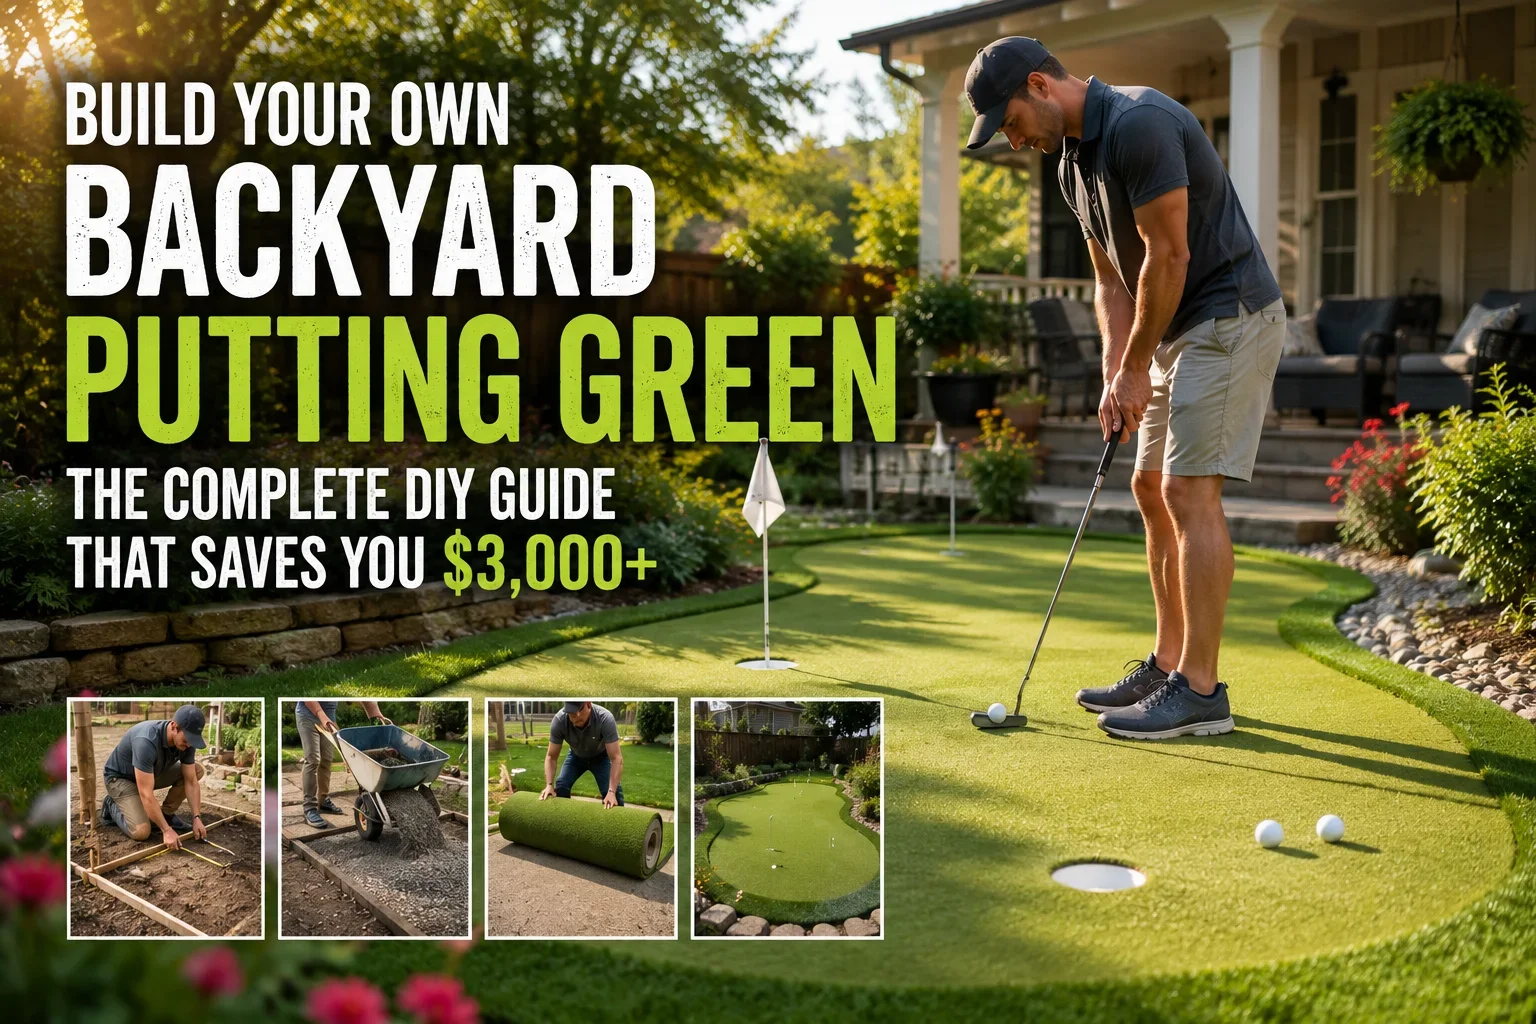
Build Your Own Backyard Putting Green: The Complete DIY Guide That Saves You $3,000+

Imagine the joy of stepping outside to your personal putting green, crafted with your own hands. It’s more than savings—it’s about creating a space that reflects your passion and improves your game. This guide empowers you to build confidently, saving over $3,000 while making memories.Unlocking the Joy of a DIY Backyard Putting GreenBuilding a DIY backyard putting green is all about combining your love for golf with the satisfaction of a hands-on project. With a little effort, you can transform your outdoor space into your very own practice haven—no need to book tee times or drive to the club for a quick roll.The idea isn’t just about improving your short game (though that happens), but about enjoying your backyard in an entirely new way, while saving seriously compared to professional installation.Let’s put this into perspective: professional putting green installation often runs past $4,000 for even small greens, but with the right know-how, you can create a beautiful, high-performance green for a fraction of that cost. Whether you’re dreaming of a simple 6-foot roll for quick putting drills or a complex, multi-hole layout designed for serious golfers, you’re in the right place.This fun, peer-led guide will walk you through the step-by-step process, highlight common pitfalls, and share real DIY stories (and a few laughs) along the way.What You’ll Learn About Building Your Own DIY Backyard Putting Green:Step-by-step process for a diy backyard putting greenComparison: green kit vs. diy backyard putting greenNatural grass vs. artificial turf for putting greensExpert insights, practical tips, and real DIY storiesWhy a DIY Backyard Putting Green? (And How You Save $3,000+)Let’s cut right to it: building your own backyard putting green means major savings—usually over $3,000—versus hiring out a full professional installation. That’s extra cash for new clubs, fun backyard upgrades, or maybe even a celebratory BBQ once your green’s complete. But the financial angle is only half the story.Going DIY turns the process into an adventure you’ll actually remember (and brag about). You get full control over design and choice of materials—think backyard greens that perfectly fit your yard, reflect your style, and match your golf goals.Instead of one-size-fits-all, you tweak every detail, from the slope of your putting surface to the green kit flag colors. And when the job’s done? You’re rewarded every time you roll a putt with friends, family, or even just the dog.“Installing my own backyard putting green was the best weekend project—I play more and saved a fortune over professional installation!” — Brad, Weekend GolferEssential Tools and Materials for Your DIY Backyard Putting GreenThe foundation for any quality putting surface is having the right tools and supplies. Depending on whether you go the full DIY route or opt for a putting green kit, here’s what’s usually in the mix:Putting green kits vs. buying separate materialsArtificial turf options for backyard putting greensDrainage gravel, cups, flags, and moreA basic shopping list for a DIY backyard project usually includes a shovel, rake, sturdy trowel, heavy-duty scissors or razor knife (for shaping turf), landscaping fabric, a tamper for packing the soil, leveling boards, and a garden hose for testing drainage. For turf-based greens, you’ll also need a quality putting green kit with artificial turf, infill sand, and hole cups (plus decorative flags if you’re feeling fancy).Don’t ignore drainage—nothing ruins a green faster than pooled rainwater. Consider drainage gravel and plan the base so water flows away from the surface. Even if you’re picking up a green kit for ease, it’s smart to have some basic tools handy, since most kits require minor landscaping.Advice: keep gloves and a spirit level close—you’ll thank yourself when you’re shaping those all-important slopes.If you’re concerned about soggy spots or water pooling in your yard, it’s worth exploring low-cost drainage solutions for wet backyards before you start your putting green project. Addressing drainage early can save you time and ensure your green stays playable year-round.Planning Your Backyard Putting Green: Design Tips and PitfallsChoosing the best location in your yardMeasuring space for your diy backyard putting greenDesign inspiration: single vs. multi-hole layoutsStart by picturing the finished look: a lush green patch just steps from your patio or nestled in a shady corner of your backyard. Choosing the right spot makes all the difference for your overall success, especially when working with existing landscaping, sunlight, and drainage. Look for relatively level ground near your house (for convenience), but don’t worry if the area isn’t perfectly flat—gentle slopes can add challenge and personality to your green.When planning size, measure your space with both your putting goals and the rest of your yard in mind. A standard putting green kit will fit smaller yards, while DIYers can go as large or as creative as space allows. Single-hole designs offer simplicity, but a few cups distributed across the green keep things interesting. Inspiration? Try adding a break or undulating surface, or mimic your favorite golf course’s signature hole.Choosing Artificial Turf or Natural Grass for a DIY Backyard Putting GreenThe biggest decision for most backyard putting green builders is whether to go with natural grass or artificial turf. Both options can look stunning and provide a quality putting surface, but there are real differences when it comes to installation, cost, long-term care, and playability.Natural grass gives unbeatable authenticity underfoot—think classic grass green golf feel and that fresh-mown smell. But it requires serious commitment: watering, mowing, fertilizing, and (ideally) a dedicated irrigation system. Artificial turf, by contrast, delivers a low-maintenance, always-green surface that performs consistently in all weather and looks tidy year-round.Artificial Turf vs. Natural Grass for DIY Backyard Putting GreensFeatureArtificial TurfNatural GrassInstallationFast, can use green kit; DIY-friendlyLabor intensive (seeding/sodding); needs irrigation systemMaintenanceMinimal—brush, sweep, rinse occasionallyMowing, fertilizing, watering, pest controlPlayabilityConsistent roll, less affected by weatherTraditional golf feel, can be slower after rainLifespan10–15+ years (quality synthetic greens)Variable; depends on care and climateCostUpfront cost for turf or green kitLower up front, higher over time (maintenance)Step-by-Step Guide: Building a DIY Backyard Putting GreenExcavation and ground prep for a backyard putting greenBase installation and drainage solutionsLaying turf or seeding natural grass putting greensCutting, shaping, and installing cups for putting green kitsHere’s where your DIY adventure really begins! The steps below work whether you’re starting from scratch or adapting a putting green kit. First, mark out your chosen area with stakes and string. Remove any existing grass or debris to create a clean slate. You’ll want to excavate a few inches down (4–6 inches is typical) so your base, drainage, and final green surface sit flush with the yard.Next comes the foundation for top-quality putting: lay down a compacted base of crushed stone or drainage gravel. This keeps the turf stable and allows water to flow freely—key for longevity and a true roll. Top the gravel with leveling sand and, if desired, landscape fabric to block weeds. If you’re using a green kit, follow kit instructions for placing pre-cut base panels or mats.Roll out artificial turf, making sure the pile runs uniformly. For natural grass green builds, lay sod or seed the area, keeping it moist until established. Cut holes for cups, then drop in putting green kit elements, adjusting for level. Finish by brushing turf fibers upright or, for living greens, rolling and mowing for that pro look.“Level base = better putts. Don’t skip on prep!” — Mark R., Landscape ProAdding Features: Upgrades, Edging & Custom TouchesLandscape edging and retaining wallsUnique obstacles, chipping areas, and creative layoutsBackdrop ideas to match your backyard putting green styleWith the basics done, it’s time to add style: border your green with wood, stone, or brick edging for a polished finish. This not only looks sharp but keeps turf or grass in place. Want more fun? Create chipping mats, sand traps, or even quirky obstacles for a true backyard challenge. Try accenting with flowerbeds, shrubs, or garden art that fits your landscape style—think curb appeal and personal flair.Consider including a bench, shade sail, or even solar pathway lights for after-dusk practice. Many green kits offer upgrade features or matching accessories if you want a themed look. Get the family involved—kids love designing tricky pin placements or re-arranging mini obstacles for a short game contest.Care, Maintenance, and Troubleshooting for Your DIY Backyard Putting GreenTips for keeping backyard putting greens looking sharpDrainage fixes, seam repairs, and long-term careDIY solutions for natural grass vs. artificial green kitsAfter all your hard work, you want your green to stay gorgeous. For artificial turf greens, occasionally sweep leaves or debris, brush turf fibers upright, and rinse down the surface as needed. Seam coming loose on your synthetic surface? Re-glue with outdoor adhesive and press firmly. If puddles appear, check the base—sometimes adding extra gravel in low spots fixes drainage issues fast.For a natural grass green, routine care means mowing weekly (short and neat is best), watering deeply, and fertilizing a few times a year. Watch for weeds, pests, or browning, and treat early; aeration once or twice a year will keep roots healthy. Greens with proper irrigation systems and regular brushing/mowing will reward you with pro-level putting year after year.DIY Backyard Putting Green Kits: Worth It or Go Full Custom?Comparing putting green kit optionsPros, cons, and expert adviceWhen to opt for professional installationSo, is a putting green kit the right call? Green kits are hugely popular with first-time builders, offering pre-cut turf, cups, flags, and often base panels—taking a lot of the guesswork out of DIY. They’re efficient for small or awkward spaces and especially handy if you’d rather skip landscaping from scratch.But full custom DIY means ultimate creative control: you choose the turf, shape every contour, and decide on every last detail. This can deliver a unique backyard putting green that’s both impressive and personalized.The potential downside? DIY builds take more time, research, and effort than kit installs—and may need more tools.Wondering when to call in the pros? If your yard has complex slopes, tricky drainage, or you want commercial-course perfection, professional installation may be worth it. Otherwise, green kits or a well-planned DIY build will suit most hobbyists.“Do your homework before buying a kit. The best putting green kits use dense, real-feel turf and come with strong cups. Ask for sample pieces and compare before you commit!” — Lisa G., Retired Golf SuperintendentDIY Backyard Putting Green QuestionsHow to build a cheap putting green in your backyard?Affordable materials and thrifty DIY tips for backyard putting greensTo keep things budget friendly, reuse what you already have: repurpose landscape timbers for edging, fill the base with leftover gravel from other projects, and grab a simple roll of affordable synthetic turf from a home improvement store. Skip fancy extras and focus on a solid, level base for a smooth, reliable putting surface.Many DIYers have built 6-foot greens for under a few hundred dollars by hunting for sales on turf and upcycling found materials, proving you don’t need a pro budget for a functional backyard green.How much does it cost to make a putting green in a backyard?Typical DIY backyard putting green budget breakdownYour final spend comes down to turf choice, green size, and whether you go with a kit or build from scratch. DIY projects typically range from $500 to $2,500 plus a few weekends of elbow grease. A basic green kit with artificial turf, cups, and minimal extras is often the most affordable option, while a custom synthetic green with multi-hole layout and pro borders will hit the higher end of DIY budgets. Don’t forget to factor in essential tools, especially if you need to buy rather than borrow.Can I put a putting green in my backyard?Zoning, suitability and backyard requirements for a diy backyard putting greenAlmost every yard has potential for a backyard putting green. Flat, well-draining spaces work best, but rolling or irregular lawns can be shaped to add challenge. Check with your neighborhood HOA or city for any restrictions on outdoor landscaping or water use (especially for natural grass). Even the smallest yard can fit a fun practice patch with creative design—some green kits are engineered especially for tight spaces!How do I get my yard to look like a putting green?Tips for transforming your lawn into a green-worthy surfaceAchieving the manicured look of a professional green means leveling, aerating the soil, then seeding or sodding with fine-blade, grass green blends such as bentgrass or fescue. Mow regularly with the highest-quality sharp blade you have, water deeply (with an irrigation system if possible), and fertilize to keep things healthy. Dethatch or aerate your yard every spring for lush growth, then cut cup holes and drop in putting cups for that true private-golf-club vibe.FAQs: Mastering the DIY Backyard Putting Green ExperienceWhat is the best artificial turf for backyard putting greens?The best turf for most DIYers is a dense, low-pile synthetic turf designed specifically for putting. Look for UV-stabilized, tightly woven products (like those in higher-end green kits) for smooth roll and weather resilience.How long does a diy backyard putting green last?Quality synthetic greens often last 10–15 years or more with routine maintenance. Natural grass greens require more ongoing care and may need partial resodding depending on weather and usage.Do putting green kits come with everything I need?Most top-rated putting green kits come with pre-cut turf, base panels, cups, and flags—sometimes even infill sand and brushes. You’ll usually still need basic landscaping tools for site prep.Expert Tips & Key Takeaways for Your DIY Backyard Putting Green ProjectLevel up with these top diy backyard putting green strategiesAlways spend extra time getting your base level—it’s the secret to a true-rolling, pro feel green. Check your turf or grass direction before final install, and don’t forget drainage (standing water can ruin even the best synthetic greens). Learn from others: read user reviews of green kits, ask for sample turf if ordering online, and test cup locations before final cutting. And remember—DIY is as much about fun, trial, and error as about getting it “perfect. ”Ready for More Backyard Inspiration?Dive deeper into backyard living here: theBackyardPal.comIf you’re inspired to take your backyard transformation even further, consider exploring how a lush pocket forest can add privacy, beauty, and even fresh food to your outdoor space. Discover the benefits and step-by-step approach to creating your own DIY backyard pocket forest—a sustainable upgrade that pairs perfectly with your new putting green.Whether you’re seeking tranquility, a natural screen from neighbors, or a mini-ecosystem for your family, this next-level project can turn your yard into a true sanctuary. Dive in and see how combining recreation with nature can elevate your backyard lifestyle.Conclusion:If you’ve made it this far, you’re more than ready to build a putting green that actually earns its keep — saving thousands while giving you unlimited practice. With a clear plan, a few essential tools, and a DIY mindset, you can create a green that fits your space and your game. No more waiting for tee times or paying for range buckets when the perfect lie is right outside your door.You’ll sharpen your short game, add value to your home, and enjoy a backyard that’s built for memories. Don’t overthink it — take the first step, and let your DIY green become your personal golf haven all year long. Grab your materials and get started today.Other Sources:Players Series Putting Green Kits - https://www.xgrass.com/players-series-putting-green-kits.htmlDIY Backyard Putting Green - https://newbuildnewlyweds.com/diy-backyard-putting-green/Do It Yourself Backyard Putting Greens - https://proputtsystems.com/do-it-yourself-putting-greens/How To Make Your Backyard Putting Green Dream a Reality - https://www.usga.org/content/usga/home-page/course-care/green-section-record/62/issue-17/how-to-make-your-backyard-putting-green-dream-a-reality.html

06.27.2026

3 Small Backyard Destinations That Make Any Tiny Yard Feel Luxurious

Transform your outdoor space with these 3 small backyard destinations that make any tiny yard feel luxurious, inviting, and surprisingly spacious without a major renovation. #BackyardLiving

© 2026 CompanyName All Rights Reserved. Address . Contact Us . Terms of Service . Privacy Policy

Terms of Service

Privacy Policy

Core Modal Title

Sorry, no results found

You Might Find These Articles Interesting

T
Please Check Your Email
We Will Be Following Up Shortly
*
*
*