The BackYard Pal

TheBackyardPal.com

  • Home
  • Categories
    • Design
    • Relaxation
    • Social Activities & Games
    • Small Yards
    • Outdoor Living
    • Backyard Structures
    • Exercise & Health
  • All Posts
  • Design
  • Relaxation
  • Social Activities & Games
  • Small Yards
  • Landscaping & Gardening
  • Outdoor Living
  • Backyard Structures
  • Exercise & Health
6 Minutes Read

The Real Cost of Building a Backyard Structure in 2026 

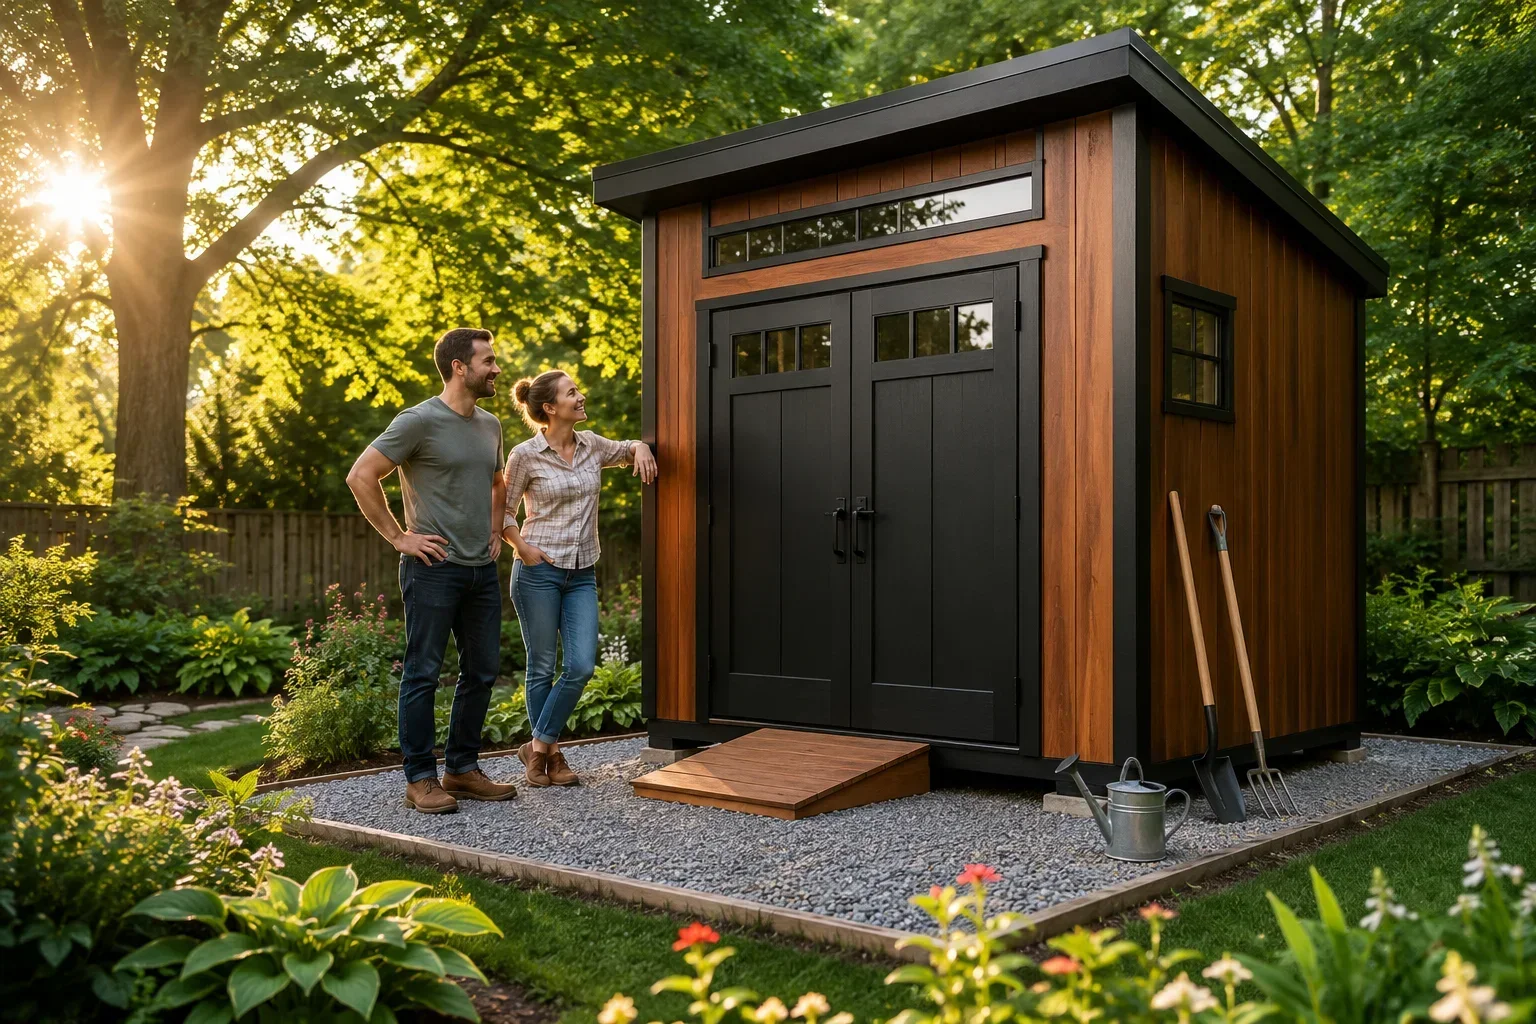
A happy couple in casual attire examining blueprints in sunlight, showcasing emotional connection.

The Real Cost to Build a Backyard Room 2026 (Sheds, Studios, Offices & Cabins Compared)

You’re standing in the backyard looking at that empty corner behind the fence.

It could be a quiet home office, a small guest cabin for visiting family, or maybe a backyard studio where nobody interrupts you every five minutes.

Then you look up the cost online.

One article says you can do it for $6,000.
Another says $80,000.

Both sound confident. Neither explains why.

That’s the frustrating part about backyard structures in 2026: they look simple, but the real cost depends on choices most homeowners don’t think about until halfway through the project.

This guide breaks down the actual cost to build a backyard room in 2026, including sheds, studios, backyard offices, and small cabins—so you can decide which option fits your budget, timeline, and sanity.

What a Backyard Structure Actually Is

A backyard structure is a stand-alone building separate from your house, typically used as an office, studio, guest space, or hobby room. These range from simple prefab garden offices delivered in panels to fully custom mini-cabins with plumbing and HVAC.

Some are basically upgraded sheds with insulation and electricity. Others are essentially tiny houses without wheels.

The price difference between those two worlds is where most surprises happen.

Real Cost Breakdown

Let’s start with the honest numbers.

In 2026, the typical cost to build a backyard room ranges from $18,000 to $95,000, depending on size, utilities, and whether it's prefab or custom-built.

(Source: HomeAdvisor, Fixr residential cost reports 2025–2026)

Backyard Structure Cost Comparison (2026)

Structure Type

Typical Price Range

Typical Size

Basic shed conversion

$8,000 – $18,000

80–120 sq ft

Prefab backyard office

$18,000 – $40,000

100–200 sq ft

Modern backyard studio

$30,000 – $70,000

150–300 sq ft

Small backyard cabin

$45,000 – $95,000

250–500 sq ft

Custom guest house / ADU-style

$80,000 – $180,000+

400–800 sq ft

Prefab backyard offices are currently the fastest-growing segment of this market (Grand View Research, 2024).

But the structure itself is only part of the story.

Stylish backyard structure ideal for office or hobby use, featuring modern design.

Hidden Costs Many Buyers Miss

Additional Cost

Typical Price

Site leveling / gravel pad

$1,500 – $4,000

Concrete slab foundation

$4,000 – $9,000

Electrical hookup

$1,200 – $3,500

Plumbing (if needed)

$4,000 – $12,000

Permits & inspections

$300 – $2,000

Insulation & drywall

$1,500 – $5,000

HVAC mini-split system

$1,800 – $4,000

(Source: Angi 2025 Home Improvement Report)

A Realistic All-In Example

Let’s say you install a mid-range prefab backyard office.

Structure kit: $27,000
Concrete slab: $6,000
Electrical trenching + install: $2,200
Mini-split HVAC: $2,600
Permits and inspections: $800

Actual finished cost: about $38,600

That’s why many people start with a $20K estimate and end up closer to $35K–$45K once everything is finished.

Well-appointed backyard shed studio office with proper entrance

Why People Are Buying These Now

Backyard structures have exploded in popularity over the last few years, and it’s not just because they look cool on Instagram.

1. Remote work isn’t going away

About 27% of U.S. employees work remotely at least part-time (Pew Research Center, 2024).

Many homeowners want a workspace physically separate from the house.

2. Home additions are far more expensive

Traditional home additions average $150–$300 per square foot (HomeAdvisor 2025).

Backyard studios often cost half that per square foot.

3. Families need flexible space

Parents are using them for:

  • guest rooms

  • rental spaces

  • hobby studios

  • quiet offices

Basically, extra square footage without remodeling your house.

Genuine Advantages

1. You Gain Space Without Renovating Your Home

Interior remodels can disrupt your life for months.

A backyard structure is built outside your daily chaos, which means construction doesn’t take over your kitchen.

For many homeowners, that alone makes it appealing.

2. It Can Be a Dedicated Work Zone

Working from the dining table gets old quickly.

A backyard office gives you a clear mental boundary between work and home, which many remote workers say improves focus.

A Stanford study found remote workers are 13% more productive when they have a dedicated workspace (Stanford WFH Study).

3. It’s More Affordable Than Moving

Moving to a larger home can cost tens of thousands in transaction costs alone.

A backyard structure lets you expand your usable space without buying a new house.

4. Some Structures Can Generate Income

In certain cities, backyard cabins or ADU-style units can be rented.

Even occasional Airbnb use can offset costs — though local zoning rules matter a lot.

Trendy backyard structures enhancing outdoor spaces for Instagram-worthy homes.

Real Downsides

1. Permits Can Be Complicated

Permit requirements for backyard structures vary widely by city.

Some towns allow sheds under 120 sq ft without permits, but larger structures usually require approvals.

Before building anything, check your local zoning office.

2. Utilities Drive Costs Up Fast

Adding plumbing or a bathroom dramatically increases the price.

A simple studio might cost $35K.

Add plumbing, and it may jump to $60K+.

3. Cheap Kits Aren’t Always Cheap Long-Term

Some DIY guest house kits look affordable online.

But many require:

  • extra insulation

  • electrical upgrades

  • foundation work

Those extras can double the initial cost.

4. Yard Space Matters

A large structure can eat up valuable yard space.

If you have a small lot, a bulky cabin may make the backyard feel cramped.

Does It Add Home Value?

Typically yes.

But not always in the way people expect.

According to the National Association of Realtors, accessory dwelling units and backyard offices can increase resale appeal but typically return 50–70% of their construction cost depending on location (NAR Remodeling Impact Report).

Factors that influence ROI include:

  • quality of the build

  • utility connections

  • local demand for home offices

  • neighborhood price ceilings

A well-built backyard studio often helps sell a house faster, even if it doesn’t return every dollar spent.


Backyard Studio Investment Overview

Who Should (and Shouldn't) Build One

Good Fit

You might benefit from a backyard structure if you:

  • work remotely several days a week

  • want a guest space without remodeling

  • need a quiet hobby or studio space

  • plan to stay in your home 5+ years

Probably Not Worth It

This project may not make sense if you:

  • plan to sell your home soon

  • have limited yard space

  • expect rental income but live in a strict zoning area

  • need full plumbing and kitchen utilities on a tight budget

People Also Ask

How much does it cost to build a backyard office in 2026?

Most prefab backyard offices cost $18,000 to $40,000, while custom-built versions typically range from $35,000 to $70,000 depending on size and electrical installation (HomeAdvisor).

Do backyard structures require permits?

Usually yes if they exceed local size limits or include utilities. Many municipalities allow small sheds under 100–120 sq ft without permits, but insulated offices and cabins typically require approval.

Is prefab or custom better for a backyard office?

Prefab structures are faster and usually cheaper. Custom builds allow more flexibility but often cost 20–40% more.

What is the cheapest backyard office option?

Converted sheds or DIY garden office kits can cost $8,000–$15,000, but they often require additional insulation, electrical work, and weatherproofing.


Final Take

Backyard structures are one of the most practical ways to add usable space without tearing apart your house.

But the internet often focuses on the best-case price, not the real one.

In 2026, most finished backyard rooms land somewhere between $30,000 and $60,000 once everything is installed properly.

If you want a quiet office, guest space, or creative studio and plan to stay in your home for a while, it can absolutely be worth it.

Just budget for the whole project, not just the kit.

That’s the part many homeowners only learn halfway through.

theBackyardPal.com

Backyard Structures

0 Comments

Write A Comment

*
*
Please complete the captcha to submit your comment.
Related Posts All Posts
07.29.2026

Best Foundations for Backyard Buildings: Gravel, Concrete, or Helical Piles?

Did you know the right foundation can extend your backyard shed's life by decades? Choosing between gravel, concrete, or helical piles impacts durability, cost, and ease of installation. Discover the best foundation for your backyard shed and build with confidence.Extend Your Shed’s Lifespan: Why the Best Foundation for Backyard Shed MattersDid you know the right shed base can extend your outdoor building’s life by decades? Choosing the best foundation for backyard shed impacts structural integrity, installation ease, and total cost.When it comes to your backyard shed, the foundation is more than just a starting point—it’s the base that supports every season, storm, and project you’ll throw at it. Selecting the best foundation for backyard shed isn’t simply about supporting the structure; it’s about protecting your investment for years to come.The right shed base prevents shifting, resists moisture, and shields your building from pests and frost damage, ensuring that expensive repairs or replacement are not needed over time.From small tool storage to spacious hobby sheds, a properly chosen foundation directly affects your shed’s lifespan, reducing the risk of sagging floors, warped doors, or rot. Whether you’re considering a gravel pad, a sturdy concrete slab, or advanced helical piles, understanding your options—and what they mean for your property and goals—is critical. Let’s explore what you need to know before you begin your shed foundation project.What You’ll Learn About the Best Foundation for Backyard Shed• Key factors that determine the best foundation for backyard shed• Pros and cons of gravel pad, concrete slab, and helical pile shed foundations• Insights on types of shed foundations for various soil and shed types• Step-by-step guides on installing popular shed foundation optionsThis comprehensive guide will equip you with everything you need to confidently choose and build the right foundation for your shed. By the end, you’ll understand which type of foundation suits your needs, the differences in cost, durability, and installation, and practical steps to make your shed project a success.Understanding Shed Base Options: Principles for the Best Foundation for Backyard ShedWhat is a Shed Base and Why Is It Critical for Shed Foundations?The shed base is the prepared surface or structure on which your shed rests. It’s the most crucial component of any shed foundation because it provides stability, prevents the structure from settling unevenly, and acts as a barrier against ground moisture. Whether you choose a gravel pad foundation, a concrete slab foundation, or the more advanced helical pile system, each type of foundation ensures your shed remains level and protected from water, frost, and pests.Installing the correct base is essential for both wooden, metal shed, and plastic shed construction; skipping this step often leads to doors and windows not closing properly, sagging floors, and even total shed failure. A reliable base also simplifies the rest of the building process, making it easier to build a shed that lasts for years.Core Factors Shaping the Type of Foundation: Soil, Shed Use, and Size• Types of shed• Load requirements• Drainage and frost line considerations• Local regulations on shed foundationBefore selecting the type of foundation for your shed, consider your property’s soil type, drainage patterns, frost line depth, and the size and use of your shed. Different types of shed foundations support varying loads—so a gravel pad may be ideal for small to medium wooden sheds, while a concrete slab foundation is the solid base of choice for larger, heavier structures or workshops storing vehicles or machinery. Always check local building code requirements, as regulations often dictate the minimum depth and material needed for a legal and safe installation.Ultimately, soil stability, water drainage, and whether you expect to relocate the shed later all play roles in deciding between gravel pads, concrete slabs, piers, or more modern solutions like helical piles. If your yard is uneven or susceptible to frost heave, helical piles or piers might offer the best long-term performance. Assess these core factors early on—you’ll save money, time, and future maintenance headaches.Choosing the right foundation depends heavily on the size and weight of what you're putting on top of it. Before you pour a single bag of concrete, make sure your overall project budget is realistic by checking out: The Real Cost of Building a Backyard Structure in 2026.Shed Foundation Types: Comparing Gravel, Concrete, and Helical PilesOverview Table: Best Foundation for Backyard Shed ComparisonFoundation TypeAverage CostInstallation DifficultyLongevityShed Types SupportedMaintenance NeedsGravel Pad$350–$900DIY-friendly15–25 yearsWooden, small–medium plastic/metal shedsLow: Rake, add gravelConcrete Slab$1,000–$3,200Professional/Advanced DIY30+ yearsAll, best for larger/heavy-duty shedsMonitor cracksHelical Piles$1,500–$3,500Professionally installed25–50 yearsAll, especially sloped/poor soilOccasional inspectionThe Gravel Pad Foundation for Sheds• What is a gravel pad foundation?• When to choose a gravel shed base• How to build a gravel pad – steps and tips• Pros & cons: longevity, drainage, costThe gravel pad foundation is a simple yet powerful solution for many backyard sheds. This foundation option involves creating a level, compacted bed of crushed stone—usually 4 to 6 inches deep—surrounded by a timber or plastic frame to keep gravel from spreading. The biggest advantage of a gravel shed base is its excellent drainage, which keeps your shed floor dry and safe from rot. It’s a favorite for wooden or small-to-mid-size plastic sheds and suits most DIYers looking to build a shed foundation themselves.You’ll want to choose a gravel pad if your site is flat, your shed isn’t excessively heavy, and you want a relatively low-cost, low-maintenance shed base. To build one, mark out and excavate your area, add landscape fabric for weed control, and fill with layers of compacted gravel. Always ensure the gravel and frame are level before installing your shed. The gravel foundation offers a solid base and is often approved by local building codes for sheds not intended for heavy equipment.“A gravel pad is simple, cost-effective, and often recommended for wooden sheds due to its natural drainage capability. ” – Professional BuilderConcrete Slab Foundation: A Durable Option for Shed Foundations• What is a concrete slab foundation?• Benefits of a concrete pad or slab foundation for sheds• Step-by-step: How to pour a concrete slab for your shed• Challenges and maintenance of concrete shed foundationsThe concrete slab foundation is widely regarded as the best foundation for backyard shed projects needing maximum strength and permanence. A concrete pad starts with excavation and formwork, followed by steel reinforcement and the pour of concrete that sets into a solid, perfectly level surface. It excels for larger sheds, metal sheds, or garages where you’ll park equipment, store heavy tools, or use as a workshop—situations where a solid base is essential.The main benefits are remarkable stability, permanent level support, and minimal maintenance—just monitor for cracks and reseal if necessary. However, installation is more complex and often requires professional help or advanced DIY skill, especially if digging to the frost line or working on sloped ground. The investment is higher, but so is the return: a well-poured concrete slab can last more than three decades with little upkeep, supporting your shed through all seasons.“Concrete provides a solid, smooth, and level surface, making it the best foundation for backyard sheds intended for heavy equipment or vehicles. ” – Construction ExpertHelical Piles: Modern and Efficient Shed Foundations• What are helical piles and how do they work as a type of foundation?• Installation process for helical piles in backyard shed projects• Pros & cons: speed, minimal site disturbance, cost, longevityHelical piles are a cutting-edge solution growing in popularity for challenging shed sites and modern outdoor structures. These steel shafts feature spiral blades and are “screwed” deep into the earth using a power tool, bypassing unstable or sloped ground and anchoring your shed to a stable soil layer—often below the frost line. Their main advantages are rapid installation (usually less than a day), minimal mess, and suitability for sloped or flood-prone yards where traditional bases struggle.A professionally installed helical pile foundation is ready for immediate shed construction and offers longevity up to 50 years with very little maintenance. The main drawbacks are higher upfront cost and the need for specialized installation machinery. For owners committed to permanent, zero-settlement support in tricky locations—or those wanting an environmentally friendly and non-invasive shed foundation—helical piles are a smart investment.“Helical piles deliver an eco-friendly and fast-installing solution for uneven terrain. ” – Structural EngineerOther Shed Foundation Alternatives: Concrete Blocks, Piers, and More• Concrete block foundations• Concrete piers and pier foundations• Pad foundations: when to use them?For temporary or small-to-medium sheds where budget, portability, or ease of installation matter most, concrete blocks or concrete piers offer excellent alternatives. Concrete block foundations are assembled by stacking heavy-duty blocks at each corner and along the shed’s perimeter, creating an elevated, movable base that’s perfect when you don’t want permanent disruption to your yard. These are particularly helpful for smaller sheds or utility units and work well on relatively flat, compacted soil.In contrast, concrete piers (sometimes called a pier foundation) involve pouring concrete into holes dug below the frost line, creating deep-set vertical supports for large or raised sheds, decks, or greenhouses. This approach is more labor intensive but offers superior frost protection and leveling on uneven terrain.Lastly, pad foundations combine a poured or precast pad—similar to a small slab—with anchors or brackets for easy installation of lightweight units. For all these options, careful site prep and adherence to local codes are essential for security and longevity.Choosing the Best Foundation for Backyard Shed: Factors to Consider• Soil type and level• Shed size and type of shed (wooden, metal shed, plastic)• DIY skill level and tools required• Local building codes• Future plans and relocation needsMaking an informed choice starts with your site evaluation. Determine if your soil is sandy, clay, or loam—drainage impacts everything from gravel pads to concrete slabs. Think about the size and use of your shed: heavier uses or larger sheds benefit from a solid base like a concrete pad, while lighter or temporary sheds work with concrete blocks.Consider your ability and appetite for DIY work, the availability of tools, and local climate factors like freeze-thaw cycles; the frost line can dictate if a shallow gravel pad or deeper helical piles or piers are necessary.Don’t overlook legal requirements. Even if you’re working on private property, many jurisdictions enforce setback distances, minimum depth for foundations, and anchoring rules to ensure safety. If you might move or upgrade the shed later, opt for a base that’s either reusable (like concrete blocks) or easily adapted. And always invest in proper drainage—nothing shortens a shed’s life faster than standing water or unchecked frost heave.Step-by-Step Guide: How to Build a Shed FoundationPlanning and Site Preparation for the Best Foundation for Backyard ShedBefore you lay any material, proper planning lays the groundwork for a successful shed base. Choose a level, well-drained location away from trees or utility lines. Using a tape measure, mark out your shed's footprint, then add at least a foot on all sides for foundation overhang or drainage.Next, remove grass or soil to create a flat, stable platform. For all types of shed foundations—from gravel pad to slab—compacting the soil and checking for levelness with a spirit level is key to preventing future shifting or uneven settling.If your ground slopes, consider partial excavation or selecting a helical pile or pier foundation, which handle grades much better than surface pads. Site prep also includes checking municipal codes: some areas require a building permit or inspection before concrete is poured or piers are dug. With careful marking and prep, your shed project starts on the right foot.How to Build a Gravel Shed Base1. Excavate the shed footprint area to about 4–6 inches deep.2. Lay down landscape fabric to block weeds.3. Install a timber or plastic edge to contain the gravel.4. Add and compact crushed stone/gravel in 2-inch layers, checking for level after each fill.5. Tamp the entire surface flat and make sure drainage slopes slightly away from the center—install your shed once level.Gravel pads are ideal for small and medium wooden sheds and deliver excellent drainage at a bargain cost. You’ll need minimal tools: shovel, rake, tamper, and a wheelbarrow. Maintenance down the line is simple—just add extra gravel and re-level if settlement occurs.How to Pour a Concrete Slab Foundation for a Shed1. Excavate the footprint to recommended depth (usually 6–12 inches or to local frost line).2. Build and secure wooden forms to shape the slab.3. Add and compact a base layer of crushed stone.4. Place rebar or mesh for reinforcement.5. Pour concrete evenly, screed to level, and smooth the surface.6. Allow to cure fully, then install anchor bolts or fasteners.This foundation option is best reserved for those comfortable with concrete work or hiring a pro. Concrete slabs are heavy-duty and handle the heaviest metal shed, workshops, or garages with ease.Installing Helical Piles for Shed Foundations1. Map out the shed corners and mark pile positions based on engineer or manufacturer instructions.2. Using mechanical screw machinery, install steel piles to the required depth, often past the local frost line.3. Attach a pile cap or bracket to each for shed framing attachment.4. Level all pile tops to ensure even support.5. Place beams or shed skids on the caps; build your shed as normal.Helical piles require professional equipment and expertise but deliver a foundation that’s ready the same day, with near-zero impact on existing landscaping. They’re excellent where soil or slope issues make other foundations impractical.Placing Concrete Blocks or Concrete Piers for Sheds1. Place concrete blocks at each shed corner and along the sides for load support on a compacted, level pad.2. For piers, dig holes below the frost line, insert a form tube, and pour concrete to create a short “pillar. ”3. Allow piers to cure, then install metal brackets or anchors for the shed frame.4. Adjust height for level and ensure stable contact between all supports.These foundation options are especially useful for temporary structures or owners who may want to move their shed in the future. They’re also quick to re-level or repair if settling occurs due to fluctuating ground moisture.Maintenance Tips for the Best Foundation for Backyard Shed• Gravel pad maintenance• Concrete slab crack monitoring• Helical pile inspection• Avoiding frost heave and water poolingMaintaining your shed foundation is critical for long-term performance. For gravel pads, rake the surface annually to ensure levelness and add fresh gravel if low spots appear. Inspect concrete slabs each season for cracks or surface erosion—small cracks can be filled to prevent moisture intrusion, while larger ones may require a professional assessment.Helical piles need only periodic inspection to check for movement, exposed metal, or loosening of bolts. Regardless of base type, proactively address signs of water pooling or frost heave, and keep any foliage or debris cleared from the shed perimeter to prevent pest problems and excess moisture.Taking these simple steps protects your shed—and its foundation investment—for years to come, reducing costly repairs and the risk of structural failure.Cost Analysis: The Best Foundation for Backyard Shed by BudgetFoundation TypeUpfront Cost (Material/Labor)Long-Term Costs (Maintenance/Repair)Best ForGravel Pad$350–$900 (mostly DIY labor)Low ($30–$90 per decade)Wooden, plastic sheds; flat sitesConcrete Slab$1,000–$3,200 (material + pro labor)Very low ($150–$300 for sealing/crack repair over 20+ years)Large, heavy-duty, or metal sheds; permanent useHelical Piles$1,500–$3,500 (professional only)Very low ($0–$70 for periodic inspection every 20 years)Sloped/unstable soil; premium/eco-friendly buildsConcrete Block/Pier$200–$700 (DIY/labor)Low, if re-leveled ($50–$200; rarely more)Temporary or portable sheds; flexible or uneven sitePeople Also Ask: Best Foundation for Backyard ShedWhat is the best foundation for a backyard shed?A detailed answer that summarizes shed base types, pros and cons, and expert recommendation based on shed size, use, and soil—using the main keyword.The best foundation for backyard shed depends on your site conditions, shed size, intended use, and budget. For most homeowners, a gravel pad foundation offers a balance of low cost, DIY readiness, and solid drainage—great for wooden or small plastic sheds. Concrete slab foundations are best for large or heavy-duty applications, offering maximum durability and stability, especially for metal sheds or workshops.Helical piles suit sloped yards or challenging soil conditions, providing fast, permanent support with minimal landscaping disturbance. If you need portability or have a small, temporary shed, concrete blocks or piers are practical alternatives. Consult local building codes and consider drainage, frost line, and soil type to make the right choice for your property.Can I put a shed directly on concrete?Directly placing a shed on concrete slab foundation is common, but proper moisture barriers and anchors are critical to prevent rot and secure the shed effectively.Yes, placing a shed directly on a concrete slab is common and effective, especially for metal sheds or workshops. However, it’s essential to install a moisture barrier between the shed floor and slab to avoid condensation and rot. Additionally, use proper anchors or bolts to secure the shed structure to the slab, preventing wind uplift and shifting—this is especially important in regions with high winds or freeze-thaw cycles.Do outdoor sheds need a foundation?Most outdoor sheds require a stable foundation—such as a gravel pad, concrete slab, or helical piles—to prevent shifting, settlement, and moisture issues.Nearly all outdoor sheds benefit from a stable foundation option to protect against uneven settlement, water intrusion, frost heave, and pest damage. Building your shed directly on the ground can lead to rapid deterioration of the floor, warped framing, and shortened lifespan. Proper types of shed foundations like gravel pads, slabs, or piers ensure your structure stays level, safe, and dry for years to come.How deep should foundations be for a shed?Foundation depth varies by type—concrete pads and helical piles often require digging down to or below the frost line, while gravel pad foundations should be at least 4–6 inches deep.The recommended foundation depth varies. Gravel pads should be a minimum of 4–6 inches deep. Concrete pads and piers must reach below the frost line (often 24–48 inches, varying by climate), to prevent shifting during freeze/thaw cycles. Helical piles are mechanically screwed past the frost line, ensuring stability in all weather. Always verify your local building code for foundation requirements before digging or pouring!Watch this expert explainer video for a side-by-side visual guide to foundation choices, animated installation steps, cost comparisons, and pro recommendations for your shed project.See the full process of planning, site prep, and building your shed base—perfect for first-time DIYers or anyone wanting a visual walkthrough!Best Foundation for Backyard Shed – Quick Picks by Use-CaseBest for wooden sheds: gravel pad foundationBest for heavy-duty use: concrete slab foundationBest for sloped yards: helical pilesMost DIY-friendly: gravel padBest for temporary or movable sheds: concrete blocksKeep in mind, the foundation is just step one. To make sure you aren't blindsided by the price of lumber, roofing, and permits later on, check out our complete breakdown of the real cost to build a backyard structure in 2026."FAQs About the Best Foundation for Backyard ShedCan I install a shed foundation myself? Yes, most gravel pads, concrete blocks, and some piers can be installed DIY with basic tools and careful planning. For concrete slabs and helical piles, professional help is recommended for best results.How long do different shed bases last? Gravel pads and block foundations can last 10–25 years with simple maintenance; concrete slabs regularly exceed 30 years; helical piles offer up to 50 years of stable support with minimal upkeep.Does a metal shed require a concrete slab? While not always required, concrete slabs are often preferred for metal sheds due to their weight and need for anchoring—always check the manufacturer’s recommendation and local code.What permits do I need for shed foundations? Most towns and cities require a permit for permanent shed installations, particularly when using a concrete slab, piers, or large structures. Always confirm requirements before breaking ground.Which type of foundation is best for wet areas? For wet or flood-prone yards, helical piles or elevated concrete pier foundations offer the best protection against ground moisture, as they elevate the structure above standing water and avoid saturation.Key Takeaways: Finding the Best Foundation for Your Backyard ShedDifferent types of foundations suit different sheds and budgetsGravel pad and concrete slab remain the leading choices for most homeownersHelical piles excel for challenging sitesProper preparation and installation are vital for shed longevityBuilding with Confidence: Trust the Best Foundation for Backyard Shed AdviceReady to build? Visit TheBackYardPal.com for detailed guides, trusted product recommendations, and the latest information you can use and trust on shed foundations.Build smarter—choose the right foundation for your shed and protect your investment for decades to come. Information You Can Use and Trust: TheBackYardPal. comSourcesFamily Handyman – https://www.familyhandyman.com/project/best-shed-foundation/Home Depot – https://www.homedepot.com/c/ah/building-a-shed-base/9ba683603be9fa5395fab90191d2206Houzz – https://www.houzz.com/magazine/the-best-type-of-foundation-for-your-shed-stsetivw-vs~15977257This Old House – https://www.thisoldhouse.com/sheds/21015094/how-to-choose-the-best-shed-foundationBetter Homes & Gardens – https://www.bhg.com/home-improvement/outdoor/sheds/choose-shed-foundation/Selecting the appropriate foundation is crucial for the longevity and stability of your backyard shed. Among the various options, gravel pads, concrete slabs, and helical piles are commonly considered.Gravel Pad FoundationA gravel pad foundation is a cost-effective and DIY-friendly option, particularly suitable for small to medium-sized sheds. It offers excellent drainage, preventing water accumulation that can lead to structural issues. To construct a gravel pad, excavate the shed’s footprint to a depth of 4–6 inches, lay down landscape fabric to deter weeds, and fill the area with compacted crushed stone. This method provides a stable base and is relatively easy to install. (shelterlogic. com)Concrete Slab FoundationFor larger or heavier structures, a concrete slab foundation offers maximum strength and durability. This type of foundation creates a solid, level surface capable of supporting substantial weight without shifting. The process involves excavating the area, building and securing wooden forms, adding a base layer of crushed stone, placing reinforcement materials like rebar, and pouring concrete. While more labor-intensive and costly, a well-poured concrete slab can last for decades with minimal maintenance. (durasheds. com)Helical PilesHelical piles are an advanced solution ideal for challenging sites, such as those with uneven terrain or poor soil conditions. These steel shafts with spiral blades are screwed deep into the ground, anchoring the shed to a stable soil layer below the frost line. The main advantages include rapid installation, minimal site disturbance, and suitability for sloped or flood-prone areas. However, this option requires professional installation and comes with a higher upfront cost. (durasheds. com)When choosing the best foundation for your backyard shed, consider factors such as soil type, shed size and weight, budget, and local building codes. Each foundation type has its pros and cons, so it’s essential to select the one that aligns with your specific needs and site conditions.For a visual guide on laying a foundation base for a backyard storage shed, you might find the following video helpful: How to lay a foundation base for a backyard storage shed.

07.27.2026

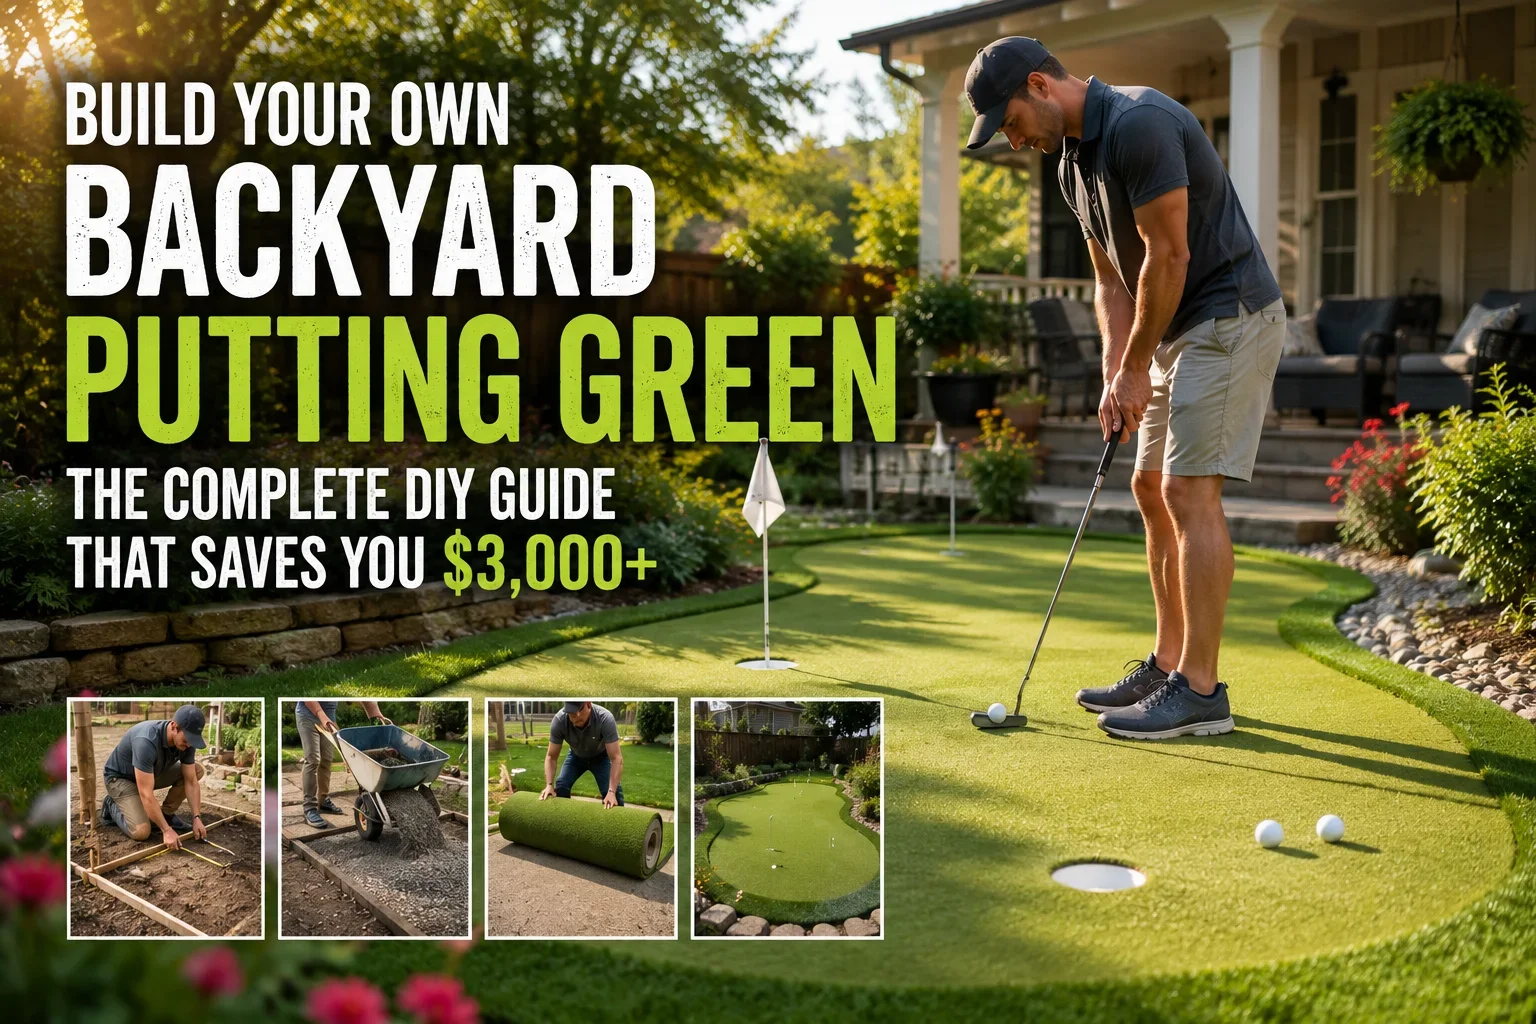
Build Your Own Backyard Putting Green: The Complete DIY Guide That Saves You $3,000+

Imagine the joy of stepping outside to your personal putting green, crafted with your own hands. It’s more than savings—it’s about creating a space that reflects your passion and improves your game. This guide empowers you to build confidently, saving over $3,000 while making memories.Unlocking the Joy of a DIY Backyard Putting GreenBuilding a DIY backyard putting green is all about combining your love for golf with the satisfaction of a hands-on project. With a little effort, you can transform your outdoor space into your very own practice haven—no need to book tee times or drive to the club for a quick roll.The idea isn’t just about improving your short game (though that happens), but about enjoying your backyard in an entirely new way, while saving seriously compared to professional installation.Let’s put this into perspective: professional putting green installation often runs past $4,000 for even small greens, but with the right know-how, you can create a beautiful, high-performance green for a fraction of that cost. Whether you’re dreaming of a simple 6-foot roll for quick putting drills or a complex, multi-hole layout designed for serious golfers, you’re in the right place.This fun, peer-led guide will walk you through the step-by-step process, highlight common pitfalls, and share real DIY stories (and a few laughs) along the way.What You’ll Learn About Building Your Own DIY Backyard Putting Green:Step-by-step process for a diy backyard putting greenComparison: green kit vs. diy backyard putting greenNatural grass vs. artificial turf for putting greensExpert insights, practical tips, and real DIY storiesWhy a DIY Backyard Putting Green? (And How You Save $3,000+)Let’s cut right to it: building your own backyard putting green means major savings—usually over $3,000—versus hiring out a full professional installation. That’s extra cash for new clubs, fun backyard upgrades, or maybe even a celebratory BBQ once your green’s complete. But the financial angle is only half the story.Going DIY turns the process into an adventure you’ll actually remember (and brag about). You get full control over design and choice of materials—think backyard greens that perfectly fit your yard, reflect your style, and match your golf goals.Instead of one-size-fits-all, you tweak every detail, from the slope of your putting surface to the green kit flag colors. And when the job’s done? You’re rewarded every time you roll a putt with friends, family, or even just the dog.“Installing my own backyard putting green was the best weekend project—I play more and saved a fortune over professional installation!” — Brad, Weekend GolferEssential Tools and Materials for Your DIY Backyard Putting GreenThe foundation for any quality putting surface is having the right tools and supplies. Depending on whether you go the full DIY route or opt for a putting green kit, here’s what’s usually in the mix:Putting green kits vs. buying separate materialsArtificial turf options for backyard putting greensDrainage gravel, cups, flags, and moreA basic shopping list for a DIY backyard project usually includes a shovel, rake, sturdy trowel, heavy-duty scissors or razor knife (for shaping turf), landscaping fabric, a tamper for packing the soil, leveling boards, and a garden hose for testing drainage. For turf-based greens, you’ll also need a quality putting green kit with artificial turf, infill sand, and hole cups (plus decorative flags if you’re feeling fancy).Don’t ignore drainage—nothing ruins a green faster than pooled rainwater. Consider drainage gravel and plan the base so water flows away from the surface. Even if you’re picking up a green kit for ease, it’s smart to have some basic tools handy, since most kits require minor landscaping.Advice: keep gloves and a spirit level close—you’ll thank yourself when you’re shaping those all-important slopes.If you’re concerned about soggy spots or water pooling in your yard, it’s worth exploring low-cost drainage solutions for wet backyards before you start your putting green project. Addressing drainage early can save you time and ensure your green stays playable year-round.Planning Your Backyard Putting Green: Design Tips and PitfallsChoosing the best location in your yardMeasuring space for your diy backyard putting greenDesign inspiration: single vs. multi-hole layoutsStart by picturing the finished look: a lush green patch just steps from your patio or nestled in a shady corner of your backyard. Choosing the right spot makes all the difference for your overall success, especially when working with existing landscaping, sunlight, and drainage. Look for relatively level ground near your house (for convenience), but don’t worry if the area isn’t perfectly flat—gentle slopes can add challenge and personality to your green.When planning size, measure your space with both your putting goals and the rest of your yard in mind. A standard putting green kit will fit smaller yards, while DIYers can go as large or as creative as space allows. Single-hole designs offer simplicity, but a few cups distributed across the green keep things interesting. Inspiration? Try adding a break or undulating surface, or mimic your favorite golf course’s signature hole.Choosing Artificial Turf or Natural Grass for a DIY Backyard Putting GreenThe biggest decision for most backyard putting green builders is whether to go with natural grass or artificial turf. Both options can look stunning and provide a quality putting surface, but there are real differences when it comes to installation, cost, long-term care, and playability.Natural grass gives unbeatable authenticity underfoot—think classic grass green golf feel and that fresh-mown smell. But it requires serious commitment: watering, mowing, fertilizing, and (ideally) a dedicated irrigation system. Artificial turf, by contrast, delivers a low-maintenance, always-green surface that performs consistently in all weather and looks tidy year-round.Artificial Turf vs. Natural Grass for DIY Backyard Putting GreensFeatureArtificial TurfNatural GrassInstallationFast, can use green kit; DIY-friendlyLabor intensive (seeding/sodding); needs irrigation systemMaintenanceMinimal—brush, sweep, rinse occasionallyMowing, fertilizing, watering, pest controlPlayabilityConsistent roll, less affected by weatherTraditional golf feel, can be slower after rainLifespan10–15+ years (quality synthetic greens)Variable; depends on care and climateCostUpfront cost for turf or green kitLower up front, higher over time (maintenance)Step-by-Step Guide: Building a DIY Backyard Putting GreenExcavation and ground prep for a backyard putting greenBase installation and drainage solutionsLaying turf or seeding natural grass putting greensCutting, shaping, and installing cups for putting green kitsHere’s where your DIY adventure really begins! The steps below work whether you’re starting from scratch or adapting a putting green kit. First, mark out your chosen area with stakes and string. Remove any existing grass or debris to create a clean slate. You’ll want to excavate a few inches down (4–6 inches is typical) so your base, drainage, and final green surface sit flush with the yard.Next comes the foundation for top-quality putting: lay down a compacted base of crushed stone or drainage gravel. This keeps the turf stable and allows water to flow freely—key for longevity and a true roll. Top the gravel with leveling sand and, if desired, landscape fabric to block weeds. If you’re using a green kit, follow kit instructions for placing pre-cut base panels or mats.Roll out artificial turf, making sure the pile runs uniformly. For natural grass green builds, lay sod or seed the area, keeping it moist until established. Cut holes for cups, then drop in putting green kit elements, adjusting for level. Finish by brushing turf fibers upright or, for living greens, rolling and mowing for that pro look.“Level base = better putts. Don’t skip on prep!” — Mark R., Landscape ProAdding Features: Upgrades, Edging & Custom TouchesLandscape edging and retaining wallsUnique obstacles, chipping areas, and creative layoutsBackdrop ideas to match your backyard putting green styleWith the basics done, it’s time to add style: border your green with wood, stone, or brick edging for a polished finish. This not only looks sharp but keeps turf or grass in place. Want more fun? Create chipping mats, sand traps, or even quirky obstacles for a true backyard challenge. Try accenting with flowerbeds, shrubs, or garden art that fits your landscape style—think curb appeal and personal flair.Consider including a bench, shade sail, or even solar pathway lights for after-dusk practice. Many green kits offer upgrade features or matching accessories if you want a themed look. Get the family involved—kids love designing tricky pin placements or re-arranging mini obstacles for a short game contest.Care, Maintenance, and Troubleshooting for Your DIY Backyard Putting GreenTips for keeping backyard putting greens looking sharpDrainage fixes, seam repairs, and long-term careDIY solutions for natural grass vs. artificial green kitsAfter all your hard work, you want your green to stay gorgeous. For artificial turf greens, occasionally sweep leaves or debris, brush turf fibers upright, and rinse down the surface as needed. Seam coming loose on your synthetic surface? Re-glue with outdoor adhesive and press firmly. If puddles appear, check the base—sometimes adding extra gravel in low spots fixes drainage issues fast.For a natural grass green, routine care means mowing weekly (short and neat is best), watering deeply, and fertilizing a few times a year. Watch for weeds, pests, or browning, and treat early; aeration once or twice a year will keep roots healthy. Greens with proper irrigation systems and regular brushing/mowing will reward you with pro-level putting year after year.DIY Backyard Putting Green Kits: Worth It or Go Full Custom?Comparing putting green kit optionsPros, cons, and expert adviceWhen to opt for professional installationSo, is a putting green kit the right call? Green kits are hugely popular with first-time builders, offering pre-cut turf, cups, flags, and often base panels—taking a lot of the guesswork out of DIY. They’re efficient for small or awkward spaces and especially handy if you’d rather skip landscaping from scratch.But full custom DIY means ultimate creative control: you choose the turf, shape every contour, and decide on every last detail. This can deliver a unique backyard putting green that’s both impressive and personalized.The potential downside? DIY builds take more time, research, and effort than kit installs—and may need more tools.Wondering when to call in the pros? If your yard has complex slopes, tricky drainage, or you want commercial-course perfection, professional installation may be worth it. Otherwise, green kits or a well-planned DIY build will suit most hobbyists.“Do your homework before buying a kit. The best putting green kits use dense, real-feel turf and come with strong cups. Ask for sample pieces and compare before you commit!” — Lisa G., Retired Golf SuperintendentDIY Backyard Putting Green QuestionsHow to build a cheap putting green in your backyard?Affordable materials and thrifty DIY tips for backyard putting greensTo keep things budget friendly, reuse what you already have: repurpose landscape timbers for edging, fill the base with leftover gravel from other projects, and grab a simple roll of affordable synthetic turf from a home improvement store. Skip fancy extras and focus on a solid, level base for a smooth, reliable putting surface.Many DIYers have built 6-foot greens for under a few hundred dollars by hunting for sales on turf and upcycling found materials, proving you don’t need a pro budget for a functional backyard green.How much does it cost to make a putting green in a backyard?Typical DIY backyard putting green budget breakdownYour final spend comes down to turf choice, green size, and whether you go with a kit or build from scratch. DIY projects typically range from $500 to $2,500 plus a few weekends of elbow grease. A basic green kit with artificial turf, cups, and minimal extras is often the most affordable option, while a custom synthetic green with multi-hole layout and pro borders will hit the higher end of DIY budgets. Don’t forget to factor in essential tools, especially if you need to buy rather than borrow.Can I put a putting green in my backyard?Zoning, suitability and backyard requirements for a diy backyard putting greenAlmost every yard has potential for a backyard putting green. Flat, well-draining spaces work best, but rolling or irregular lawns can be shaped to add challenge. Check with your neighborhood HOA or city for any restrictions on outdoor landscaping or water use (especially for natural grass). Even the smallest yard can fit a fun practice patch with creative design—some green kits are engineered especially for tight spaces!How do I get my yard to look like a putting green?Tips for transforming your lawn into a green-worthy surfaceAchieving the manicured look of a professional green means leveling, aerating the soil, then seeding or sodding with fine-blade, grass green blends such as bentgrass or fescue. Mow regularly with the highest-quality sharp blade you have, water deeply (with an irrigation system if possible), and fertilize to keep things healthy. Dethatch or aerate your yard every spring for lush growth, then cut cup holes and drop in putting cups for that true private-golf-club vibe.FAQs: Mastering the DIY Backyard Putting Green ExperienceWhat is the best artificial turf for backyard putting greens?The best turf for most DIYers is a dense, low-pile synthetic turf designed specifically for putting. Look for UV-stabilized, tightly woven products (like those in higher-end green kits) for smooth roll and weather resilience.How long does a diy backyard putting green last?Quality synthetic greens often last 10–15 years or more with routine maintenance. Natural grass greens require more ongoing care and may need partial resodding depending on weather and usage.Do putting green kits come with everything I need?Most top-rated putting green kits come with pre-cut turf, base panels, cups, and flags—sometimes even infill sand and brushes. You’ll usually still need basic landscaping tools for site prep.Expert Tips & Key Takeaways for Your DIY Backyard Putting Green ProjectLevel up with these top diy backyard putting green strategiesAlways spend extra time getting your base level—it’s the secret to a true-rolling, pro feel green. Check your turf or grass direction before final install, and don’t forget drainage (standing water can ruin even the best synthetic greens). Learn from others: read user reviews of green kits, ask for sample turf if ordering online, and test cup locations before final cutting. And remember—DIY is as much about fun, trial, and error as about getting it “perfect. ”Ready for More Backyard Inspiration?Dive deeper into backyard living here: theBackyardPal.comIf you’re inspired to take your backyard transformation even further, consider exploring how a lush pocket forest can add privacy, beauty, and even fresh food to your outdoor space. Discover the benefits and step-by-step approach to creating your own DIY backyard pocket forest—a sustainable upgrade that pairs perfectly with your new putting green.Whether you’re seeking tranquility, a natural screen from neighbors, or a mini-ecosystem for your family, this next-level project can turn your yard into a true sanctuary. Dive in and see how combining recreation with nature can elevate your backyard lifestyle.Conclusion:If you’ve made it this far, you’re more than ready to build a putting green that actually earns its keep — saving thousands while giving you unlimited practice. With a clear plan, a few essential tools, and a DIY mindset, you can create a green that fits your space and your game. No more waiting for tee times or paying for range buckets when the perfect lie is right outside your door.You’ll sharpen your short game, add value to your home, and enjoy a backyard that’s built for memories. Don’t overthink it — take the first step, and let your DIY green become your personal golf haven all year long. Grab your materials and get started today.Other Sources:Players Series Putting Green Kits - https://www.xgrass.com/players-series-putting-green-kits.htmlDIY Backyard Putting Green - https://newbuildnewlyweds.com/diy-backyard-putting-green/Do It Yourself Backyard Putting Greens - https://proputtsystems.com/do-it-yourself-putting-greens/How To Make Your Backyard Putting Green Dream a Reality - https://www.usga.org/content/usga/home-page/course-care/green-section-record/62/issue-17/how-to-make-your-backyard-putting-green-dream-a-reality.html

06.16.2026

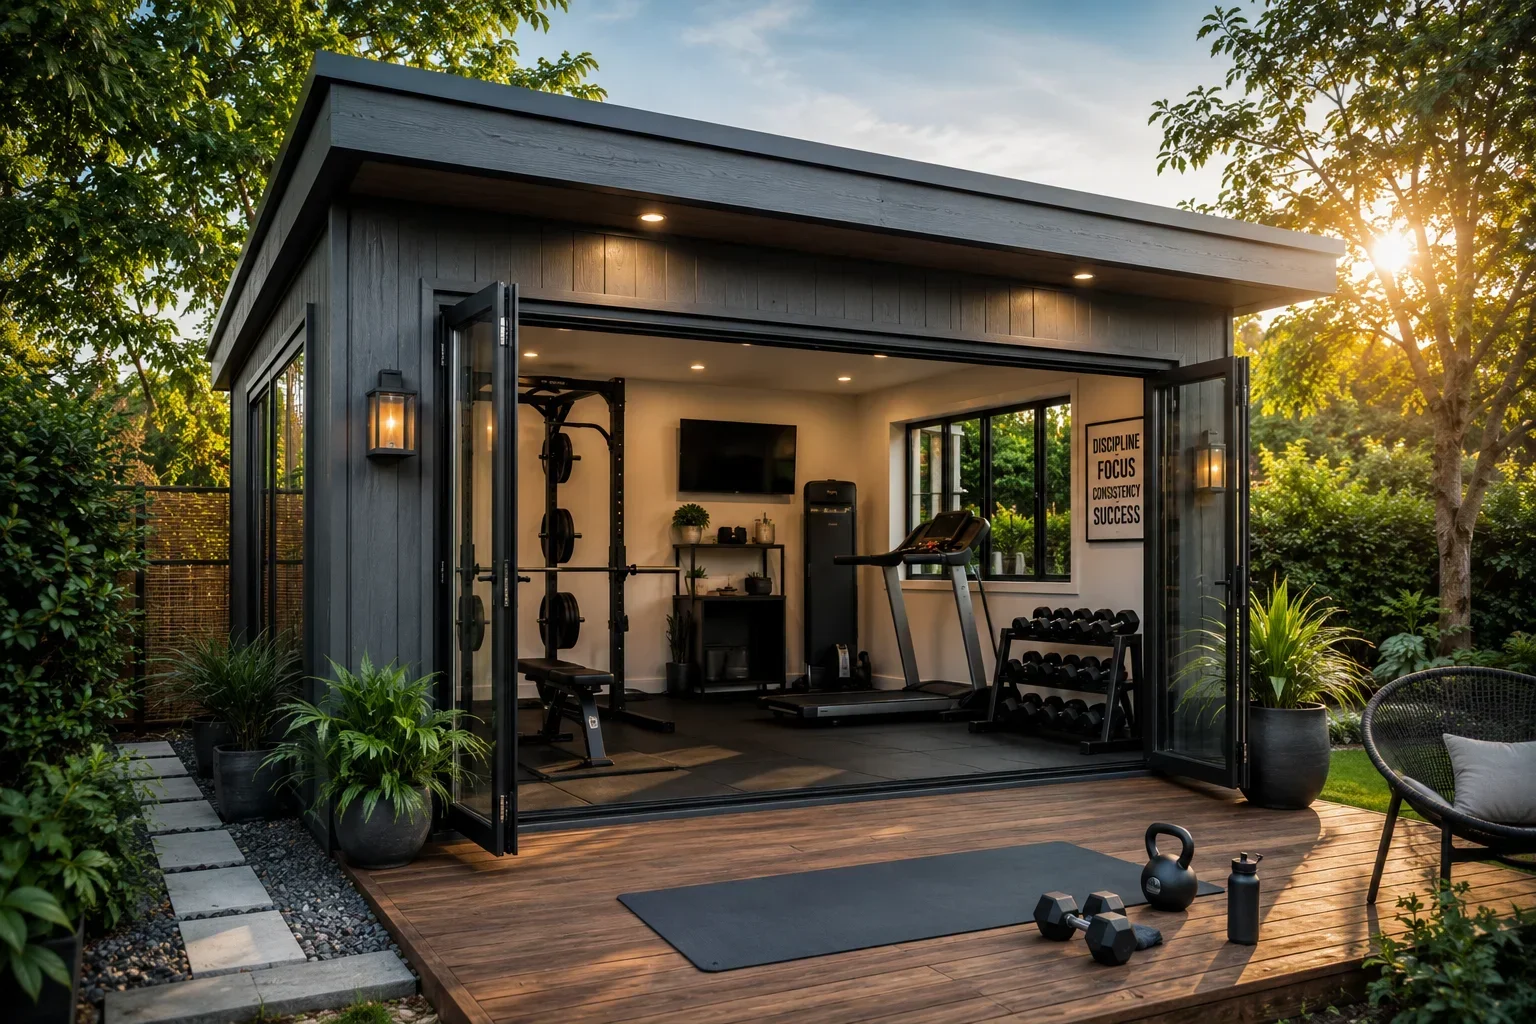
Backyard Gym Shed Secrets: How Homeowners Are Building Private Fitness Spaces Without Expanding Their House

Imagine reclaiming your fitness passion without sacrificing your living space. Many homeowners yearn for a private workout haven, free from gym crowds. Backyard gym sheds offer a personal sanctuary, transforming your yard into a motivating space that supports your health journey with convenience and privacy.Why a Backyard Gym Shed Is the New Must-Have for HomeownersThe appeal of a home gym shed vs. traditional home gym setupsPrivacy, convenience, and the power of a dedicated workout spaceTransforming a garden shed or storage shed into a personalized backyard gymMore homeowners today are seeking alternatives to crowded fitness centers and the inconvenience of turning spare rooms into gyms. A backyard gym shed bridges this gap by delivering a dedicated workout space just steps from your backdoor.Unlike traditional home gym setups that might disrupt your living area or require extensive renovations to your existing home, a gym shed provides privacy and separation—critical ingredients for focus and motivation.Imagine starting your morning with fresh air and serenity, not the chaos of a public gym or the makeshift feel of a treadmill crammed next to your couch. With a gym shed, your workout space is always ready for new fitness goals, whether you’re hitting the weights or jumping on the stationary bike.Beyond privacy, a backyard gym shed gives you the ability to customize your equipment layout, decor, and climate control—something not easily achieved in a multipurpose room or garage. Plus, you'll save time (and often money) by removing the need to drive to the gym or pay a monthly gym membership.What You'll Learn About Building a Backyard Gym ShedCrucial planning steps for your backyard gym shedFeatures of a functional workout space in your garden shedHow to choose flooring, insulation, and ventilation for your gym shedReal homeowner success stories to inspire your projectThis guide draws on expert recommendations and real-life transformations to help you build the perfect backyard gym shed. You’ll learn about effective planning, see which features matter most, and get practical advice on materials, layouts, and long-term durability. By the end of this article, you’ll understand the best way to turn a simple garden shed or storage shed into the performance-boosting, motivating home gym you’ve always wanted.As you consider the possibilities for your backyard gym shed, it can be helpful to compare different types of outdoor structures and their unique benefits. For a detailed breakdown of how sheds, cabins, and studios stack up for various uses—including fitness spaces—explore this guide on choosing the best structure for your yard.Planning Your Backyard Gym Shed: Essential ConsiderationsConstructing a backyard gym shed begins with clear goals and early decisions. By addressing basics such as location, shed size, access, and local code requirements, you set the stage for a functional, inspiring home gym shed. These early steps prevent costly mistakes and ensure your shed matches your vision for an ideal exercise room—whether focused on strength training, cardio, or a combination of both.Start by reflecting on your available extra space and measuring your yard. Consider sun and wind exposure for comfort and think about accessibility from your house to the shed int. If you plan on using heavy workout equipment, ensure the size of shed can accommodate machines and allow adequate movement.The right foundation is also critical for a lasting shed floor, especially if your workout equipment puts hundreds of lbs per square foot on the surface. Check your local guidelines to confirm if a permit is required, as regulations for backyard gym installations vary by municipality.Choosing the Right Shed: Size, Placement, and PermitsFinding the right structure sets the foundation for your privacy and productivity. Start with a close look at your yard, thinking not just about the actual size, but also about placement for maximum sunlight, privacy, and convenience. Shed sizes usually start at about 8x10 feet and can scale up depending on your fitness goals. Make sure you leave enough space to move comfortably around exercise equipment—remember, keeping at least two feet around each machine is essential.It’s also crucial to ensure the shed meets your regional building codes. Many cities require permits for structures over a certain square footage, especially if you’re adding electricity for good lighting and climate control. Reach out to your local building department for specifics; getting a permit at the start can save you money—and headaches—down the line. Lastly, be sure to factor in easy access to your home and the distance from outdoor distractions.Designing a Home Gym Shed for Comfort and Performance“A well-designed backyard gym shed removes barriers to regular fitness. It provides a dedicated, motivating environment, just steps from your backdoor.” – Emily Bryant, Certified Home Fitness DesignerDesigning your backyard gym shed means balancing inspiration and practicality. Insulation and climate control are must-haves if you want to use your gym year-round—this creates a comfortable workout environment regardless of the season. Consider closed-cell foam or insulated panels to regulate temperature. Ventilation matters, too: ceiling fans or operable windows can help air circulate, especially during intense cardio sessions.Don’t overlook lighting. Well-planned good lighting transforms shed interiors (shed int), making morning or evening workouts both safe and energizing. LED lights are energy-efficient and cool to the touch. Many homeowners also install mirrors to check form and boost motivation. Finally, use wall space for racks, hooks, and shelves to keep the area tidy and inspiring—a place you’re excited to use day after day.Must-Have Features for a Backyard Gym ShedDurable shed floor options for heavy equipmentInsulation and climate control for year-round useLighting and electrical: Outfitting your home gym shed safelyOptimizing storage for your workout space and gearA well-equipped gym shed includes a tougher-than-average floor, strong insulation, bright and efficient lighting, and plenty of storage solutions. For your shed floor, look for gym-grade rubber mats or interlocking tiles rated for 300+ lbs per square foot. This protects both your subfloor and your equipment from scuffs and impact.Proper insulation means adding layers between your wall studs and under your roof deck—this guards against temperature swings, making the gym comfortable and inviting even in extreme weather. Adding portable or built-in heating and cooling expands usability even further. Don’t forget about wiring for outlets and lighting—if you’re unfamiliar, hire a licensed electrician for safety.For storage, wall-mounted racks keep weights, bands, towels, and mats in reach without eating up floor space. Shelving allows for easy organization of smaller gear. Mirrors multiply available light inside your workout area and let you track your form for safer, more effective training sessions.From Garden Shed to Home Gym: Transforming Existing StructuresAlready have a garden shed or storage shed? You’re in luck: repurposing an existing structure is the fastest, most cost-effective way to build a home gym shed. Converting sheds into custom fitness spaces starts with clearing out clutter, cleaning thoroughly, and assessing the structure for water damage, rot, or weak floorboards. Upgrading the shed floor, improving insulation, and running power lines for lights and exercise equipment are common steps in these projects.Inspiring success stories abound. Take Mitch and Joanne: after outgrowing their cramped indoor exercise room, they turned their old potting shed into a light-filled home gym—a transformation that now supports both their weight training and stationary bike routines, while keeping their main living space uncluttered. Homeowners are increasingly opting to view options and adapt what they already have rather than expand or renovate their main house.Flooring Upgrades: Protect Your Shed Floor and EquipmentProper shed floor upgrades are critical for any gym shed conversion. Most standard sheds—especially those built for gardening—feature wooden flooring not rated for the impact or weight of gym equipment. Lay down high-density rubber tiles or commercial-grade gym mats (at least 3/8” thick) to withstand heavy dumbbells, barbells, and machinery. These protect both the structure and your investments, preventing damage from repeated drops and vibration.Easy-to-install interlocking mats make for a smooth, level workspace—ideal if you’re frequently rearranging gear. Some even feature anti-slip textures, which are perfect for high-intensity sessions. If your use is mostly yoga or light weights, softer foam or cork floors may suffice, but for anything over 200 lbs per square foot, upgrade to rubber or composite tiles designed for true gym shed demands.Customizing Your Storage Shed With Racks, Mirrors, and EquipmentThe best home gym sheds maximize efficiency. Use wall-mounted racks to store barbells, kettlebells, and resistance bands. Compact racks and folding benches allow for multiple workouts even in tight quarters (like an 8x10 shed). Full-length mirrors reinforce correct form and make the space feel bigger and brighter—key for motivation.When selecting equipment, prioritize versatility. Adjustable dumbbells, a compact stationary bike, resistance bands, and a foldable bench fit most home gym shed layouts. Utilize wall hooks for mats, towels, and jump ropes to reduce clutter. The final touch is a Bluetooth speaker system or wall-mounted TV for entertainment during workouts, keeping you excited to use your new fitness retreat every day.Comparing Backyard Gym Shed Materials and FeaturesMaterialDurabilityInsulationBest ForWoodHigh (with maintenance)Excellent (easy to insulate)Long-term, custom projectsMetalVery HighModerate (needs specialized insulation)Heavy-duty, commercial-grade gymsPlastic/ResinMediumPoor/ModerateQuick, budget-friendly solutionsExpert Advice: Maximizing Motivation in Your Backyard Gym Shed“Consistency is easier when workout hurdles disappear. A home gym shed gives you the autonomy to exercise on your schedule.” – Dr. Samuel Lee, PhD, Exercise ScienceThe biggest advantage of a backyard gym shed isn’t just equipment or location—it's how it fits seamlessly into your routine, making consistency natural. Experts agree that an exercise room set apart from your main living area, with a finished interior and motivational touches, makes you much more likely to follow through on your fitness goals. Set up a schedule and personalize your decor: motivational quotes, bright colors, or even a small fridge for recovery drinks can make a huge difference.Keep your playlist ready, and streamline your workout flow: arrange your workout equipment so you move efficiently from warm-up to strength to cool-down. Some homeowners install chalkboards to track goals or digital timers to keep sessions focused. Routine and personalization together form the backbone of a home gym experience that lasts beyond the first month of excitement.Short, engaging process montage of a backyard gym shed transformation — starting from an empty garden shed, evolving through construction, flooring setup, equipment placement, and a final reveal of the finished gym shed. This video provides inspiration and an overview of what’s possible in your own yard.People Also Ask: Answers to Your Backyard Gym Shed QuestionsQ: Can I use any garden shed as a backyard gym? A: Most standard garden sheds can be repurposed as home gym sheds, provided the structure is sound and the shed floor can support your planned workout equipment. Reinforcement and upgraded ventilation are usually needed for both comfort and safety.Q: What is the best flooring for a home gym shed? A: The best gym shed floors are interlocking heavy-duty rubber mats, which protect both your shed’s flooring and your exercise equipment. For lighter activity, thick foam tiles may suffice, but for weights or cardio machines, durable rubber is strongly recommended.Q: How do I ventilate my backyard gym shed? A: Natural ventilation through windows and ridge vents is effective for most gym sheds. However, for year-round use or high-intensity sessions, consider adding a small exhaust fan or portable AC unit to improve airflow and maintain a safe workout environment.Q: Do I need permits to build a gym shed in my backyard? A: Many municipalities require permits for outdoor structures over a certain size, especially if you plan to add wiring or plumbing. Always check with your local building department before beginning your shed project.Q: What equipment fits best in compact workout spaces? A: Adjustable dumbbells, compact benches, folding squat racks, resistance bands, and a small stationary bike all work well in smaller home gym sheds. Prioritize versatile gear that can be stored vertically or against the walls.FAQ: Backyard Gym Shed EssentialsCan I use any garden shed as a backyard gym? – Yes, with proper structural upgrades and the right flooring, most garden sheds can be transformed into safe, functional gym sheds.What is the best flooring for a home gym shed? – Thick rubber tiles are ideal for durability and shock absorption.How do I ventilate my backyard gym shed? – Combine windows, vents, and fans for optimal airflow, especially during high-intensity workouts.Do I need permits to build a gym shed in my backyard? – Checking your local codes is essential before building or converting any backyard structure.What equipment fits best in compact workout spaces? – Use space-saving tools like resistance bands, adjustable weights, and folding benches for flexibility and convenience.Key Takeaways: Designing Your Dream Backyard Gym ShedA backyard gym shed boosts convenience, privacy, and motivation.Careful planning ensures a durable and functional workout space.Upgrading a garden shed or storage shed is a cost-effective solution.Expert advice and real-world examples help perfect your home gym shed.If you’re inspired to create your own backyard gym shed but want to see what other trending outdoor buildings might suit your needs, don’t miss our comprehensive overview of the most popular backyard buildings homeowners are choosing this year.Whether you’re weighing the benefits of a gym shed, a studio, or a multi-purpose retreat, this resource will help you make a confident, future-proof decision for your property. Dive deeper to discover which structure aligns best with your lifestyle, space, and long-term goals—your perfect backyard upgrade could be just a step away.Discover More Actionable Tips on Backyard Sheds at TheBackYardPal.comSourcesMen’s Health – https://www.menshealth.com/fitness/a35415134/backyard-gym-shed-ideas/Sheds Unlimited – https://www.shedsunlimited.net/blog/home-gym-shed-ideas/Better Homes & Gardens – https://www.bhg.com/home-improvement/outdoor/sheds-and-garages/backyard-gym-shed-ideas/Creating a backyard gym shed offers a private, convenient workout space just steps from your home.For a comprehensive guide on designing and building your own backyard fitness retreat, consider exploring the article “Home Gym Shed | Backyard Fitness Space” by North Texas Sheds. This resource provides detailed insights into planning, construction, and customization options to suit your fitness needs.Also, “Home Gym Sheds | Prefab Backyard Gym Buildings” by Stoltzfus Structures offers valuable information on prefab gym sheds, including features, customization possibilities, and installation tips.These resources will equip you with the knowledge to create a personalized and functional backyard gym shed tailored to your fitness goals.Information You Can Use and Trust, TheBackYardPal.com

© 2026 CompanyName All Rights Reserved. Address . Contact Us . Terms of Service . Privacy Policy

Terms of Service

Privacy Policy

Core Modal Title

Sorry, no results found

You Might Find These Articles Interesting

T
Please Check Your Email
We Will Be Following Up Shortly
*
*
*